37 incredible coding toys that every kid will want
Fun (and learning) for kids of all ages!
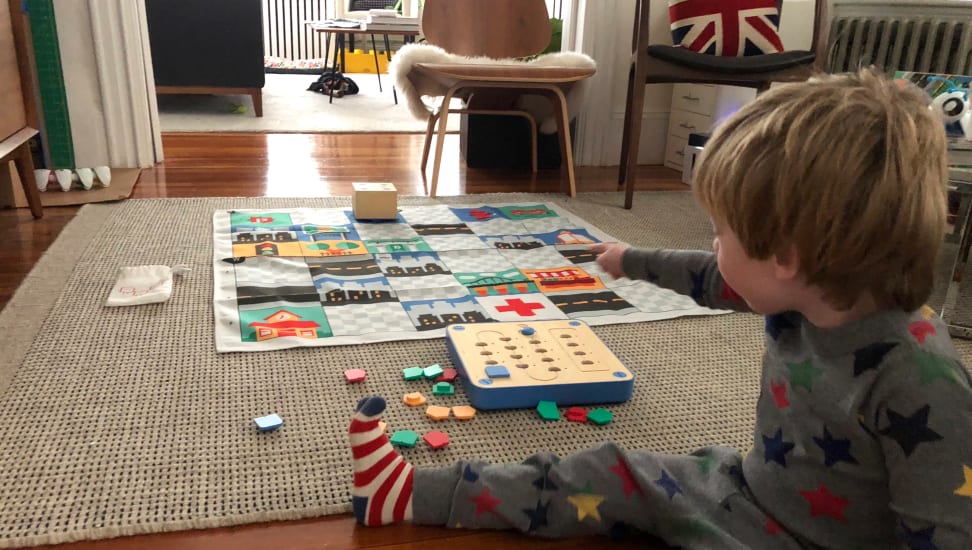 Credit:
Reviewed.com / Dave Kender
Products are chosen independently by our editors. Purchases made through our links may earn us a commission.
Wow, educational toys have changed a lot since I was a kid. I remember inserting floppy disks (!) into a computer in order to play classic games like “Number Munchers” and “The Oregon Trail”. I learned very quickly that “Dog” was not a day of the week, and that it was very easy to die of wasting diseases in the western US in the 19th century.
Flash forward to today, where the “Internet of Things” and the next tech gadget rule the day. As the world becomes more and more digitally inclined, parents and teachers alike want toys that teach kids computer-and technology-related skills, both for their future employability and for being a citizen in a society built on 1’s and 0’s.
One emerging trend is toys that teach kids how to write computer programming code. Coding is becoming essential knowledge because the world runs on computers, and computers themselves run on code. As a person with a degree in a STEM field, I had to learn how to code later in life, and it was a miserably long learning curve (even if it’s one of my favorite things to do now). So, naturally, these coding toys aimed at kids piqued my interest.
I (with the help of some curious kids and parents) investigated a bunch of toys and games (covering an age range from 3 years old to adulthood) that claim to teach coding skills in fun and novel ways. To check out our experiences with a wide variety of robots and board games (arranged in increasing age appropriateness), keep scrolling.
(For additional resources on coding for kids, check this site out.)
STEM coding toys for kids ages 3-5
1. Think & Learn Code-a-Pillar
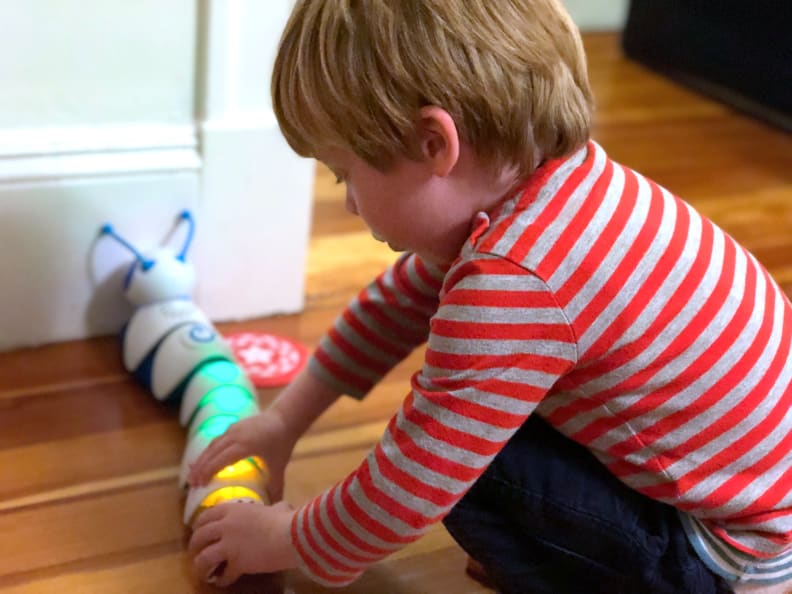
Ages: 3-8 years old
App: Code-a-Pillar (iOS/Android) (optional; not needed to play with the toy)
Power: 4 AA batteries
Parental involvement needed: Minimal, once the basics are established and the toy is assembled
Coding concepts: Following commands, order of operations
How it works: This is coding at its most basic. The Think & Learn Code-a-Pillar has a motorized, caterpillar-shaped head, and kids can make it move in different directions or complete certain actions by adding a variety of pieces to the body of the Code-a-Pillar. Changing the order of the body parts changes the Code-a-Pillar’s routine.
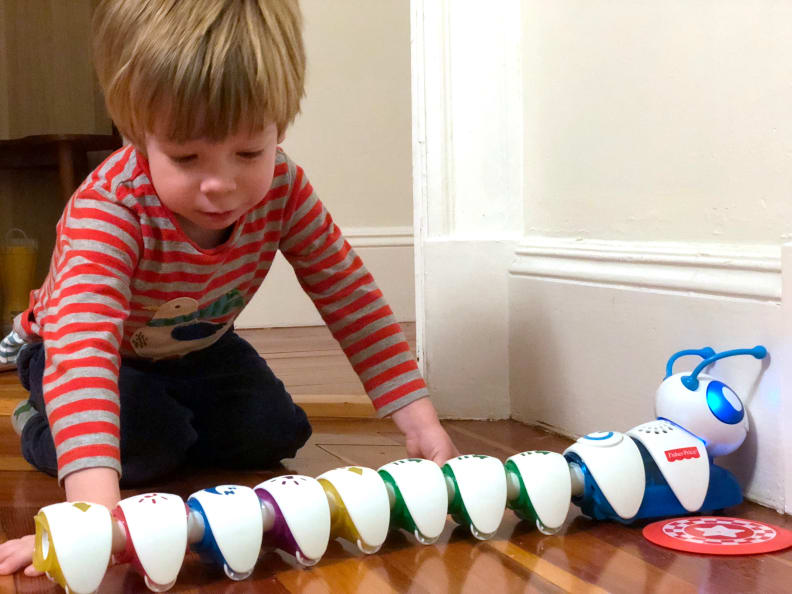
Each command module lights up as the Code-a-Pillar completes that action, often while catchy music plays. Once the sequence is complete, and the Code-a-Pillar has wiggled all over your living room, all of the modules light up, and a “success” music clip plays.
The different actions and motions are “move forward”, “turn left”, “turn right”, and “play music”. Expansion packs include additional actions like “play sleepy music” and “play excited music”.
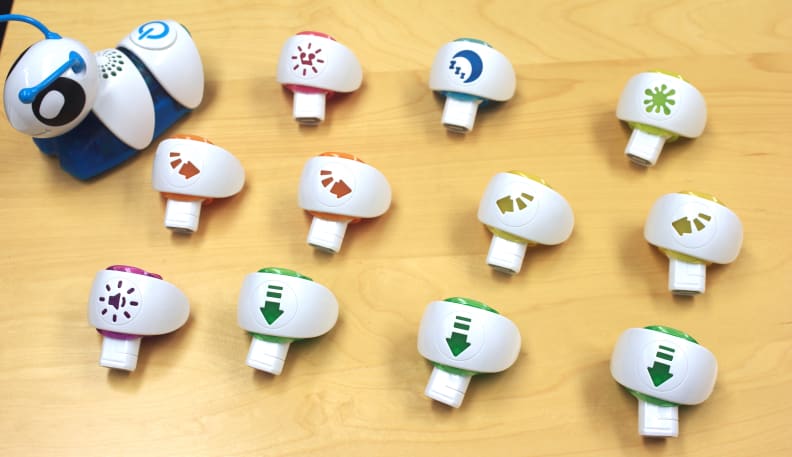
Our experience: The Code-a-Pillar is just so adorable. The different Code-a-Pillar body parts are big, colorful, and kid-friendly. Children just getting the hang of hand-eye coordination and with minimal hand strength may need some help from parents with assembly, but once the Code-a-Pillar is all put together, it’s just a push-and-play experience from there.
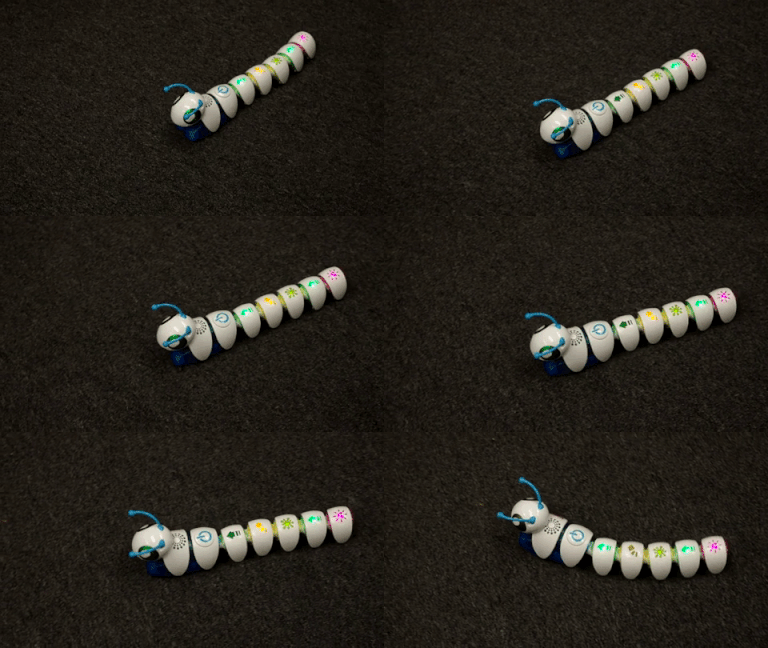
The music that accompanies the Code-a-Pillar is pretty loud, so be sure to not blast it right next to sensitive little ears. The Code-a-Pillar motors right along on very thin carpet, but does best on hard floor surfaces.

For more advanced playing, the Code-a-Pillar also comes with “Start” and “Finish” disks at which kids can aim the Code-a-pillar. This requires a bit more experimentation (and a longer attention span) because it’s not immediately apparent how much distance the Code-a-Pillar covers in a given action.
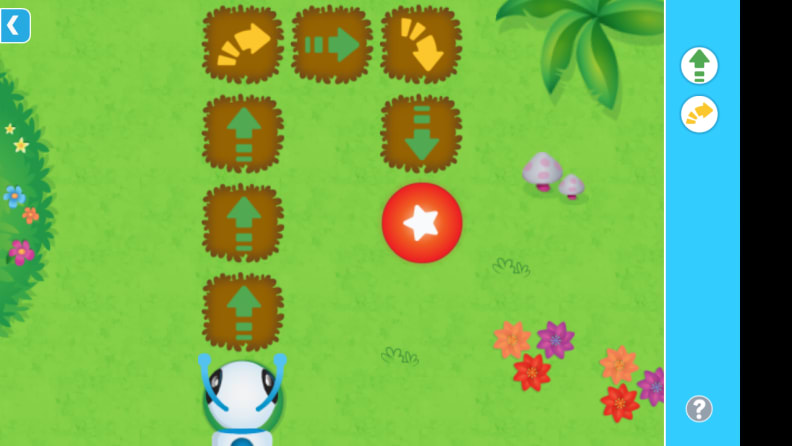
The Code-a-Pillar app doesn't control the Code-a-Pillar toy, but instead acts as a tutorial on how to use the Code-a-Pillar through a series of games.
The bottom line: The Code-a-Pillar is lots of fun for families with curious toddlers and plenty of open floor space.
Buy the Think and Learn Code-a-Pillar for $82
2. Cubetto
Ages: 3+ years old
App: N/A
Power: 6 AA batteries
Parental involvement needed: Some for teaching the basics and beyond the basics, some for reading the storybook if a kid is too young to read
Coding concepts: Following commands, order of operations, functions, function calls
How it works: The Cubetto playset has four main components:
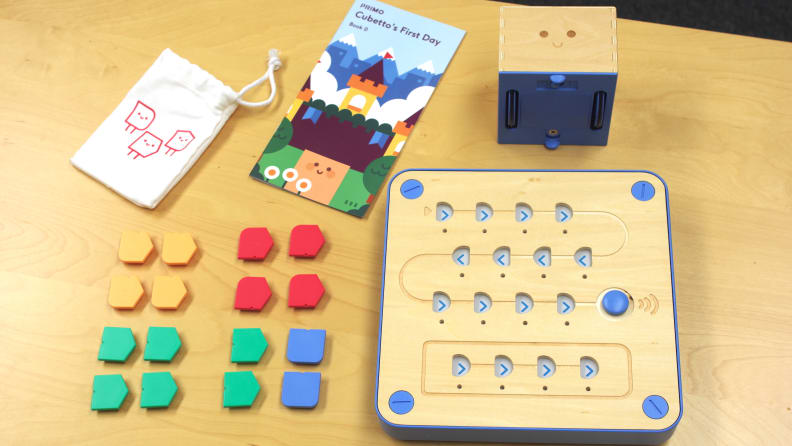
- Cubetto, a small wooden robot
- Command tiles and control box
- A fabric playmat with a grid of Cubetto’s world
- A storybook describing Cubetto's adventures on the grid squares of the playmat
After pairing Cubetto and the control box, commands are routed to Cubetto by placing command tiles in a certain order on the control box, and then pressing the large blue button. Cubetto then navigates the grid on the playmat following the commands on the control board.
The last row on the control board is reserved for defining a function, which is a sequence of actions that can be called repeatedly from the main control board without having to add tiles for that sequence manually each time. Kids use the tiles to guide Cubetto through the adventures mentioned in the storybook.

The different tiles represent “move forward”, “turn left”, “turn right”, and “function call”. Expansion packs include more “function call” tiles, “opposite” and “random” tiles, and additional playmats and storybooks.
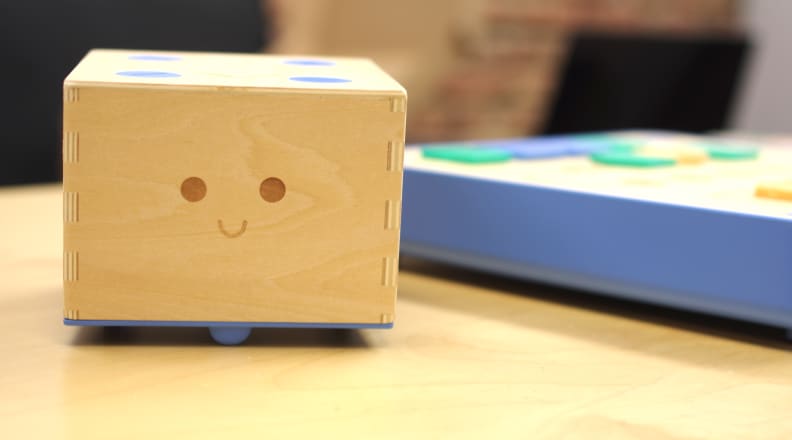
Our experience: I have never wanted to hug a small wooden box with a smile on it before, but I guess there’s a first time for everything. From the basic shapes of the tiles to the bright colors on the playmat, Cubetto is perfect for little kids. The storybook is full of neat illustrations and directions to help Cubetto get to his next destination, but thanks to the little cartoon drawings of the start and end grid squares, even kids who can’t yet read can still follow along.

Cubetto moves slowly and quietly from one grid square to the next, making it easy for small children to track the movement. The playmat is fairly stiff fabric, and we recommend placing it on a hard floor surface for optimal Cubetto movement.
Our testers reported that the kids needed a lot of instruction and guidance up front, but that once they got going, Cubetto was "a very rich experience." The storybook aspect really lends a sense of urgency to the toy, making kids really want to help Cubetto reach its destination.

One potential difficulty parents may have with this toy (and any other robot aimed at toddlers) is teaching their young children the concept of relative directions. The fact that "right" and "left" depend on which way the robot is facing may take a bit of explanation from parents.
The bottom line: Cubetto is an awesome copilot on your kid's journey to becoming a junior programmer.
3. Mochi

Younger children will look forward to exploring new lands and coding concepts with Mochi.
Ages: Ages 3+ years
App: N/A
Power: 6 AA batteries, not included
Hardware: board included, connected via Bluetooth
Parental involvement needed: Moderate for board assembly, Mochi vehicle assembly, and Bluetooth pairing, minimal otherwise
Coding concepts: Following commands, order of operations, functions
How it works: Using bear-shaped coding blocks, kids can guide Mochi, a cuddly bear, on fun and educational adventures.
Our experience: If you’re looking for some screen-free quality time with your young ones, look no further than Mochi. Mochi, which is similar to Cubetto, is a hands-on approach to learning computer programming basics that, with its fun titular character and beautiful artwork, will really appeal to kids.
The Mochi kit has three components: the robot on wheels (that Mochi, a stuffed animal, is driving), the board (upon which kids place the coding commands to drive Mochi around), and the playmat (the environment that Mochi is exploring).
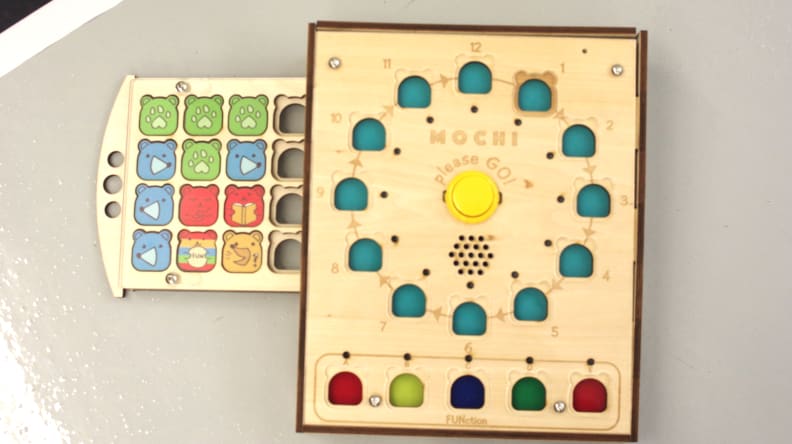
On the Mochi board, kids place coding pieces in the numbered slots in order to tell Mochi how to move across the playmat.
Both the board and the robot are made out of kid-friendly wooden pieces that slot together relatively easily. However, because the assembly process requires some manual dexterity and hand strength, it may be necessary for an adult to get things up and running.
Before the fun can begin, the Mochi-driven robot has to be paired with the board via Bluetooth. This process is very straightforward (you just put one block into the board and hit the yellow button), but it can take a while for the two devices to be paired successfully. There were a couple of times where the Mochi robot unpaired from the board unexpectedly, and I had to wait for the robot to re-pair. Fortunately, the board has lights and audio cues that give you instant feedback about the pairing status, so you’re not left to wonder if the Mochi robot is connected or not.

The most advanced coding element in the Mochi space kit is the "function" command, which calls the coding elements placed on a line located beneath the primary coding board.
Once assembled and paired, Mochi is very easy to use. With coding command blocks shaped like bears, kids learn about the order of operations by placing those coding blocks in the numbered slots, hitting the big yellow “Please GO!” button in the center of the board, and watching Mochi move slowly across the playmat. For more advanced coders, there’s a function bar on the board for coding blocks to be called by placing the “function” coding block in one of the regular numbered coding slots. Blinking lights at each coding slot tell kids which coding command is being performed at a given point in time.

The book that comes with each Mochi kit includes directions on how to get your kid coding with the Mochi board and coding pieces.
All Mochi kits (which cover themes such as biology, colors, time, animals, shapes, etc.) come with a themed book and playmat so that Mochi can go on many different adventures. I got the chance to try out the space-themed Mochi kit; both the book and the playmat contain beautiful illustrations of the Milky Way galaxy. After reading through the book, which details Mochi’s journal from Neptune to Earth, kids can help Mochi to make that trip in real time by following the coding instructions at the back of the book.

In the Mochi space kit, coding commands help Mochi explore the different planets in the galaxy.
While the playmat is comprised of gridded squares, I found that, after multiple commands, Mochi had some difficulty staying within the lines. However, this is easily solved by resetting Mochi in a new location within a grid space.
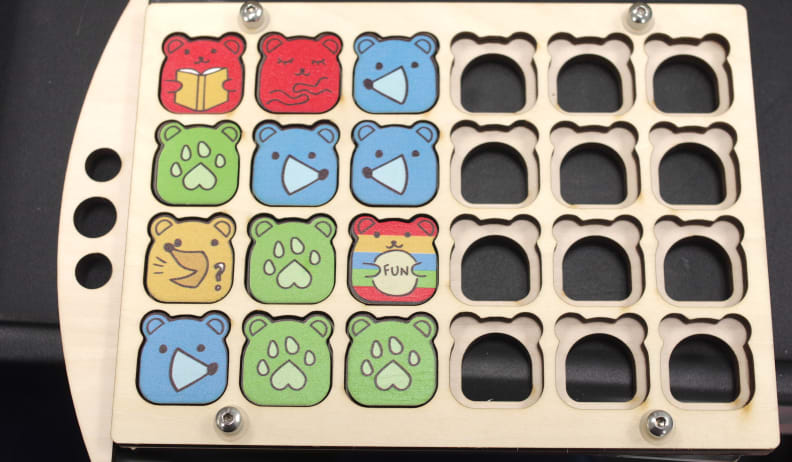
The Mochi space kit includes coding blocks for "go forward", "turn left", "turn right", "function call", "narrate the story", "sing a lullaby", and "ask a trivia question".
The Mochi Space kit came with twelve coding blocks, including four “forward” blocks, two “turn right” blocks, two “turn left” blocks, and one “function call” block”. The other three blocks are special blocks that are specifically related to the space theme: the “trivia” block asks a question about the largest and smallest planets, the “lullaby” block plays “Twinkle Twinkle Little Star”, and the “narration” block reads the space book out loud. When not in use, parents will enjoy the fact that the coding blocks can be placed in a cleverly-devised storage box that slides into the bottom of the board.
Mochi teaches children an important lesson about absolute vs. relative directions. The playmat has a compass rose on it with the four cardinal directions, and the coding instructions in the back of the space book use these directions as an absolute point of reference. As the kids move Mochi across the gridded squares, though, they begin to understand that “turn left” and “turn right” is relative to the direction in which Mochi is facing. Understanding the difference between these two sets of directions is valuable skill for kids to develop at a young age.
The bottom line: With its gorgeous illustrations and an interactive introduction to coding basics, kids will be easily drawn into the adventures of Mochi.
4. Coding Critters
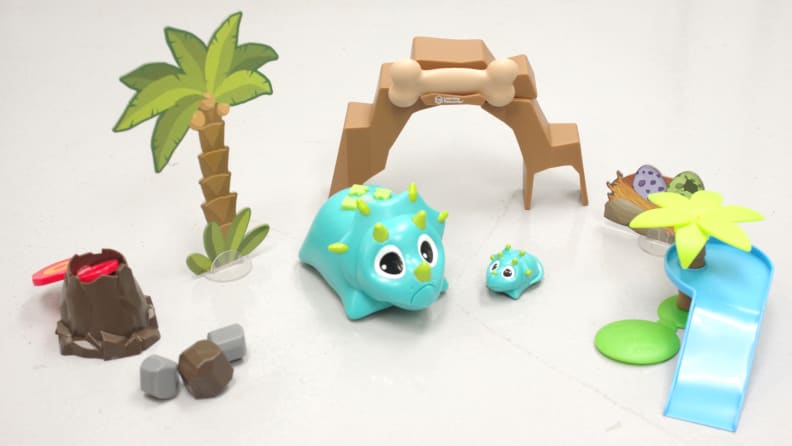
The Coding Critters playset is a great way to keep preschool-aged kids engaged while they learn about programming basics.
Ages: Ages 4+ years
App: N/A
Power: 3 AAA batteries, not included
Hardware: N/A
Parental involvement needed: Moderate for battery installation, minimal otherwise
Coding concepts: Following commands, order of operations
How it works: The Coding Critters playsets make coding basics fun and accessible for the preschoolers in your life.
Our experience: Having a tough time imagining a toy your young child could play with long enough to pick up on some coding basics? The Coding Critters playsets might be right for your kid.
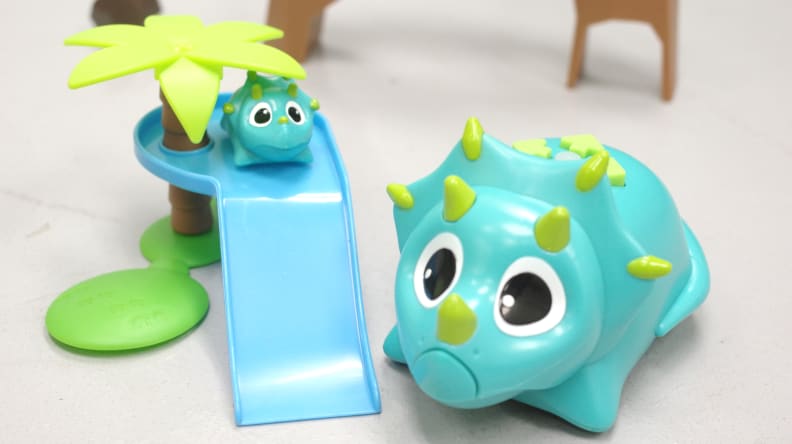
Rumble and Bumble are the stars of this Coding Critters playset.
Each Coding Critter playset involves a robotic animal commanded by six buttons, a baby version of that animal, a variety of scenery pieces and objects, and cardboard pieces that represent coding commands. I got the chance to try out the Rumble & Bumble Coding Critters playset, where Rumble and Bumble are daddy and baby dinosaurs (they are probably Triceratops, for those keen on dinosaurs), respectively.
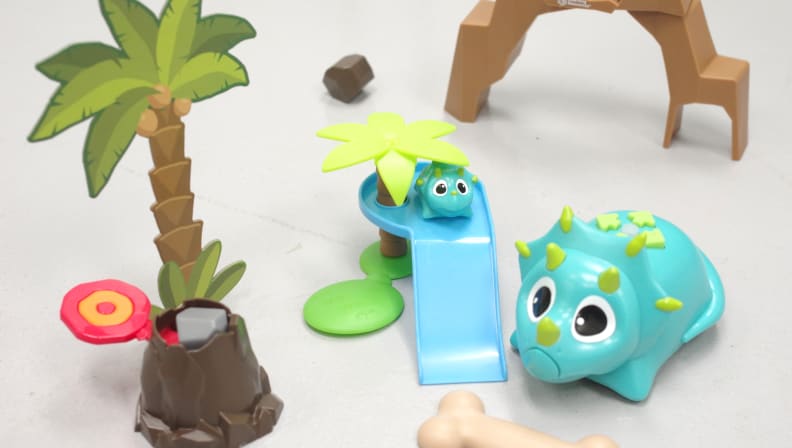
Coding Critters Rumble and Bumble live in a place with a palm tree slide and a volcano catapult.
Their prehistoric environment includes a rock arch, a palm tree slide, boulders, a nest, and a volcano catapult. If you are like me, then you probably think that a volcano catapult is possibly the coolest thing ever.
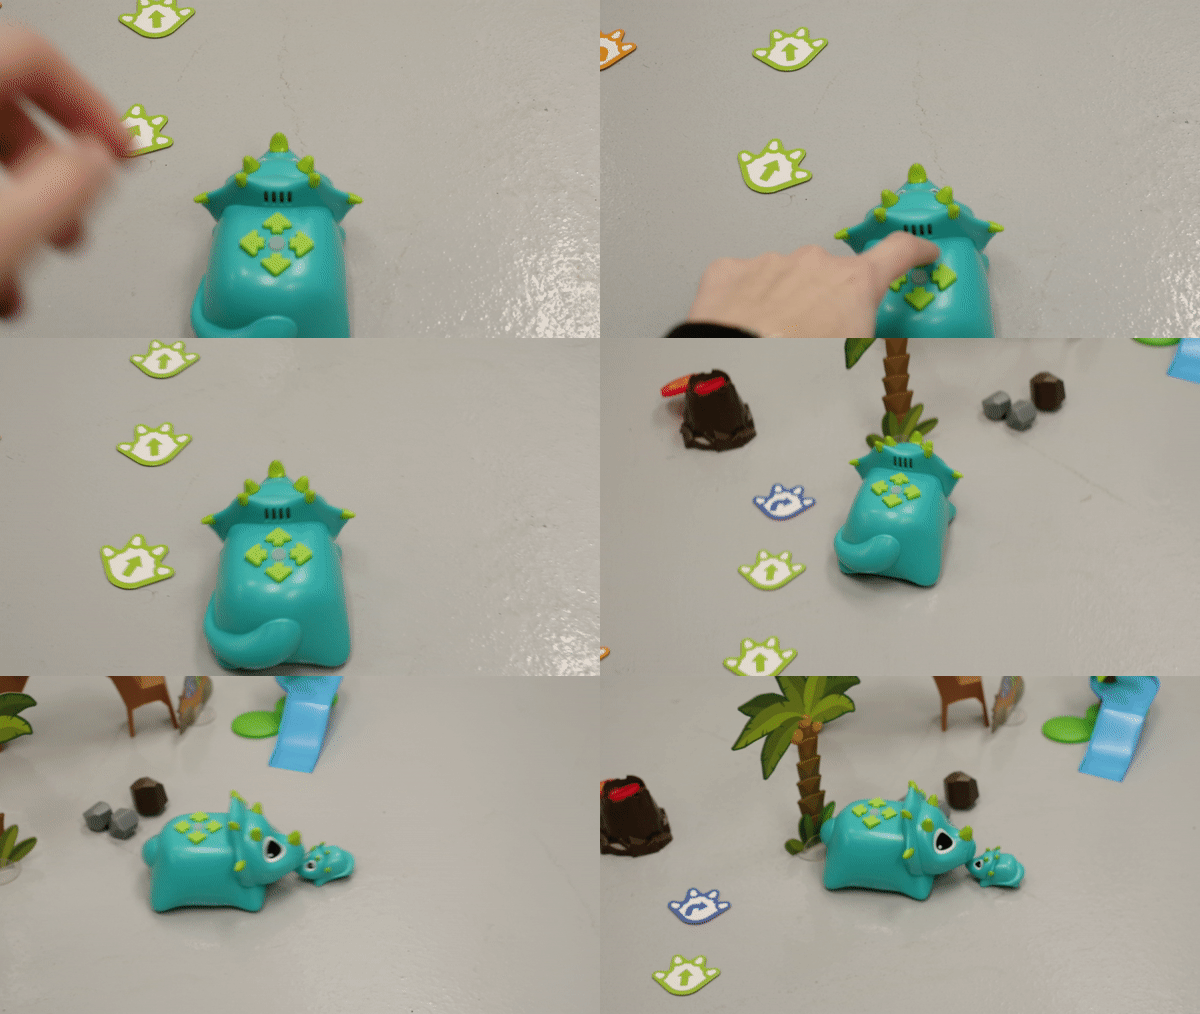
After they tap the direction buttons on Rumble's back in a certain sequence, kids will start to understand the concept of the order of operations by watching as this Coding Critter cruises across the floor.
Anyway, Rumble has five buttons on his back: “forward”, “backward”, “right”, “left”, and “go”. Kids can drive Rumble around (or in some cases through) the obstacles by hitting the direction buttons in a certain order and then pressing the “go” button. For instance, tapping the “forward” button three times, followed by the “right” button and the “go” button will result in Rumble moving forward three units and making a wide turn to the right.
Rumble also has a sixth button on his nose that, when held for two seconds, puts Rumble in “party mode”. In this mode, the five buttons on Rumble’s back will make him either move (the “dance” and “patrol” buttons) or give audio feedback (the “nap”, “pet”, and “feed” buttons). This sixth button is located close to the magnet in Rumble’s nose, which allows him to magnetically tow the presumably recalcitrant baby Bumble back to their rock-laden nest.
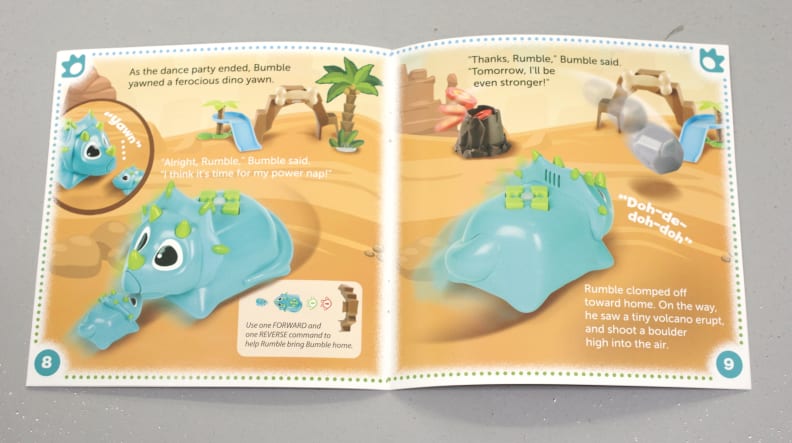
The Coding Critters playset comes with a booklet that shows kids how to start tackling the coding commands needed to get Rumble moving.
Also included is a short booklet that helps to walk kids through the process of entering certain button sequences; kids can visualize the coding commands by physically arranging the corresponding cardboard coding pieces in their play space. Just a heads up: in my experience, Rumble can’t actually run over the coding pieces without getting stuck, so have your kid arrange the coding pieces next to Rumble so that playtime isn’t disrupted.
The Coding Critters kits are best used on a hard floor surface such as concrete or linoleum; Rumble’s wheels, while surprisingly fast, are very skinny and will have a tougher time on a carpeted or uneven floor surface. One nice feature that Rumble has is a wheel alignment switch. As someone who’s spent a lot of time working with robots on wheels, it’s common to see these robots moving along a trajectory with a slight curve either because the wheels aren’t perfectly straight or because they’re moving at different speeds. With this wheel alignment toggle, you can ensure that Rumble will keep moving in a straight line.
If you’ve ever thought to yourself that there’s no way your kid would want to play with an educational toy, Coding Critters is a great solution. While it definitely helps to teach a valuable lesson about the order of operations (i.e. the difference between “forward” and “left” vs. “left” and “forward”), the playset pieces are cool and durable enough to be regular toys in their own right.
The bottom line: The Coding Critter playset splits the difference between “coding” and “toy”. As a result, it will keep younger kids entertained for hours while they explore both aspects of this playset.
Buy the Coding Critters Rumble & Bumble playset for $40
Buy the Coding Critters Ranger & Zip playset for $40
Buy the Coding Critters Scamper & Sneaker playset for $40
5. Robot Turtles
Ages: 4+ years old
App: N/A
Power: N/A
Parental involvement needed: Moderate; some for teaching the basics and beyond the basics, some to actually move the game pieces
Coding concepts: Following commands, order of operations, functions, function calls
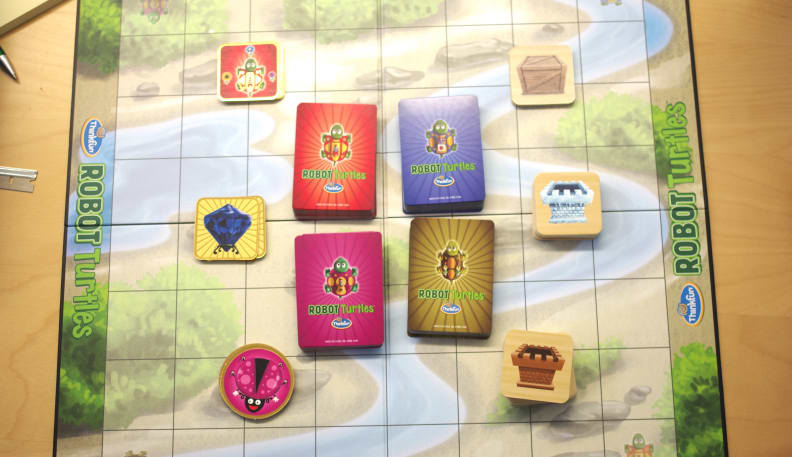
How it works: Robot Turtles is a board game that beautifully demonstrates the basics of coding. Each player is given a "robot turtle" tile, which depicts a turtle with a laser mounted on its back (obviously). Using cards representing motions or actions, the colorful turtles must navigate the gridded game board to find the jewel at the center of the board.
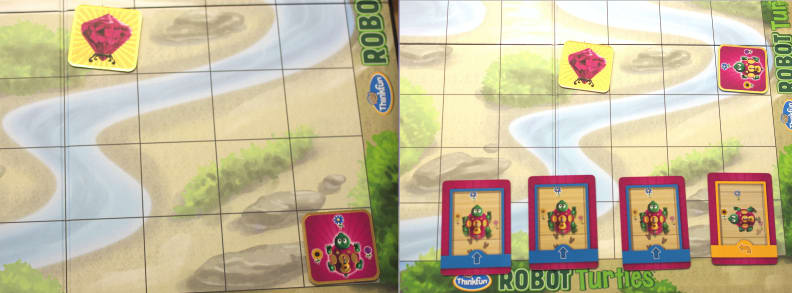
Up to four turtles can play the game at the same time; however, the Robot Turtles instruction manual advocates for collaboration (and cheering) rather than competition between players.
The different cards represent "forward", "turn left", "turn right", "laser beam", and "function call". The different obstacles include "crates" (which can be pushed, but not pulled), "ice castles" (which can be melted via laser beam), and "stone castles" (which are permanent, immovable obstacles).
One key part of this game is that an adult or an older kid must be on hand to set up the obstacle course for the turtles, as well as to move the turtles according to the cards put down by the kids. I suspect that the adults, rather than the younger participants, are asked to actually move the turtle tiles because kids may not admit to a card mistake that has them facing a stone castle, rather than the jewel.
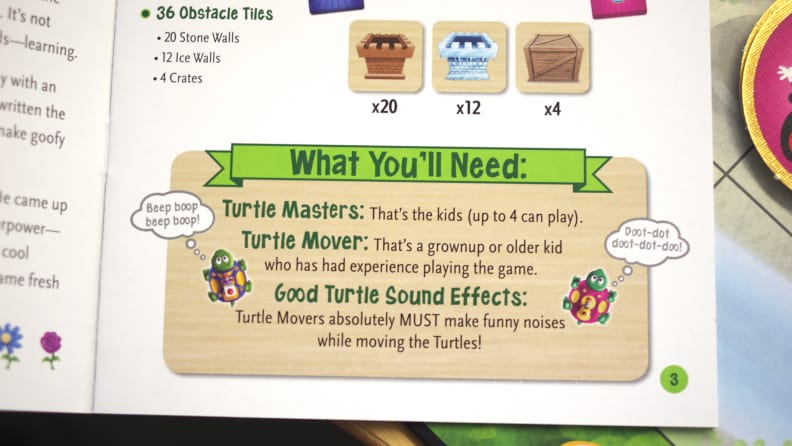
At any point while the adult is moving a player's turtle, that player is allowed to slap the "bug" tile, and shout "Bug!" if they spot an error in their card sequence, and get a chance to redo their turtle's motion on that turn. I wish coding bugs would make themselves as obvious in real life.
Our experience: Robot Turtles is a really neat, screen-free experience for both parents and kids. This game involves moderate parental involvement, so we definitely recommend saving Robot Turtles for family game night, or other instances where parents can devote their full attention to playing this game with their kids.

One cool part about Robot Turtles is that multiple kids can play at the same time, and it's very easy to set different turtles up with obstacle levels of varying difficulty on the same board. This way, both younger and older children can be challenged while playing the same game.
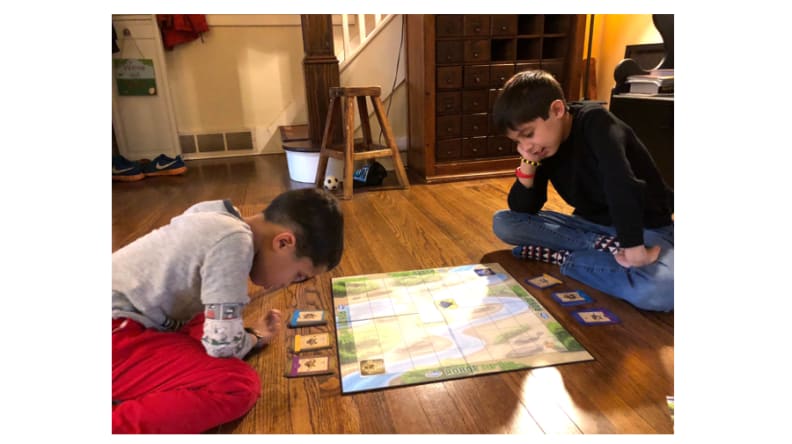
Also, because of the instant feedback between playing the movement/action cards and seeing the turtle move through the obstacle course, this game is a great way to see that "ah-ha!" epiphany moment on a kid's face when they understand how the cards actually drive the robot turtles through the maze.
The stated age range of 4+ is correct; while all kids will love learning the basics and hearing adults make hilarious turtle noises, older children or more advanced coders may soon surpass the higher levels of Robot Turtles, and may want to move on to more complex methods of coding games and toys.
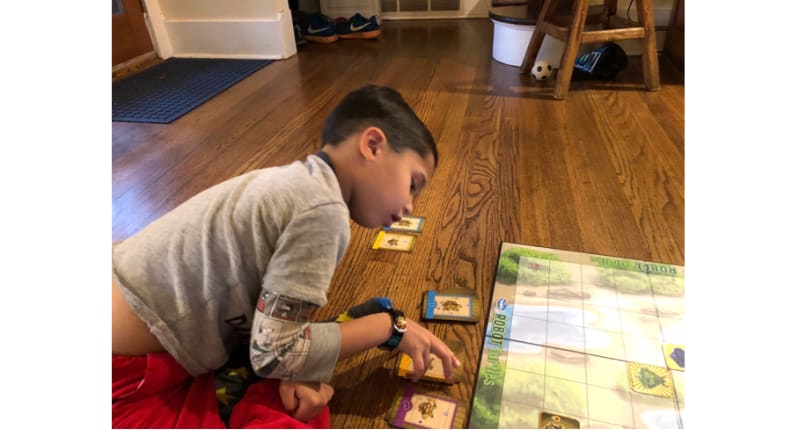
The bottom line: Robot Turtles is a fun way for small children and parents to play together while learning the basics of computer programming.
6. iRobot Root Coding Robot
Ages: Ages 4+
App: Root Coding app (iOS/Android)
Subscription service: Root Academy, $4.99 per month, first month’s subscription free
Power: Internal battery and charger included, connected via Bluetooth
Parental involvement needed: moderate for identifying the robot’s various sensors and coding basics, minimal once user is familiar with Root and coding basics are established
Coding concepts: Following commands, order of operations, logical operators, conditional statements, wait for input, loops, functions
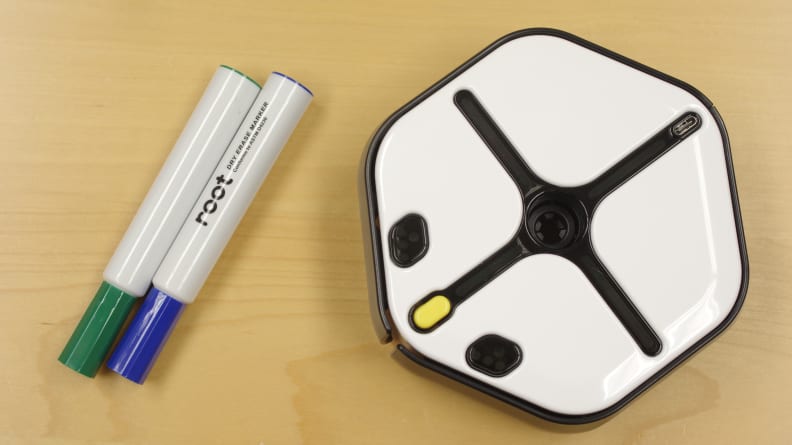
How it works: Using iRobot's Root’s block coding system and extremely thorough coding lessons, children as young as four years old can start driving and drawing with this robot.
Our experience: The iRobot Root Coding Robot is a robot with a streamlined interface that appeals to young children and an extremely customizable robotics experience that appeals to even the most experienced of coders.
The deceptively simple-looking robot has bumper sensors, touch sensors, light sensors, a surface sensor (to prevent Root from falling off of any edges) and a color sensor. My italicizing of the last four words in that sentence indicate my sheer incredulity at how many sensors Root Robotics was able to pack into this robot.
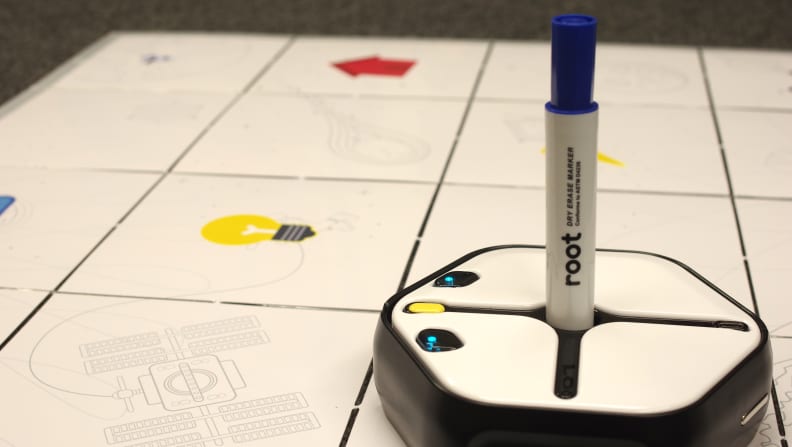
Even beyond the sensors, Root is also able to raise and lower a marker (placed in a hole in the middle of the robot) or a marker eraser on command so that Root can draw on the included foldable whiteboard grid, and ostensibly clean up after itself. More on that later.

Of course, all of the sensors and extra features in the world aren’t any fun if you can’t do anything with them. This is where the Root Coding app comes in. After connecting over Bluetooth and naming your robot (mine was named Banjo, obviously), the coding adventure begins. The app has three modules: Learn, Explore, and Code.
“Explore” is a place where the iRobot Root can showcase new and exciting projects. Users will find freestyle coding in the “Code” module, and structured lessons in the “Learn” module. If you jump straight to the “Code” module, you may be surprised by how few code blocks there are, but never fear, the level of customizability in each individual code block is nearly overwhelming.
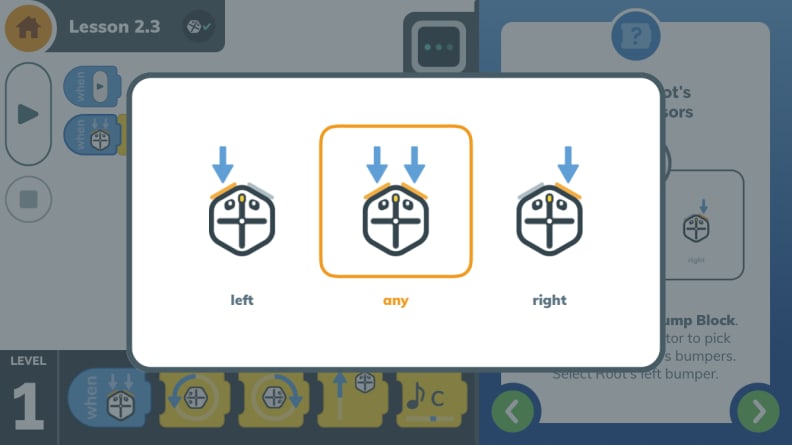
Making Root’s two bumper sensors respond separately is one thing.
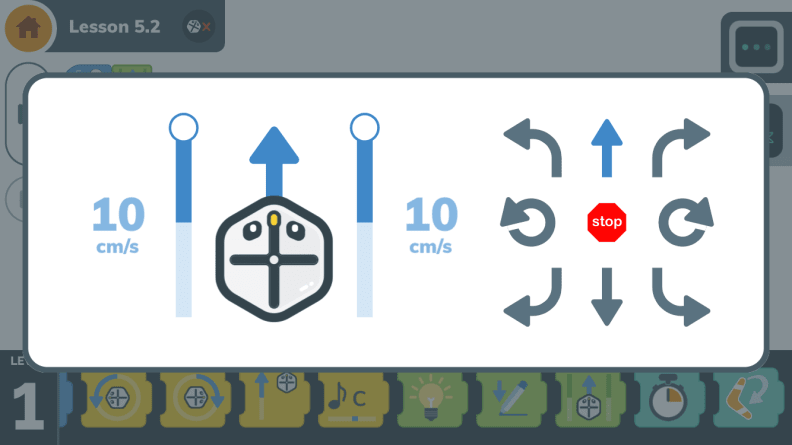
You can also control Root’s individual wheel speeds.

When you make Root sing a song, you get to pick the octave, musical note, and note duration for each tone. That's pretty hardcore.

It’s in the “Learn” section where kids find out about the frankly staggering number of ways they can alter each code block to make Root do everything from have a dance party to navigate an obstacle course to drawing an arc on the whiteboard grid.
As for the lessons themselves, I was surprised by how slowly they progressed until I remembered that this app is aimed at teaching four-year-olds how to code; it’s very appropriate for young children just learning the fundamentals of programming.
One important point to note is that iRobot Root is part of a subscription service; you can only access the first few lessons in the “Learn” module without joining Root Academy, which costs $4.99 per month. Only through Root Academy can you unlock further lessons for Root. It’s also a good way to stay updated as to new code releases; you can just be informed via the app and start using new code right away.
Another clever aspect of the app is that with a tap of a button, you can swap your code style display from simple blocks to a more graphical interface to full text coding. This will help your kid to see how to start taking the coding principles they’ve learned, and what they look like in Swift, a coding language people use in real life. As the iRobot Root website says, translation into Python and JavaScript are forthcoming (as is the Root Coding app for Android).

The Root Coding app allows you to test your code before you actually run it with the Root Robot.
As they progress further in the lessons, though, you will really come to appreciate the area where you can test out your code in the app, and not have it run before you’ve checked it thoroughly. This is especially important when kids are doing art endeavors with Root. Parents will appreciate kids finding and fixing any mistakes before actually running the code, and having Root end up drawing on the dining room floor, rather than the whiteboard grid.
The whiteboard grid itself is lightweight and foldable. Complete with reusable cling stickers (the particular colors of which Root can sense as it drives over them with its color sensor), both Root and the whiteboard grid are easily decorated and highly portable. I will say that the onboard marker eraser isn’t especially effective on the whiteboard grid. Be sure to wipe away any marker residue that Root misses with the included cloth.
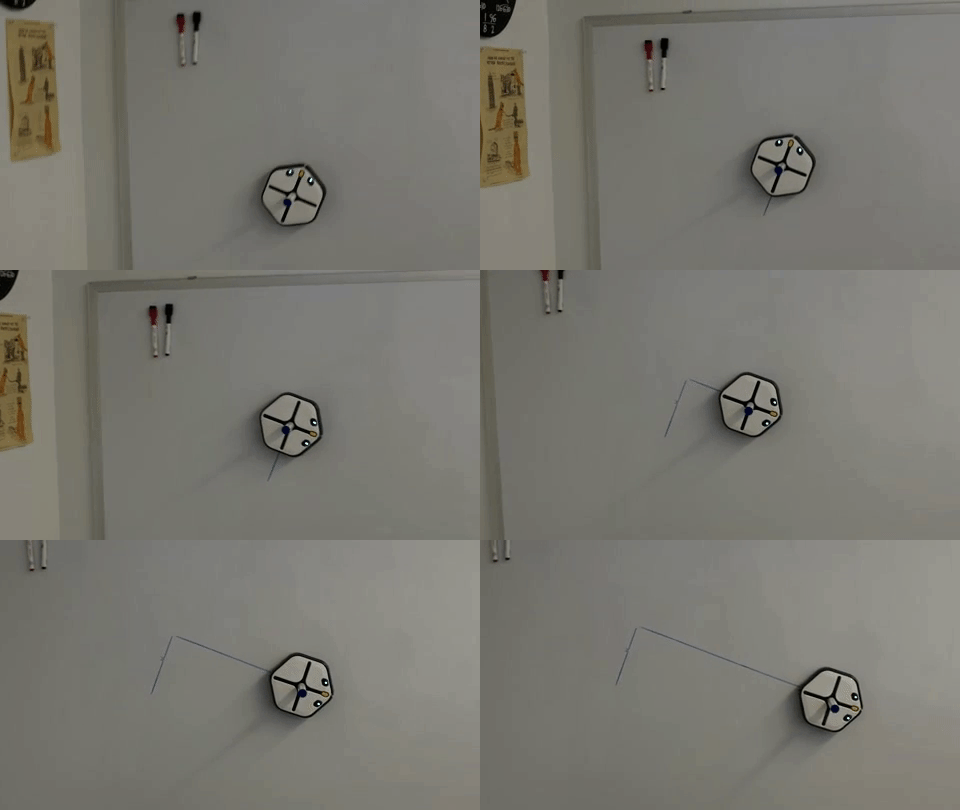
The eraser is, however, much more effective when Root is running on a mounted whiteboard. Yes, that’s right, with a strong magnet, Root can defy gravity and actually move around on a metal-framed whiteboard mounted on your wall.

Root can do so many amazing things, but I did have a couple of minor complaints. Both the robot and the app were a bit buggy at times; the first time I turned Root on, it didn’t sing its introductory song on demand. In the app, the bar with the code blocks would sometimes disappear, and coding blocks would occasionally get stranded in the middle of the code space and not react to finger taps. These problems were all easy solved by rebooting both the robot and the app.
One other minor quibbles involve the fact that, instead of just having each program finish running by itself, you have to manually hit the “stop” button on your codes after you run them. If you forget to do so, you can feel the same guilt I felt after Root kept flashing a purple light for the 10 minutes it took for me to make changes to my project, look up, and realize that Root was still doing a light show.
The bottom line: The iRobot Root Coding Robot is an easy and fun way for young children to learn how to code, yet it’s complex enough that it can keep older kids and parents interested as well. With Root, the possibilities are literally endless. Be aware that you can’t progress very far in the “Learn” module without the Root Academy subscription service before you buy Root Robotics.
Update: iRobot has made the coding platform originally found in the Root Robotics kit freely available for public use. Just hit the plus sign, and you're ready to start coding!
Another update: iRobot just announced their new Root rt0 robot. This robot similar to the original Root robot, except that it is more geared towards beginner coders. For those who want to spice up their coding experience, you can buy the Root Brick Top, which allows you to adorn your Root rt0 robot with amazing LEGO (or other building blocks) designs.
Buy iRobot Root Coding Robot for $200
7. Matatalab
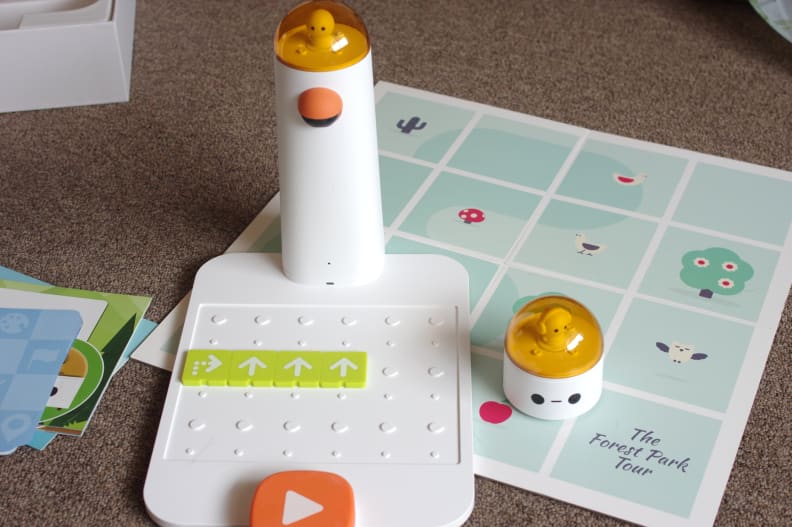
In the Matatalab Pro Set, the tower reads the coding commands and transmits them to the little robot, who then navigates the gridded board according to your instructions.
Ages: Ages 4+ years
App: N/A
Power: Robot and command tower charged with included micro-USB cable
Hardware: N/A
Parental involvement needed: Moderate to get up and running and for more advanced coding concepts, minimal otherwise
Coding concepts: Following commands, order of operations, loops, functions
How it works: Your younger kids can learn the coding basics in a screen-free environment with the Matatalab Pro Set.
Our experience: If you’re looking for a kids’ coding kit that doubles as a creative outlet, you’ll want to check out the Matatalab Pro Set.
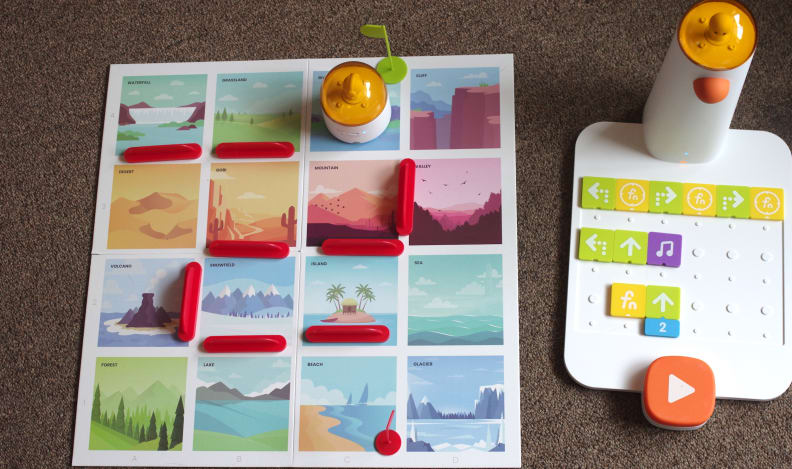
Use the coding commands to help the Matatalab robot navigate through the different environments on the gridded board.
Using coding commands found on colorful, kid-friendly pieces, children are tasked with guiding the little robot around a gridded board that is covered in beautiful depictions of different environments such as an island, a volcano, and a forest. After kids place the coding pieces on the command board and hit the big orange “play” button, the tower reads the commands and transmits them to the robot on the board.
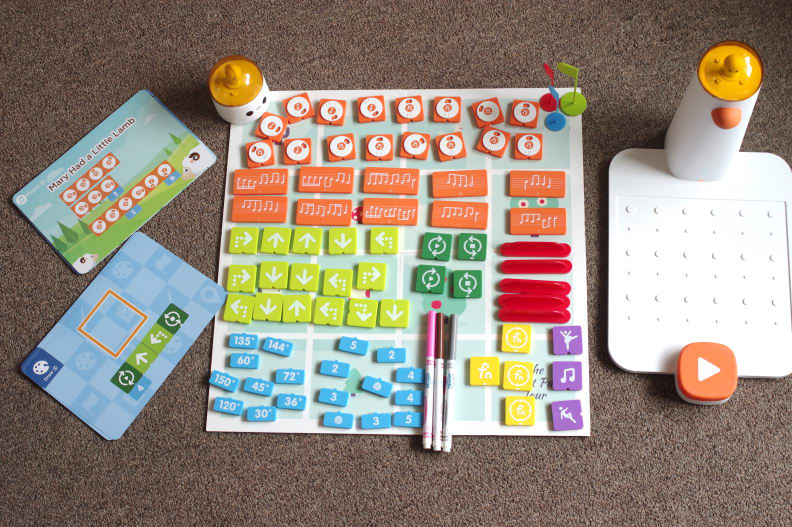
The Matatalab Pro Set includes a ton of movement, music, and control coding pieces.
With these coding pieces, kids can make the robot move, turn, rotate, and play music. Commands specific to computer programming include function definition and function call pieces, loop start and loop end pieces, and multiplier pieces that can repeat a command two, three, four, five, or a random number of times.
The command board itself has room for a programming sequence that is 18 pieces long; to minimize confusion between coding commands with similar-looking pictures, the pieces are designed to only fit on the board when they’re placed in the correct orientation.
A great part of this kit is that it really showcases the flexibility of computer programming; the same logic that underlies the coding commands that drive the Matatalab robot around the board can also be applied to drawing shapes and forming melodies.
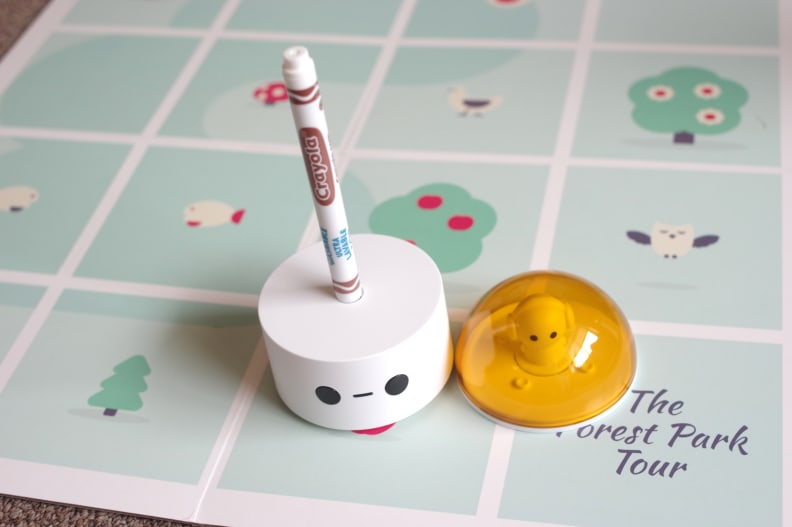
With a Crayola washable marker, you can use the Matatalab robot to draw geometric shapes.
Removing the top of the robot reveals a spot where a fine line Crayola washable marker can be placed; once the marker is installed and the robot is placed on a piece of paper, kids can start experimenting with different geometrical designs. The Matatalab Pro Set, which includes three Crayola markers, even includes some cards that demonstrate how to draw a square and different types of stars.

With Matatalab's drawing feature, the fact that the rotation angles aren't exact becomes more apparent; the robot tends to operate better on completely flat and level surfaces.
As is typical with these kinds of robots, the rotation angles aren’t quite exact; this results in imperfectly drawn stars and a robot that eventually fails to stay inside the gridded board lines. By placing the board or the piece of paper on a perfectly flat and level surface, though, you’ll get the best results when it comes to precise robot rotation.

The Matatalab Pro Set adds a lot of music-related coding commands to the robot's repertoire.
This kit allows kids to explore a ton of musical possibilities. There are two types of musical command pieces: single pieces on which you can choose one of seven tones (for an eighth note or two sixteenth notes) by adjusting a small dial, and larger pieces that have certain musical expressions built in. Between these two types of pieces and the multiplier pieces, which extend the duration of the note played, you and your kids can develop simple songs and more complex melodies. This kit also includes some cards that show how you can code in songs like “Mary Had a Little Lamb” and “Twinkle, Twinkle Little Star”.
(If you’re not interested in the musical coding pieces, you might prefer the regular Matatalab Set, which has fewer pieces and costs less than the Matatalab Pro Set).
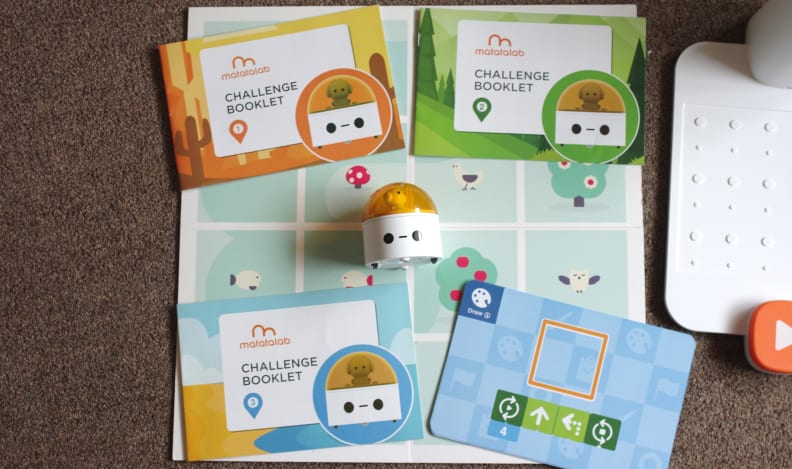
The Matatalab Pro Set comes with three challenge books and some sample drawing and music cards to get you up and running.
There are a lot of thoughtful touches in the Matatalab Pro Set. The little figures inside the command tower and the robot can be swapped out with any LEGO figure, the gridded board is double-sided (with a forest scene on the other side), and the kit includes three challenge books at increasing levels of difficulty. Using pictures alone, these books will help your kids to grasp the coding logic that allows them to successfully drive the robot from one gridded spot to the next.
Between the challenge books, the double-sided board, and the sheer number of coding pieces available, there are tons of fun ways for your kid to interact with the Matatalab Pro kit; one of the most valuable lessons your kid can take away from this kit is that programming and coding logic can be applied to many different problems in many different fields.
From the point of view of a parent, this kit scores bonus points because the gridded board has a relatively small footprint, so it won’t take up much space on your playroom floor. However, I ran into a few issues.
Firstly, to get the Matatalab kit up and running, you have to charge both the robot and the tower separately. If one or the other dies, you won’t be able to use the kit. Secondly, the directions are a bit hard to read at times because the different language translations for each step are listed one right after the other, rather than having a different set of instructions in each language. Lastly, there is no storage other than the box included in the kit; unless you keep the whole kit in the (relatively large) box, it would be pretty easily to lose some of the coding command pieces. Again, though, these issues are just something to be aware of; they do not lessen the ability of the Matatalab kit to give children a fun way to explore programming basics.
The bottom line: Parents and kids alike will appreciate the versatility of the Matatalab kit, which gives kids insight into the logic inherent in computer coding, music composition, and geometric shapes.
Buy the Matatalab Set for $170
Buy the Matatalab Pro Set for $290
8. Coji
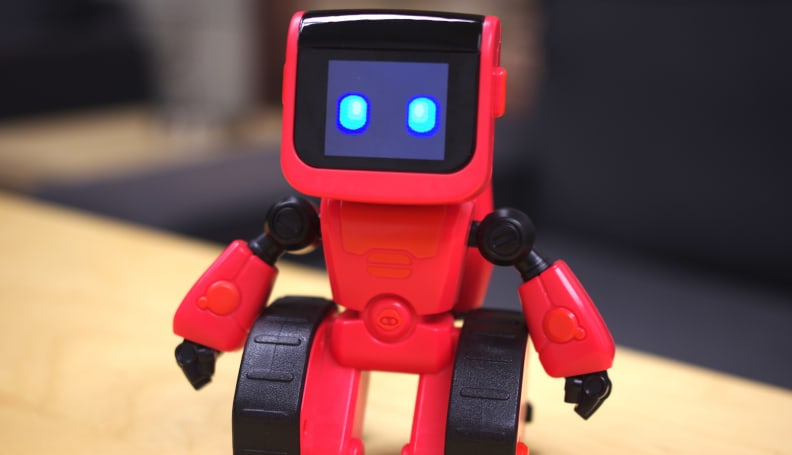
Ages: 4+ years old
App: Coji (iOS/Android) for older kids, pairing via Bluetooth
Power: 3 AAA batteries
Parental involvement needed: Minimal for non-coding play, moderate for coding play in app
Coding concepts: Following commands, order of operations, macros
Note: Elmoji appears to no longer be available for purchase; however, Coji is still widely available.
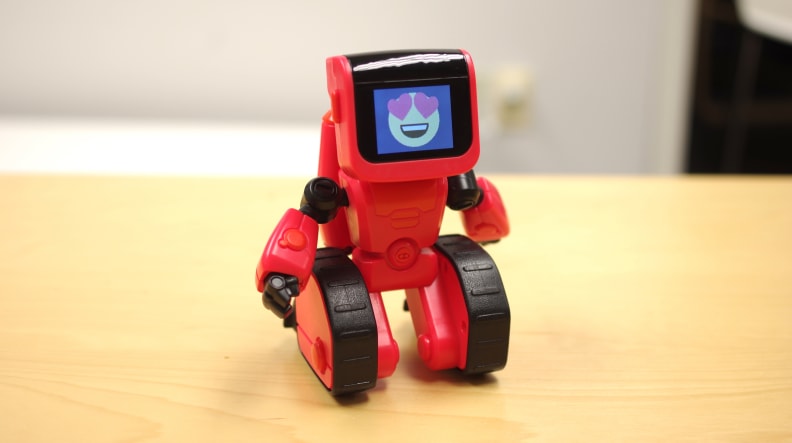
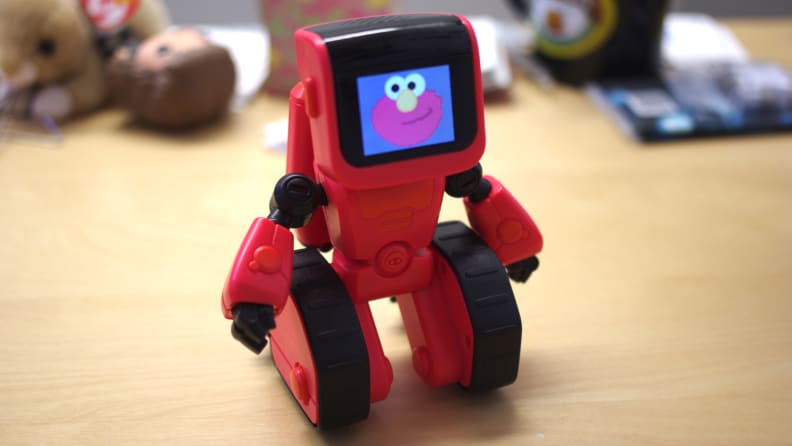
How it works: Elmoji is the latest version of Coji, an emoji-themed robot aimed at young kids.
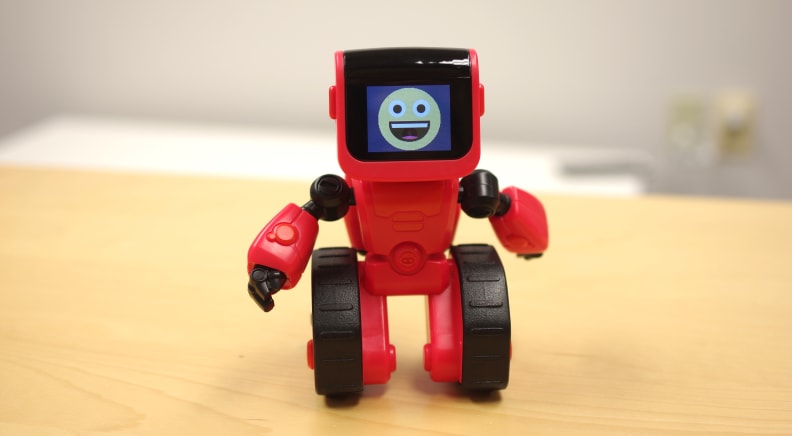
While primarily driven by activities via the Coji app, the app-free experience may be the best way for toddlers to play with Elmoji/Coji. Using the buttons on the left and right hand sides of Elmoji's head, children can scroll through a slew of emojis, then push down on Elmoji's head to select one. Elmoji, as though in a game of Charades, promptly acts out that emoji to the best of its ability. For example, activating the "roller coaster" emoji causes Elmoji to dance erratically while playing a sound clip of screaming people.
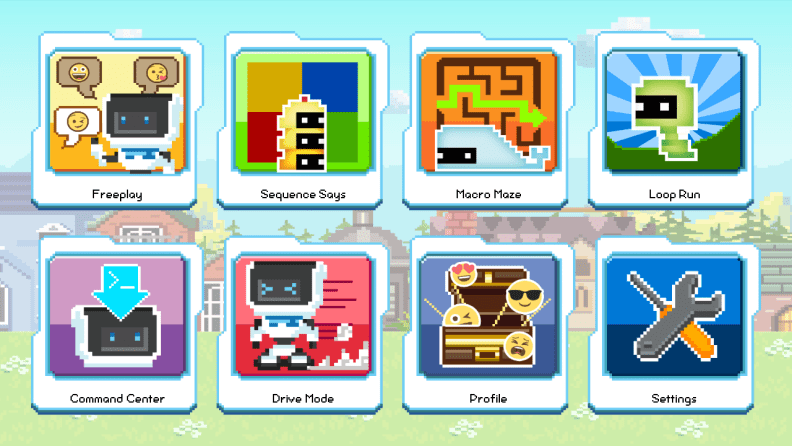
For older kids, the "Free Play" part of the Coji app offers a way for users to write code for Elmoji and make it perform a sequence of motions or display certain emojis. Users tap to add motions and emojis, and after being paired with a device via Bluetooth, Elmoji receives and enacts the code from the app.
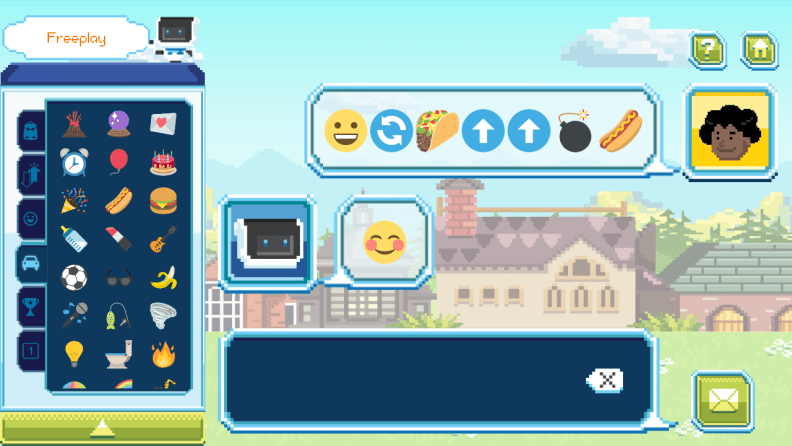
Elmoji will follow the coded sequence of events.
For a bigger challenge, in the "Command Center" part of the app, kids can actually code and upload macros (mini-programs) into Elmoji, so that even if Elmoji isn't currently connected to the app, it can still perform the actions and emojis in that macro sequence.
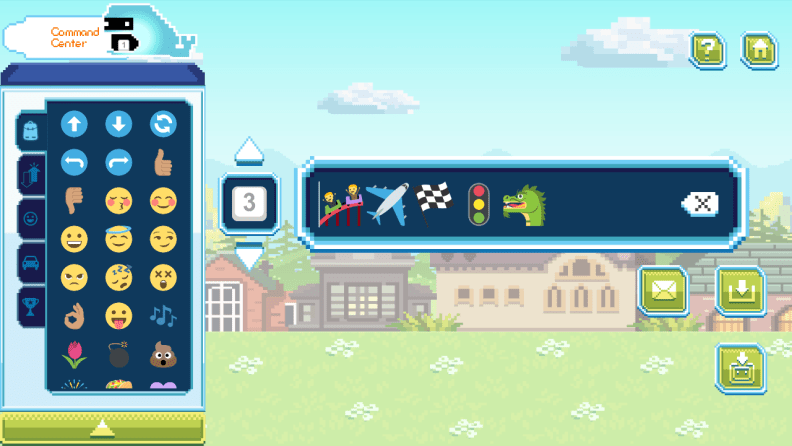
This motion/emoticon sequence was coded into the #3 macro spot.
The six modules in the Coji app are "Free Play", "Command Center", "Macro Maze" (uses emojis, motions, and macros to navigate a maze), "Sequence Says" (a game like "Simon Says", but with emojis), "Loop Run" (a game like Super Mario Brothers, but you push Elmoji's head down to jump), and "Drive" (controlling Elmoji's motions and emojis manually).
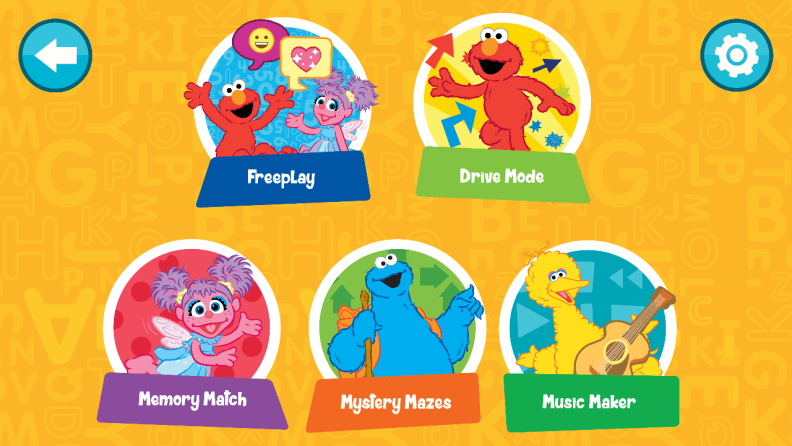
The Elmoji app is a simpler version of the Coji app, and is meant for younger children; the emojis are Sesame Street flavored, rather than just normal emojis.
The modules in the Elmoji app include "Free Play", "Drive Mode", "Memory Match", and "Mystery Mazes", which are simpler versions of the "Free Play", "Drive", "Sequence Says", and "Macro Maze" modules in the Coji app, and "Music Maker", where kids can tap on colorful xylophone keys to play music through Elmoji.
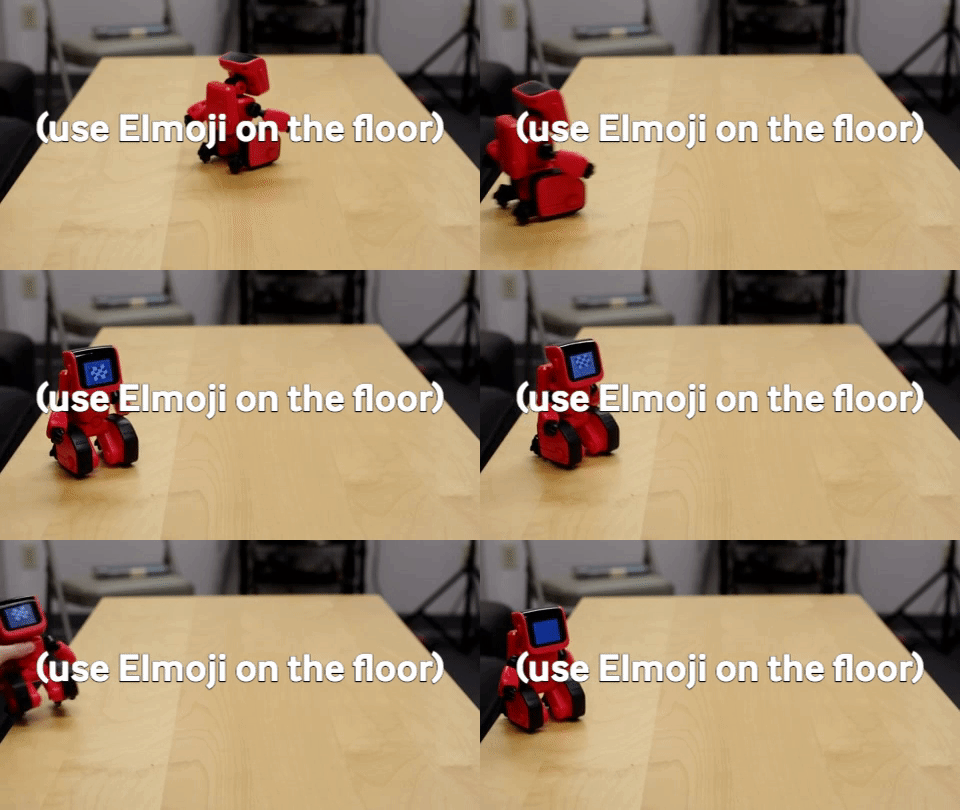
Our experience: Elmoji is fast. We recommend playing with Elmoji on the floor, since otherwise, Elmoji tends to take headers off of table edges with terrifying regularity.
The fact that mini-programs can be uploaded into Elmoji is very cool, and is sure to help kids understand the time-saving aspect of macros (calling on a set of actions repeatedly vs. coding those actions in manually over and over again).
While the Elmoji robot is the big selling point, the fact that the Coji app can be used without Elmoji is a nice benefit for parents, who don't have to worry about forgetting to bring Elmoji everywhere.
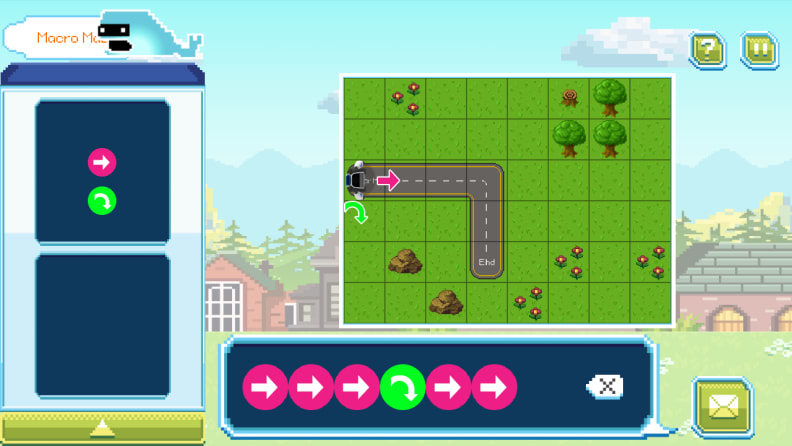
The "Macro Maze" game can be played without the Elmoji robot.
The bottom line: Both Elmoji and the Coji app will make for hours of unintentional learning for kids old and young alike.
9. Botzees
Ages: Ages 4+ years
App: Botzees AR (Android/iOS) (Compatible only with devices with operating systems more recent than (and including) iOS 12 or Android 8.0.)
Power: Power block with USB charger, connected via Bluetooth
Parental involvement needed: minimal, once the basics are established and kids have experience assembling the blocks
Coding concepts: Following commands, order of operations, conditional statements, loops
How it works: Botzees is a fun robot-building kit that will teach your children coding basics while allowing them to explore an augmented reality (AR) world full of fun new friends.
Our experience: If you want your kids to spend their screen time on activities that are both fun and educational, you won’t be disappointed with Botzees. With its easy-to-build robots, fun plot, and coding tasks disguised as neat puzzles, the Botzees robots and app are a recipe for success.
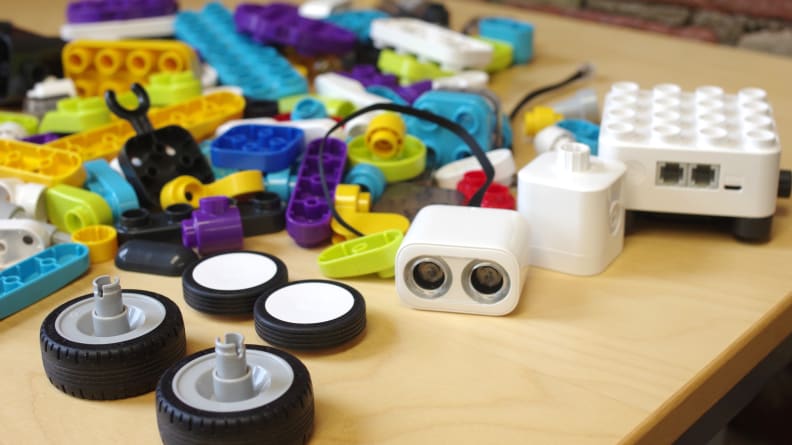
The Botzees kit is made up of 130 pieces that can be used to build 6 pre-designed robots (including a truck, a monkey musician, and a dog) and an infinite number of free-form robots or characters. The pieces are large, colorful, and durable; they snap together and disassemble easily. The three most important components are the power unit, the motor, and the light/motion sensor. The power unit takes about one hour to charge, and the motor and light/motion sensor plug into the power unit. To control the robots you build, you must connect to the power block via Bluetooth (and have to reconnect every time you leave and reopen the app).
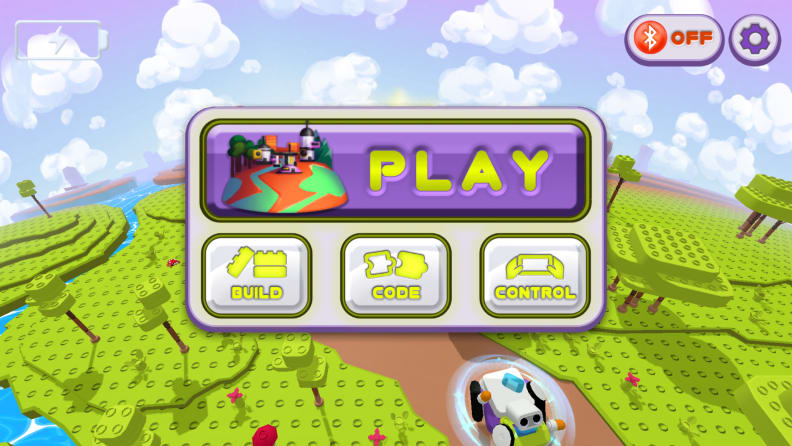
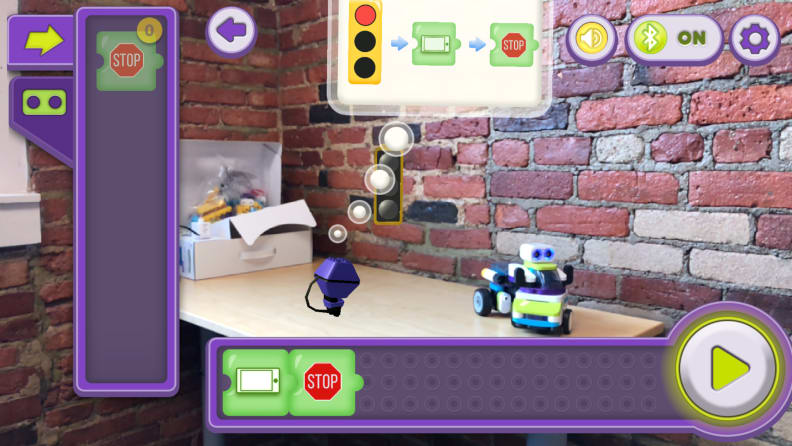
In the Botzees AR app, there are four modules: Play, Build, Code, and Control.
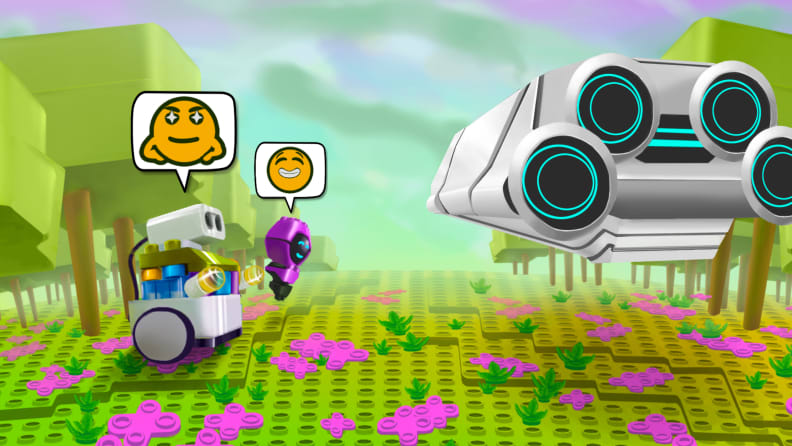
The Play module is where most of the action happens. After entering the Play module, you’re instantly drawn into an animated adventure where a robot civilization crash-lands their spaceship on a planet populated by helpful purple beings. Kids are tasked with building a robot, and then face coding challenges with that robot in an AR environment. Solving a coding puzzle means finding more spaceship parts and building more complicated robots to take on more complex coding challenges.
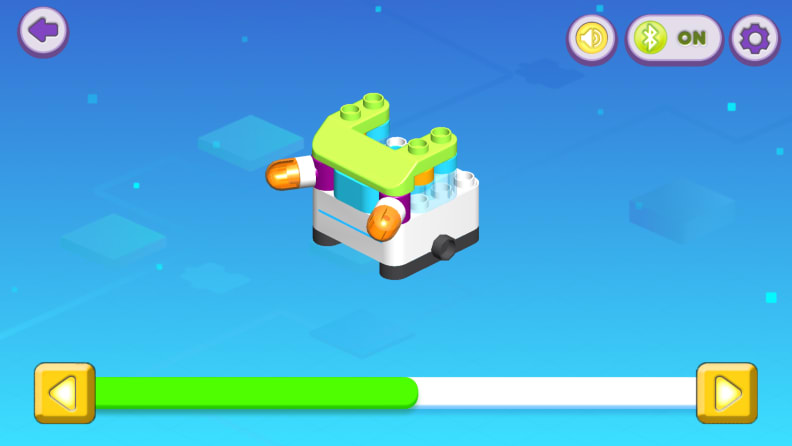
Your first task is to build a robot. The assembly instructions are a series of diagrams (similar to the diagrams used in LEGO kits) that you can scroll through; it’s easy to go back a few steps or repeat the previous step without losing your place. You can also rotate the diagram by dragging it, so you can see the pieces from multiple angles. I needed to use this option a few times, since some of the pieces look alike, and I’d accidentally used the wrong pieces in a couple of places. Parents—it might be worth it to sit in on the first few robot build-outs so that you can make sure that younger kids won’t have difficulty differentiating a 2 x 4 piece from a 2 x 6 piece.
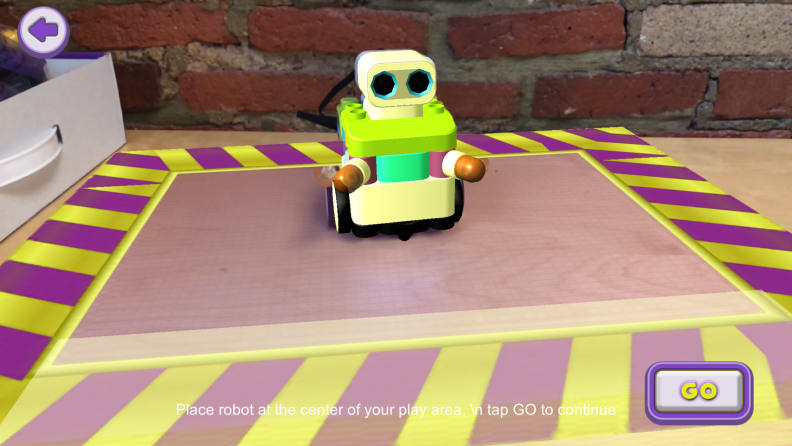
After you finish building a robot, the app asks you to aim your device’s camera at a large, flat area. While the area it eventually highlights won’t always perfectly match the room’s contours, the app is usually pretty good at identifying flat areas. You will have to initially clear the area of all objects, though, since the app interprets any objects in the flat area as no-go zones. Once the app identifies the flat area, you can manually adjust the boundaries of the play area to maximize the space. While I’d definitely recommend using Botzees on a flat floor surface, it can be used on a desk (which is what I did), so long as you identify the edges of the table as the limits of the play area.
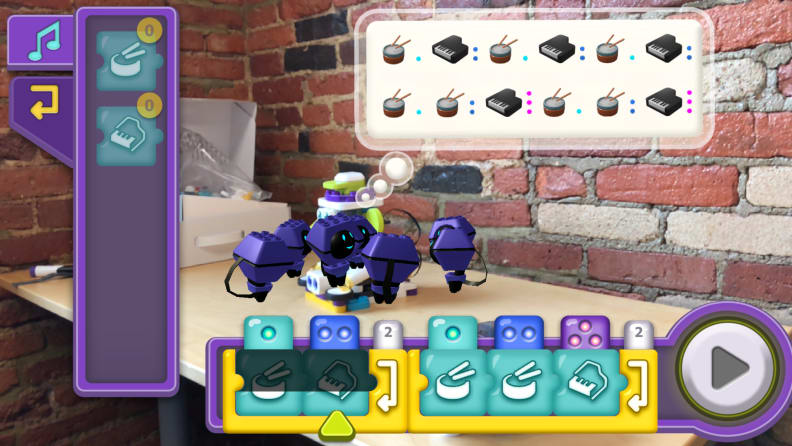
The next step is to place the robot inside the play area, let your device scan the robot again, and you’re good to go. After a scene or two that explains your task, the helpful purple beings give you the specific coding sequence you have to emulate, and it’s up to you to replicate those results with the coding blocks you have available. By solving the puzzle (i.e. unlocking a treasure chest, scaring away a worm, digging a hole in the ground, etc.), you gain access to new levels and new coding blocks. The coding blocks themselves are easy to identify and are placed in a given order by dragging and dropping. In my experience, the coding challenges are pitched at the right level to be challenging, but still doable, for young children.
As you make your way through the levels, be sure to keep the volume up on your device, since sometimes, in my experience, vital coding instructions are only provided by dialogue from the helpful purple beings. You can lower the volume during robot assembly (the music that plays at that time is just background music), but keep it turned up during the coding puzzles.
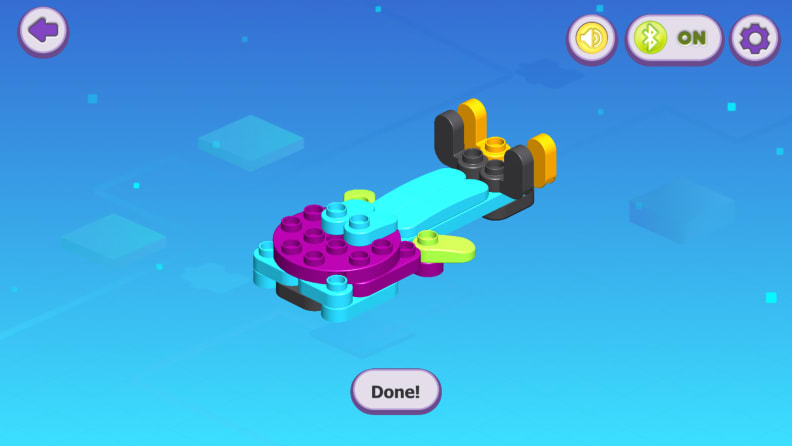
In some levels, you’re asked to build additional items with leftover blocks that will help your robot to complete its next task. Strangely, you do have to build these extra items (such as a piano and a guitar for the monkey musician), since the app scans for them before moving on to the next challenge, but after being built, they are not required to keep the plot moving; the extra items are often rendered separately in the AR environment.
All in all, I had a blast making my way through the different levels in the Play module of the Botzees AR app. Those who are a fan of AR will love the absurd robot and environmental images that are superimposed on the boring flat surfaces in your home. One thing to note is that because the app uses your camera frequently, it can drain your battery faster than other coding apps might; keep your phone charger handy.
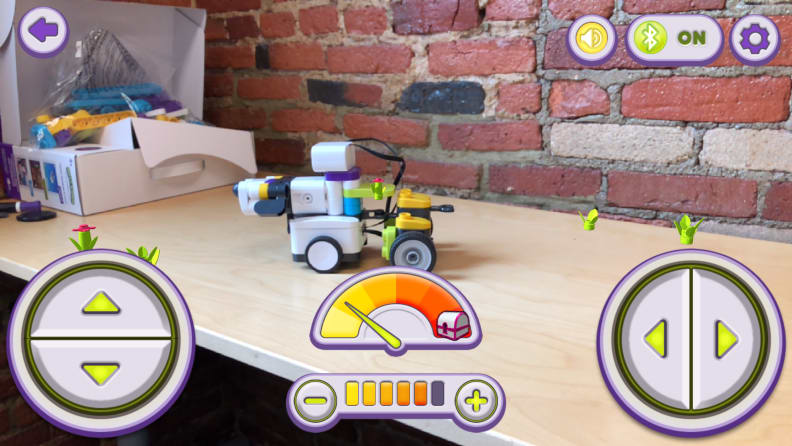
The three remaining modules, Build, Code, and Control, are basically the different sections that exist in the Play module; the Build module provides you with the robot assembly directions, the Code module gives you access to the coding environment (including the coding blocks you’ve unlocked by solving the puzzles), and the Control module allows you to drive your robot using the forward/backward and left/right buttons. Parents will appreciate that there’s an option to increase or decrease the intensity of each forward/backward and left/right button press, since lowering the intensity means that each motion happens at a much slower pace (and at a lower noise level).
While there are only 30 levels currently available in the app, there are plans to roll out more levels in the future, although it’s uncertain whether those additional levels will be free or whether they will only be accessible through a paid subscription service.
The bottom line: If your kid is interested in AR, building with blocks, or solving puzzles, look no further than the Botzees robot kit for hours of fun and subtle coding tutorials.
Update: Pai Technology has just released the Botzees Junior Kit, a more basic, dinosaur-themed version of Botzees that is aimed at children as young as three years old.
10. Tangiplay
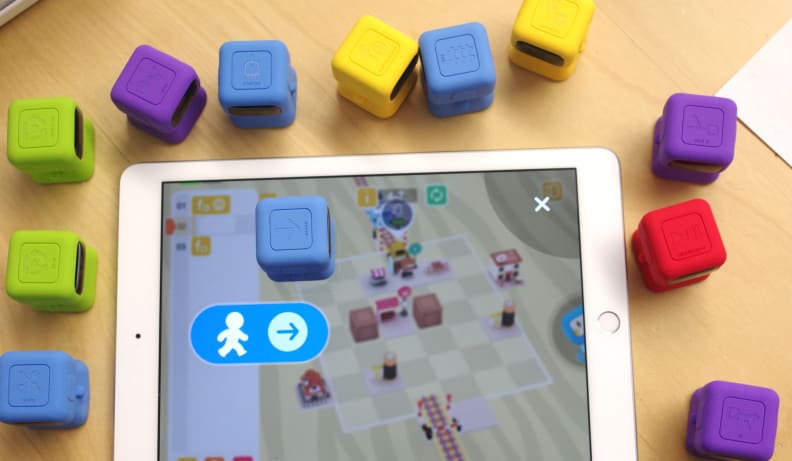
Tangiplay is a coding kit wherein kids place specific figurines on a tablet to solve coding puzzles.
Ages: Ages 4+ years
App: Tangiplay app for Apple tablets and Android tablets
Power: N/A
Hardware: A tablet with a touchscreen is required to use Tangiplay
Parental involvement needed: Moderate when first learning to use Tangiplay and when new coding concepts are introduced, minimal otherwise
Coding concepts: Following commands, order of operations, conditional statements, loops, functions, debugging
How it works: Tangiplay is a neat way for younger children to learn coding concepts and solve puzzles at the same time. By placing large kid-friendly blocks on the tablet screen in the right order, your little coder can help the explorer vehicle plot a safe path for the oncoming train.
Our experience: If you want to get your kids thinking about logic and spatial puzzles at an early age, look no further than Tangiplay. One Tangiplay kit involves 12 figurines, made out of food-grade silicone, and a series of interchangeable emoji faceplates that can be slotted onto each toy’s face.
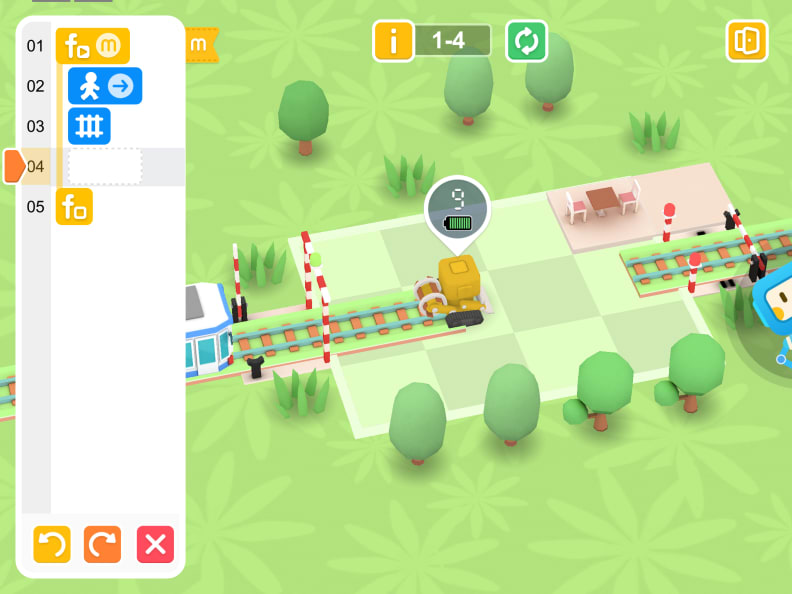
In the Tangiplay app, kids have to use coding commands to help the explorer robot bridge the gap and complete the railroad tracks.
Once you download the companion Tangiplay app on your iPad, the fun begins. You’re tasked with solving a series of puzzles wherein you help the explorer robot to fill in the gap between an incomplete set of railroad tracks without running out of power. To solve each puzzle, your kid must use the twelve figurines to successfully navigate a grid space that has obstacles, a passenger who must be picked up, and a train depot.

The Tangiplay kit comes with twelve figurines (where each figurine represents a specific coding element) and a number of emoji faceplates.
These twelve figurines each have a very specific meaning, and act as individual pieces of code that allow you to solve the puzzle and help the explorer robot complete the railroad tracks. The figurines are: “Move”, “Lay track”, “Charge”, “Use tool”, “Start loop”, “End loop”, “Debug”, “Create function”, “Call function”, “Start if statement”, “Else-if branch of if statement”, and “End if statement”.

Some Tangiplay figurines have multiple options that you can select by rotating or sliding the figurine on the tablet screen.
During each puzzle, a coding panel appears on the left; to enter a command, your kid simply places a single figurine on the flat-lying tablet, and the contacts on the bottom of each figurine translate into a coding command that is entered into the coding panel. Even more clever is the fact that certain figurines, when you place them on the screen, present multiple options that you can select by sliding or rotating the figurines on the screen.
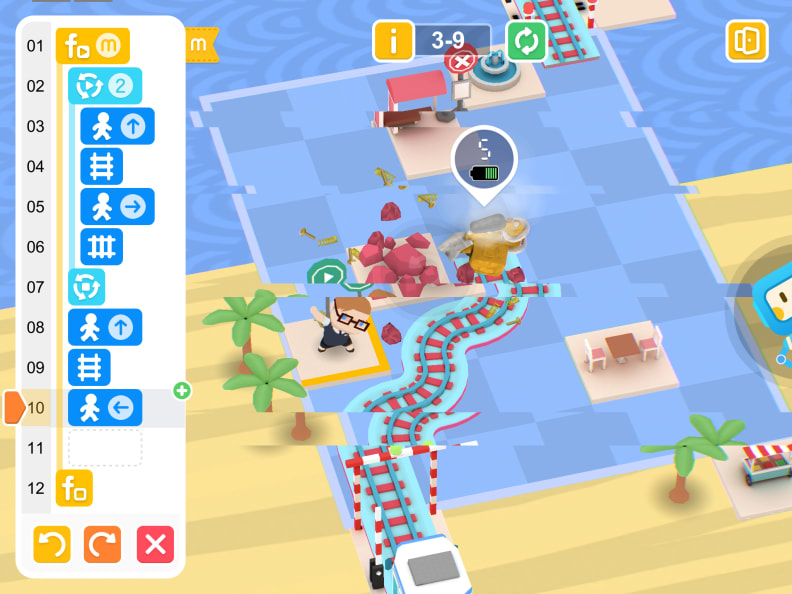
If your code is wrong, the explorer robot can crash into an obstacle.
If you input a correct coding sequence, the train flies along the track from the starting point to the finish line, and you advance to the next level. If you make an incorrect move, however, you either smash into an obstacle or end up stranded in the grid space. The level resets to your most recent successful move, and you can fix your mistake(s) by undoing the last move, editing the program in the coding panel, or using the “Debug” figurine to step through program line by line. This forces young coders to really pay attention to both the specific coding commands they’re entering, as well as the order in which they’re entered; both of these concepts are vital to understanding computer coding logic.

For more complicated bits of code, such as conditional statements (the purple blocks at the far left), the Tangiplay app builds in example blocks of code so that new coders can see how these coding elements help the explorer robot navigate around the grid.
When it comes to introducing new coding concepts, such as loops, functions, and conditional statements, Tangiplay includes a sample bit of code that plays at the beginning of a few levels so that coders can see how the new commands should be implemented, and how they can help the explorer robot to navigate the grid space in different circumstances.
I was lucky enough to be given access to a pre-production review unit; this proved a bit problematic for me as there was not a lot of information available on how to actually use Tangiplay. There are no instructions with the set of figurines or in the app (it just leads right into the map of individual levels). As of right now, the Kickstarter page has the most information about how to enter coding commands and make certain coding selections. Prior to giving Tangiplay to your kids, I suggest that you gain some familiarity with the figurines and the programming logic. Make sure you also understand that the “Move” figurine moves the explorer robot in a direction that is from the perspective of the coder (the robot moves to the left), rather than the point of view of the exploration robot (the robot moves forward).
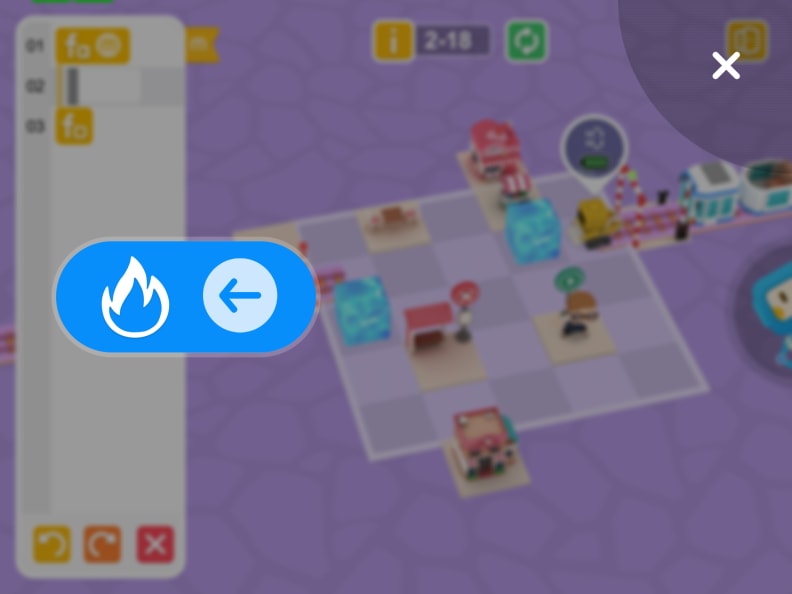
Kid coders can call on a flamethrower to help the Tangiplay explorer robot melt huge ice cube obstacles.
The lack of information also made things a bit tricky in certain levels. When confronted with an ice cube, a switch, or a pond, I had to discover that the “Use tool” figurine would give me a flamethrower, the ability to flip a switch, or a freeze ray through trial and error, since the “Use tool” figurine only allows you to use a given tool in a level that contains that specific obstacle.

Our testers enjoyed the heck out of Tangiplay, and picked up the coding logic quickly once everything had been explained by an adult.
These minor issues aside, our testers, who were aged 7 and 10, easily picked up the coding logic and blazed through multiple levels. There were a couple of instances where the figurines didn’t register as the correct command, or where they didn’t register with the app at all, but other than that, they had a blast. I also had a lot of fun solving the puzzles, using a flamethrower, and laughingly wondering why the passenger, whom you must pick up and deliver to the train depot in the course of each level, can't just walk the two grid squares to his destination.

Because most Tangiplay levels can be solved multiple ways, the Tangiplay app rates you on the elegance of your coding solution.
While Tangiplay gives kids the options to use more sophisticated coding elements, such as functions or conditional statements, the puzzles can still be completed without implementing these coding elements; however, you do get a star rating on each level that varies with the elegance of your coding solution, so that will entice more competitive kids to solve the puzzles in multiple ways to achieve the three-star rating for each level. While Tangiplay is rated for kids ages four and up, children that young may only really appreciate the puzzle aspect of Tangiplay; only the older kids will really start to appreciate the fundamentals of coding logic.
With 120 puzzles already available in the app, and with Tangiplay’s intention to add more puzzles as time goes on, Tangiplay will keep young children and young coders entertained for hours.
The bottom line: While younger kids may need some parental assistance to understand the coding logic, Tangiplay is a fun, engaging take on coding basics and spatial puzzle solving.
11. Kinderlabs Robotics KIBO

Ages: 4-7 years old
App: N/A
Power: 4 AA batteries
Parental involvement needed: Minimal, once the barcode process is established and the meanings of some of the logical expressions are explained
Coding concepts: Following commands, order of operations, counting loops, conditional statements, wait for input
How it works: KIBO is a robot who operates on a combination of sensors and barcode inputs.
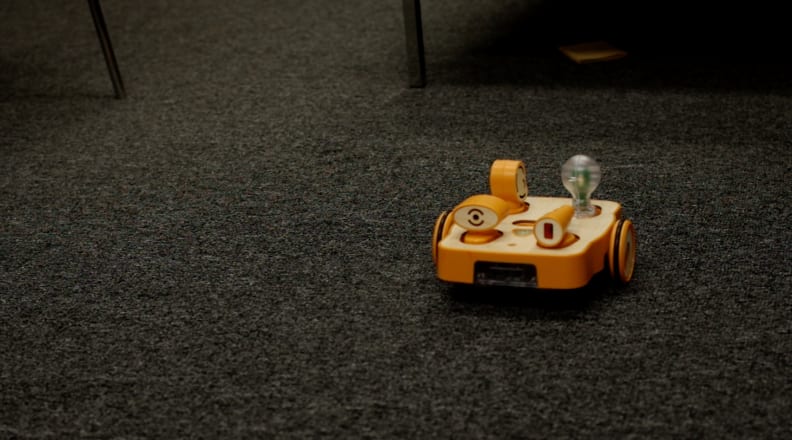
To make KIBO follow a sequence of actions, kids build a program by assembling a line of large, kid-friendly wooden blocks, each of which has a different barcode on it. Each block line must start with the "Begin" block, and finish with the "End" block, which tells KIBO's barcode reader to start and stop looking for additional barcode inputs, respectively.
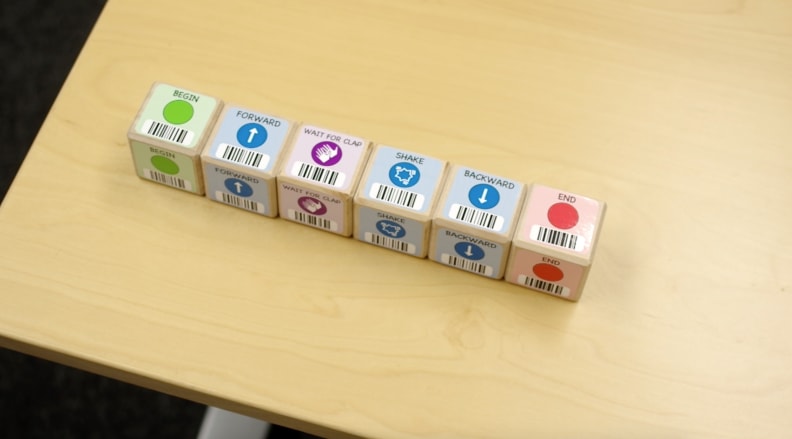
Then, children flash KIBO's barcode reader over each block in the order they want the actions performed, and KIBO chirps every time a barcode is successfully read. After placing KIBO on the floor, press the "Go" button, and let the fun begin!
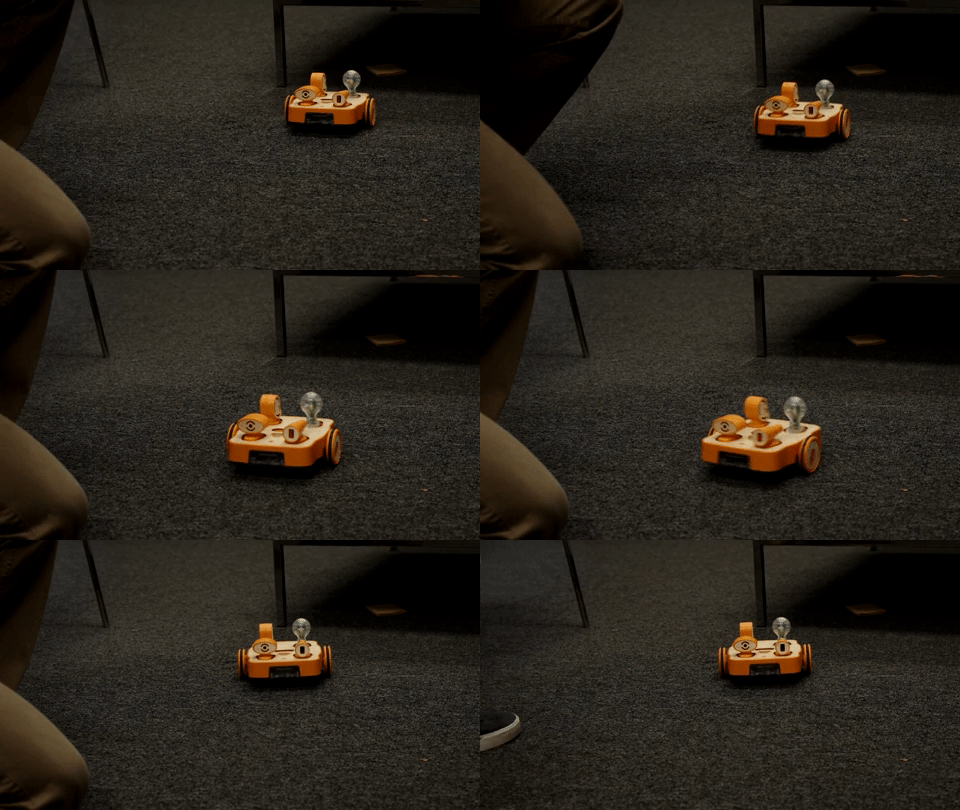
KIBO moves forward, waits for a clapping sound, then shakes and moves backwards.
KIBO comes in four different "kits", which are designed for smaller/larger groups of kids and less/more complex sensors and actions. Basic movement blocks include "forward", "backward", "turn left", "turn right", "shake", and "repeat". The basic modules are a light sensor, a sound sensor, a distance sensor, and a lightbulb. To see all of the sensors and movements in each KIBO kit, click here.
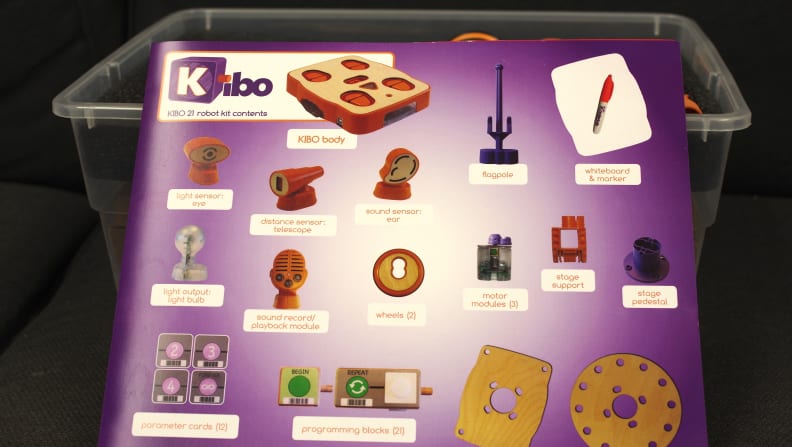
Children not as inclined to explore the coding aspect can contribute to KIBO's antics artistically; in KIBO 21 (the most complex kit), there's a stage and whiteboard included for decorating purposes, anyone can easily attach drawings or pipe cleaner creations to KIBO at any time.
Our experience: Mitch Roseberg, Co-founder of KinderLab Robotics (the makers of KIBO), told me that the motivation behind creating KIBO was to encourage all kids to become STEM-literate by making robotics and programming universally accessible and fun: "KIBO is the only robot kit on the market that enables young kids to build, code, decorate, and run a robot—with no screens, keyboards, or help from adults." With its simple materials, straightforward coding process, and emphasis on imagination and art, KIBO is meant to appeal to all kids, including those that identify as "STEM-oriented", and those that do not. Our testers couldn't help but agree.

It takes only seconds to assemble KIBO, and it only gets easier and more fun from there. The ubiquity of barcodes means that most kids will probably already know how they work. KIBO's barcode reader is wide, though, so it may take a bit of practice and some help from parents before little ones can aim and record the motion they want without accidentally scanning another barcode nearby.

KIBO uses a barcode reader to scan and store commands.
The bottom line: Whether they prefer drawing or playing with numbers, every kid can find something fun to do with KIBO.
Update: The creators of KIBO have recently released a series of extension kits, including a marker set (for drawing with KIBO), a LEGO kit, a literacy kit, and a sound kit. They've also just released the KIBO Home Edition, which is designed more for use in the home than for use the classroom.
Buy the KIBO 10 Home Edition for $150
Buy the KIBO 15 Home Edition for $200
12. Robo Wunderkind
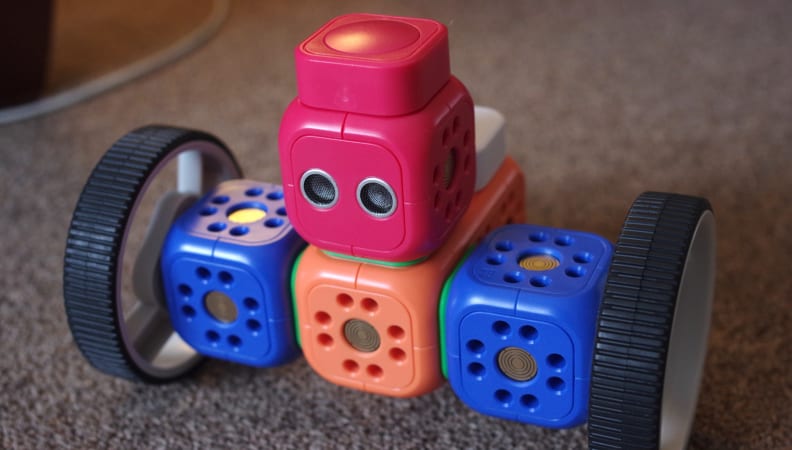
There are tons of neat robots you can build with the Robo Wunderkind kits.
Ages: Ages 5+ years
App: Robo Live (iOS/Android), Robo Code (iOS/Android), Robo Blockly (iOS/Android)
Power: rechargeable internal battery charged with included micro-USB cable
Hardware: N/A
Parental involvement needed: Moderate to explain coding logic and app basics
Coding concepts: Following commands, order of operations, loops, conditional statements, input from a sensor, variables, functions
How it works: The Robo Wunderkind ecosystem has a lot to offer coders at all ages and experience levels. Robo Wunderkind is similar to other coding playsets in that you assemble robots and then use the coding platform in the app(s) to explore coding concepts and watch how programming logic plays out in real time.
Our experience: If you have a highly motivated young programmer in your life, they’ll love exploring the various robots you can build and code in Robo Wunderkind.
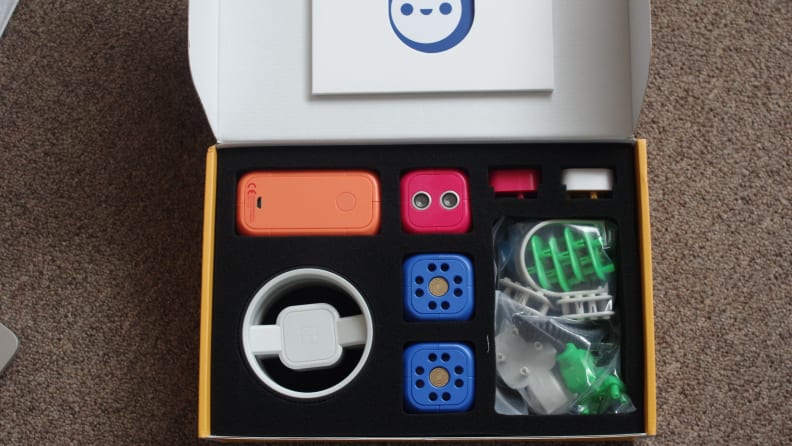
The Robo Wunderkind Explorer Lite kit comes with a control unit, a distance sensor, a push button, two motors, two wheels, and more.
I had a chance to try out the Robo Wunderkind Explorer Lite kit, which comes with a distance sensor, an RGB LED light panel, a push button, the main control block, and two motor blocks. Also included are two block remover tools, two big wheels, one small wheel, and four LEGO adapter platforms.
The Robo Wunderkind Explorer Lite kit is the least complicated of the three kits made by Robo Wunderkind. The two other kits, the Explorer Prime kit and the Explorer Pro kit, have modules such as an LED light matrix, a line follower (which detects and follows lines you draw), a light sensor, and more.
There are three different apps that you can use with each Robo Wunderkind kit: Robo Live, Robo Code, and Robo Blockly. Each app comes with building directions for a few different robots, as well as a place in which you can build and code up your own robots.
The directions that come with the Explorer Lite kit encourage your little coder to start with the Robo Live app. This app, which is recommended for ages 5+, allows you to manually operate your robot. As you follow the directions to assemble one of the robots, the modules chime as they slot into place.

In the Robo Live app, you can manually control your robot and make it move, light up, or make funny noises.
Once assembled, your kid can customize the robot’s motion and activity by making adjustments on the control panel. Here, you can change the motor speed, the colors displayed on the RGB LED light panel, the sound effects played by the main control unit, and more. Basically, if you want to ease your kid into the idea of coding, this is where he or she can start building familiarity with the different modules in the Robo Wunderkind kit.
The Robo Code app, which is aimed at kids ages 6+, is a bit more sophisticated. The format of the app is the same as that of the Robo Live and Robo Blockly apps, but here, your young programmer will get a chance to start exploring the idea of the order of operations.
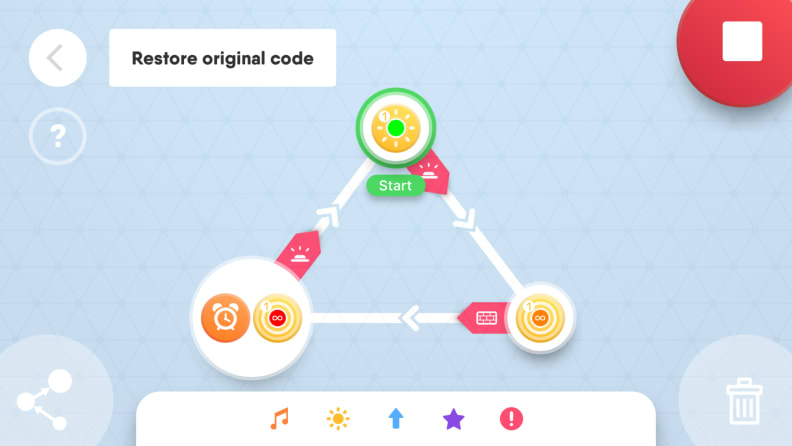
In the Robo Code app, your kid can program his/her robot by adding and customizing specific icons into the coding arena.
After assembling one of the included robot projects (or building their own robot), your kid can assemble their first programs by dragging and dropping icons onto the coding space. Each icon corresponds to one of the manual functions in the Robo Live app, including the motor control, the RGB LED light display, and the sound effects. After connecting the icons in the order you’d like them to run, you can also add “triggers” to each icon, which serve as an introduction to the idea of conditional statements. Those who have a more visual style of learning will feel right at home in the Robo Code app.
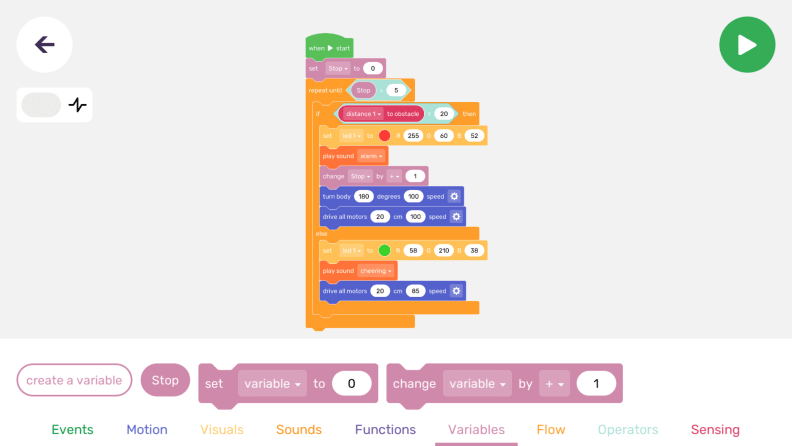
In the Robo Wunderkind Blockly app, you can use the Blockly coding language to program your robot.
If you have older kids (ages 8+) or kids with a bit more coding experience, they’ll probably prefer the Robo Blockly app. This coding app uses the Blockly coding language to allow kids to place, alter, and rearrange specific lines of code before running their programs with the robots they’ve built. The Robo Blockly app is where slightly more complex coding concepts, such as counting loops, variables, functions, and conditional statements are more formally introduced.
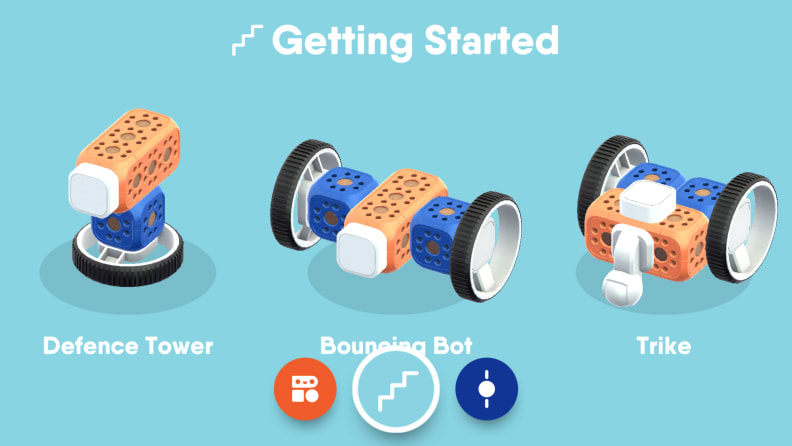
All three Robo Wunderkind apps come with built-in projects your kid can work on if they're not confident enough to strike out on their own just yet.
When it comes to the kit itself, the blocks are brightly colored, kid-friendly, and moderately durable. The modules click together nicely. While the two block remover tools make robot disassembly easy for adults or older kids, be prepared to lend a hand when younger kids try to take their robots apart.
One other thing to keep in mind is that while Robo Wunderkind has a number of tutorials and explainers on their website, including the meaning of the different coding icons in the Robo Code app and information about the different modules, there are no formal lessons in the app that will teach your kid how to code. For kids who like to tinker and explore on their own, this won’t be a problem, but for those who have little to no experience in programming, parents should be prepared to stay engaged with their burgeoning coder during play time with the Robo Wunderkind kits.
The bottom line: Robo Wunderkind is a fun way for the more experienced coders in your life to explore interesting robotics projects.
Buy the Robo Wunderkind Explorer Lite Kit for $200
Buy the Robo Wunderkind Explorer Prime Kit for $250
Buy the Robo Wunderkind Explorer Pro kit for $400
13. Osmo
Ages: Ages 5-12
App: Only available on most iPads. (Other Osmo games are available on other devices, usually an iPhone or an Amazon Fire Tablet. Click here to check on your device's compatibility with Osmo.)
Power: N/A
Required: Osmo iPad Base
Parental involvement needed: minimal once the iPad is installed in the base and each coding block’s purpose is established
Coding concepts: Following commands, order of operations, functions, loops
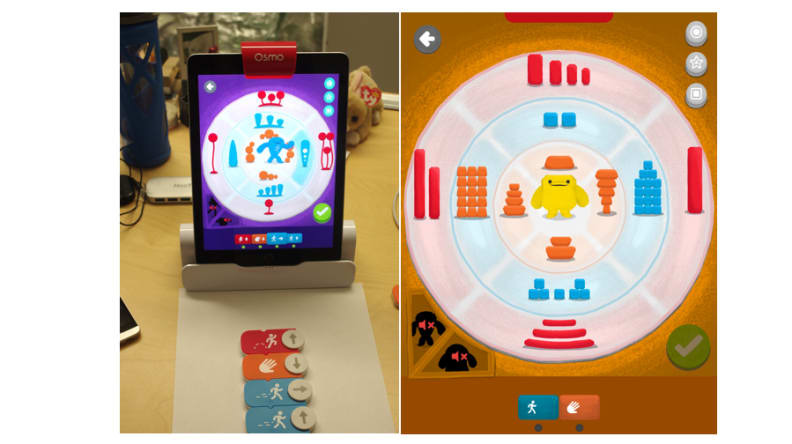
How it works: Using a clever mirror system, Osmo turns your iPad into an interface where kids play games that are so much fun that they don’t even realize they’re learning about programming.
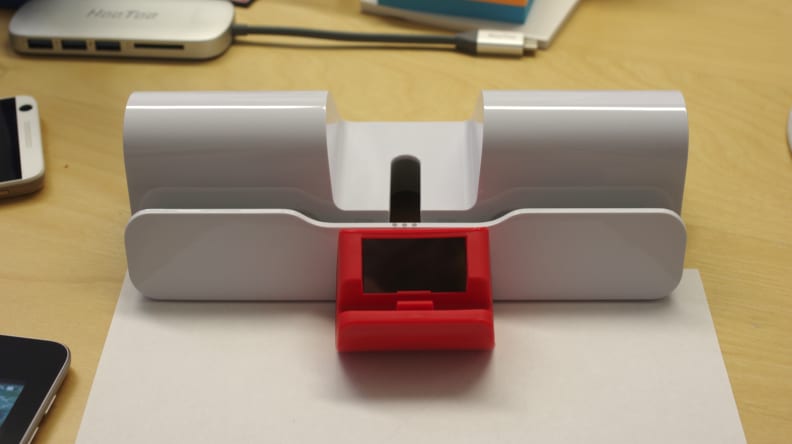
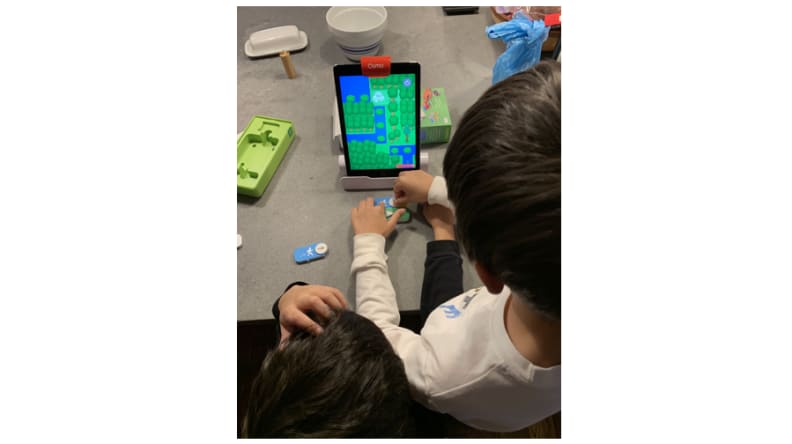
Our experience: I just loved the Osmo game and block system. Once you mount your iPad in the base, place the mirror over the iPad’s camera, and put a piece of blank white paper in front of the base, you’re ready to jump right into the expansive Osmo ecosystem.
Certain Osmo games, such as Osmo Newton and Osmo Masterpiece do not require the purchase of additional coding blocks.
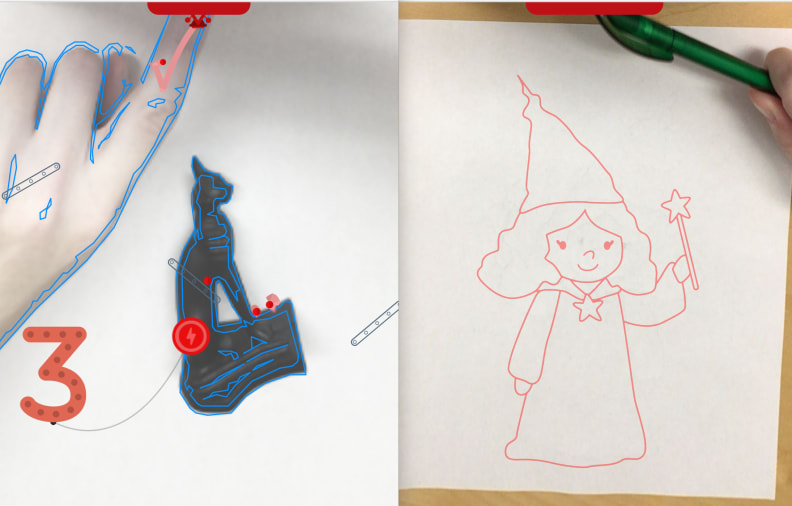
In Osmo Newton, anything you draw or insert into the view of the camera can be used as a deflector to bounce balls in certain directions to hit a target. In Osmo Masterpiece, you can project and scale an image onto the piece of paper that allows your kids to trace and draw any picture they like. Osmo Masterpiece was able to whip even my shaky drawing skills into shape enough to draw a delightful witch.
I would recommend starting kids out with these block-less apps first; I found the whole experience with the camera/mirror very disorienting at first, and it took me a while to figure out how the whole thing worked. Once I figured it out, though, it was easy to see how ingenious it is, and how it would work when the coding blocks were involved.
Osmo really shines with its coding-related games. These games require you to download additional apps and purchase the coding blocks related to a given app. While there is a large degree of overlap with coding blocks between different games/apps, certain blocks special to each game might prevent children from getting the full effect of the lessons in a specific app if they are missing.
In particular, I tried out Osmo Coding Awbie (app / blocks) and Osmo Coding Jam (app / blocks), both of which were amazingly fun and great at establishing the programming basics.
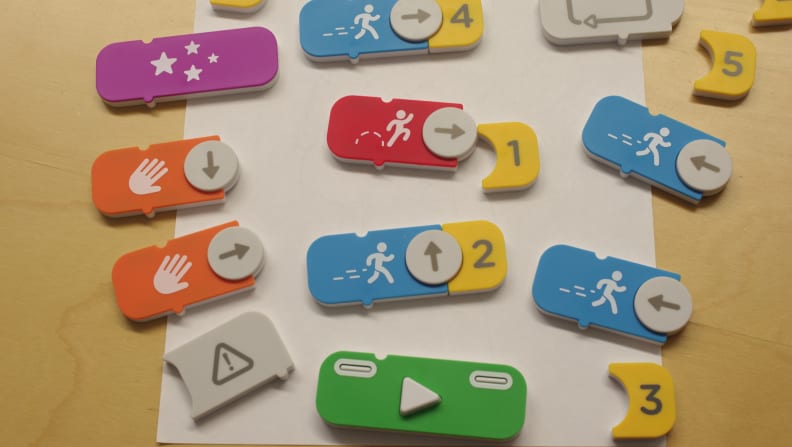
The coding blocks are both incredibly powerful and incredibly easy to use. Each block is made of kid-friendly, colorful plastic. Most of the blocks have a disk with an arrow embedded into it; you can easily rotate the arrow to point in any of the four cardinal directions. The blocks snap together magnetically, and have numerical add-ons that allow you to code in an action up to five times in a row, without needing five extra coding blocks. With these blocks, you can explore a world made of forests and caverns (in Osmo Coding Awbie), or make hilarious and catchy music (in Osmo Coding Jam).
In Osmo Coding Awbie, Awbie is an adorable creature who has to rebuild its home after a natural disaster. Awbie buys the materials to build itself a new home and a new life by collecting strawberries and pies (the primary currency of Awbie’s homeland), opening treasure chests, and chasing bunnies.
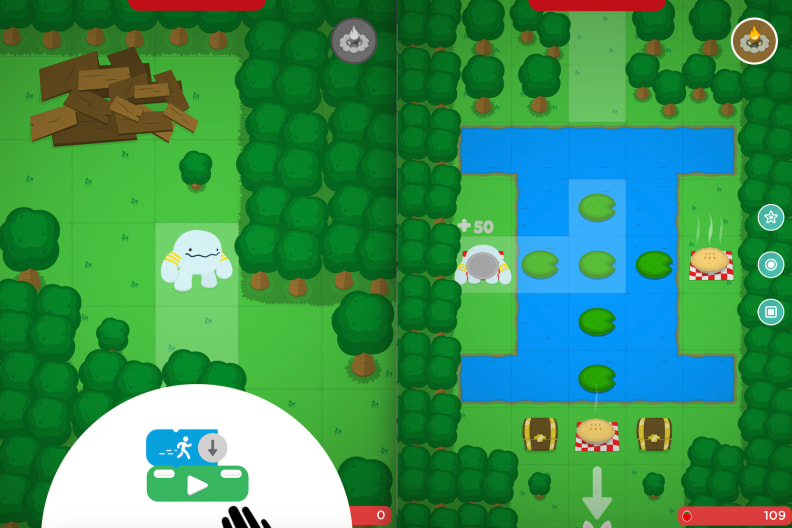
Kids progress through Awbie’s adventures in the wild by using the coding blocks to navigate Awbie through a gridded environment. The Osmo Coding Awbie app has very clear and easy-to-follow lessons about how the blocks work (including the arrow rotation on each block), and what the purpose of each block is.
There are four major types of blocks: they roughly translate into “forward”, “jump”, “grab”, and “loop”. Blocks special to the Osmo Coding Awbie set include the “sparkle” (which is like a special bonus round), and “alert”. Lastly, the Osmo Coding Awbie requires a special block with a “play” button that actually tells Awbie to start moving through the latest code block. If your child doesn’t get the code quite right, the stakes are low; Awbie is simply sent back to its initial position, and your kid gets to try until he or she gets it right.
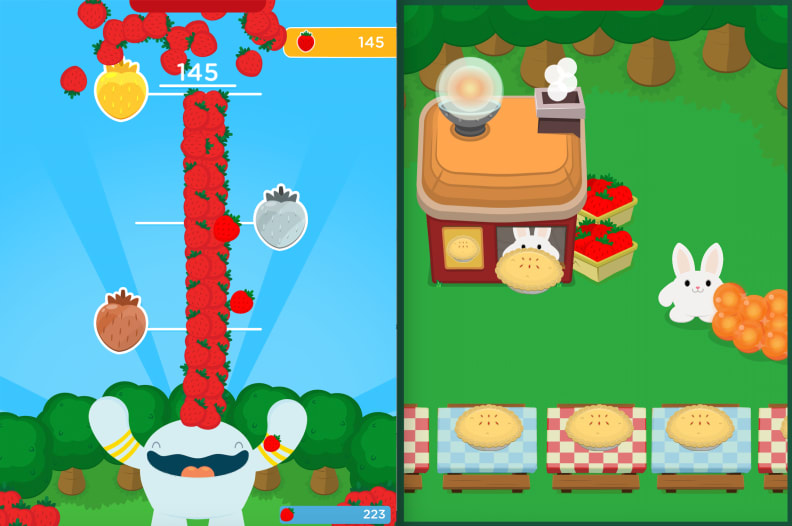
Coding with Awbie was so much fun; I had a ton of fun discovering the characters that live in the forest with Awbie and collecting tons (and tons) of strawberries along the way. In addition to Awbie’s usual adventures, there are bonus levels (where you collect pies made by bunnies) and Awbie’s plot of land, where you can plant (and reap the future benefits of) strawberry plants and buy Awbie new things to help Awbie rebuild its home. Osmo Coding Awbie is great for coders who are just starting out and younger children; older kids with some programming experience may find it a bit too easy.
Osmo Coding Jam is less adventure and more musical discovery. In this app, kids are tasked with building code to play certain musical cues in a particular order. Like Osmo Coding Awbie, Osmo Coding Jam takes the user through simple lessons that illustrate the purpose of each block. Some of the blocks in the Osmo Coding Jam, while identical to those in Osmo Coding Awbie, have different meanings.
In Osmo Coding Jam, each lesson or “jam session” starts out with a funny character (an astronaut, a mad scientist, a Neanderthal, etc.) in the center of the screen, surrounded by different aspects of their environments (a planet, a table of beakers, a fire pit, etc.), arranged in three concentric circles, each of which is divided into four parts; each quadrant of each circle corresponds to a specific sound bite.
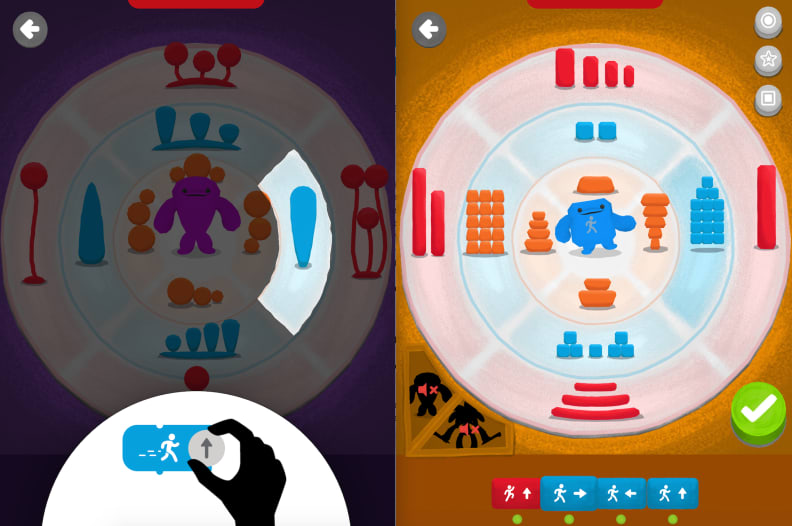
In this way, the “grab”, “forward”, and “jump” blocks in Osmo Coding Awbie are repurposed in the Osmo Coding Jam into “inner circle”, “middle circle”, and “outer circle”, and the arrow directions on each of these three types of blocks indicate which quadrant of each circle is played. The Osmo Coding Jam blocks also include a “silent” block, a “loop” block, and a few different “function” blocks, which have a certain sequence built in.
Osmo Coding Jam is divided into two sections:
• Lessons, where kids learn how each block functions by building specific songs with specific characters, and
• Studio, where kids put what they’ve learned to the test, and create their own music by building their own coding sequences with a variety of characters
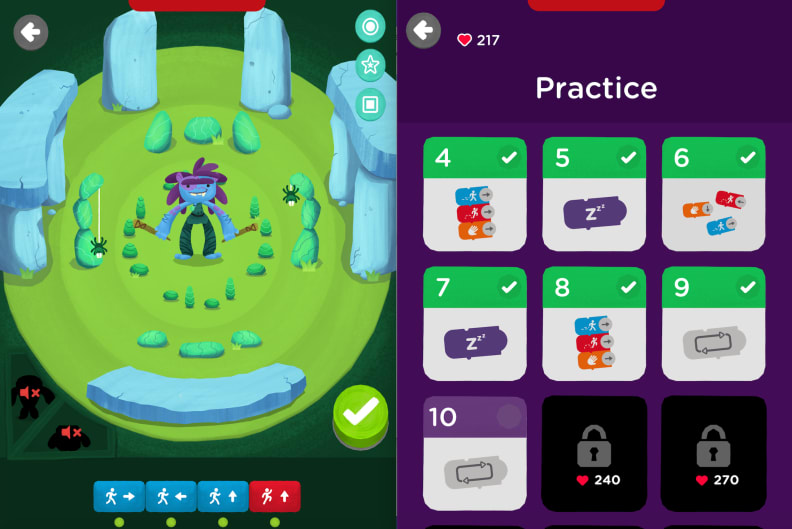
You can only get so far in the Lessons (in which you garner hearts for completing a given lesson) before you have to spend time in the Studio to get more hearts in order to unlock more Lessons. As you get further in the Lessons, you unlock more characters, each of which has its own sound effects and tone.
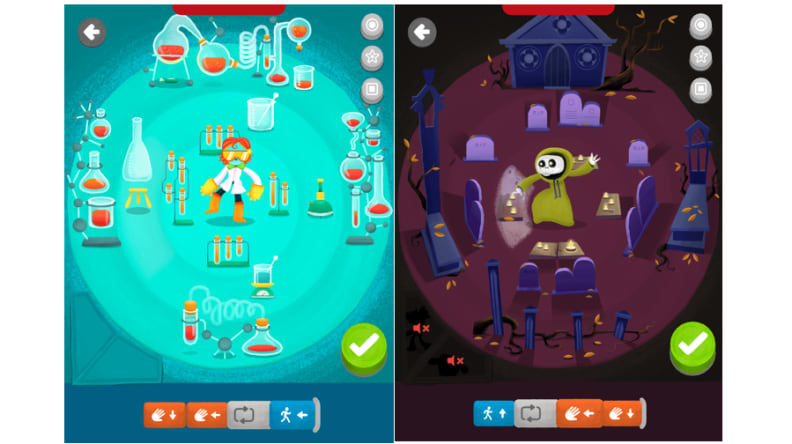
Osmo Coding Jam was a blast. Each new character always made me laugh (my favorites were the grim reaper and the chemist), and I was pleased by how well musical sequences that seemed random during the coding stage came together when combined with the sound bites from other characters. The music is surprisingly catchy! Our test family reported that spontaneous dance parties would break out when the kids starting playing their own music compilations.
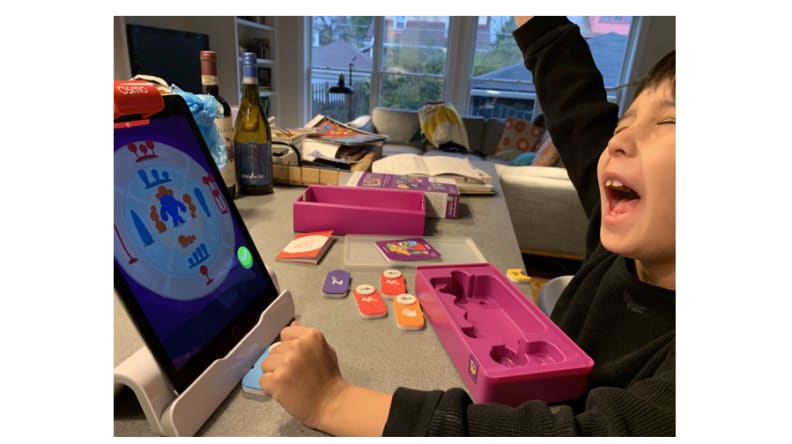
In general, the Osmo coding blocks come in stackable storage containers that make it easy to take Osmo on the go. Admittedly, kids might not be able to play with Osmo in the back of the car; you really need a steady, flat surface covered with a piece of white printer paper for kids to be able to play with Osmo away from home.
One thing that might take some getting used to is fact that between every lesson in Osmo Coding Jam or every set of moves in Osmo Coding Awbie, the white piece of paper has to be totally cleared of coding blocks; the view of the mirrored camera is about as wide as the piece of paper, so coding blocks that have been nudged aside, but are still on the piece of paper will still be read by the iPad. To avoid confusion, get into the habit of completely removing the coding blocks each time a coding block sequence is correctly deployed.
Parents will enjoy this bit of information: Osmo will replace any lost or damaged coding blocks for free, as long it’s within the first 90 days after purchase. I personally found the blocks to be pretty durable, but I can imagine how easy it would be to lose the blocks if they’re not kept in their storage boxes.
Additionally, the Osmo universe is huge; there really is something for everyone. While individual sets need to be purchased, the apps are free.
The bottom line: The Osmo coding games are an elegant add-on to your iPad. With the coding blocks, your kid will be having a blast (and also learning how to code) in no time.
Buy the Osmo base for $40 Buy Osmo Coding Awbie blocks for $50 Buy Osmo Coding Jam blocks for $60
14. Botley 2.0

Botley 2.0 comes with a ton of fun playset pieces.
Ages: Ages 5+ years
App: N/A
Power: 5 AAA batteries, not included
Hardware: N/A
Parental involvement needed: Moderate to get up and running, minimal otherwise
Coding concepts: Following commands, order of operations, loops, conditional statements, input from a sensor
How it works: Botley 2.0 is a screen-free coding extravaganza that is sure to be lots of fun for beginner and intermediate coders alike.
Our experience: If you want to invest in a coding toy that will keep entertaining your kids long after they learn the coding basics, look no further than Botley 2.0.

In "Line" mode, Botley can follow the twisty black line on one side of the included play tiles.
Botley 2.0 is a neat robotic companion that can navigate mazes, avoid obstacles, follow a black line path, and play games with your kids. That Botley can do all this while teaching basic coding concepts is a real bonus.
The Botley 2.0 kit comes with the Botley robot, a coding controller, and coding cards that allow users to visualize the coding sequences they want to build. Other accessories have a more playset-like feel to them, and include boulders, traffic cones, large tiles (with different patterns on one side, and various black line paths for Botley to follow on the other side), and some cube-and-stick pieces that can be used to outline the boundaries of a maze.

Kids direct the Botley robot by entering sequences of directions (and/or special buttons, like "loop" or "obstacle detector") into the controller.
To drive Botley around using programming commands, coders simply set Botley to "Code" mode, press the correct buttons on the controller in the correct order, and then hit the big blue “transmit” button. The six direction buttons on the controller are “forward”, “turn left”, “turn right”, “turn 45° to the right”, “turn 45° to the left”, and “backward”. While you can do plenty with those six buttons alone, the extra buttons really make Botley stand out as a great coding toy.
In addition to buttons that allow you to customize Botley’s light display and volume level, there are also buttons that set up counting loops and conditional statements, where the latter relies on the presence or absence of obstacles in Botley’s way. Because Botley can retain up to 150 commands at a time (!), it’s important to have an easy way to clear the coding memory or exit out of whatever mode you’re in; these tasks are easily accomplished by pressing and holding the “trash” button.

The Activity Guide that comes with Botley 2.0 poses a ton of fun and interesting coding challenges.
The included Activity Guide is a really helpful introduction to the world of Botley. In addition to exploring the various games and tasks, this guide also includes ten increasingly difficult coding challenges that show off Botley’s myriad capabilities. While there aren’t true coding lessons, per se, the guide gives concrete examples for how certain coding concepts, such as loops and the obstacle detection sensor, can prove useful in Botley’s adventures.

When the lights are out, Botley will act like a spooky ghost, as long as you enter the correct sequence of commands on the controller.
Sure, you can build code that makes Botley drive around your floor, but there is a surprising amount of fun stuff built into Botley. Using the black-and-white side of the play tiles (or by drawing a thick black line on a big piece of paper), you can ask Botley to navigate curvy, twisty paths in “Line” mode. By attaching arms to Botley, it can push boulders through an infinitely customizable maze. You can try to defeat Botley in a game of Simon Says. Transmitting certain coding sequences to Botley unlocks special actions such as causing Botley to act like a train, a shark, a frog, or, if you turn out the lights, a spooky ghost!
The controller itself is easy to use, and each button makes a satisfying noise whenever it’s pressed. A few times, I found that Botley wasn’t responding to my commands, but after following the included troubleshooting tips (e.g. tapping the center button on top of Botley, aiming the controller directly at Botley, etc.), Botley was ready to roll again. One point that the guide makes clear is that the commands relayed by the controller can be lost in very bright rooms (because Botley is partially ruled by light sensitivity); however, I had no issues driving Botley around in a moderately well-lit room, so it mostly shouldn’t be an issue.
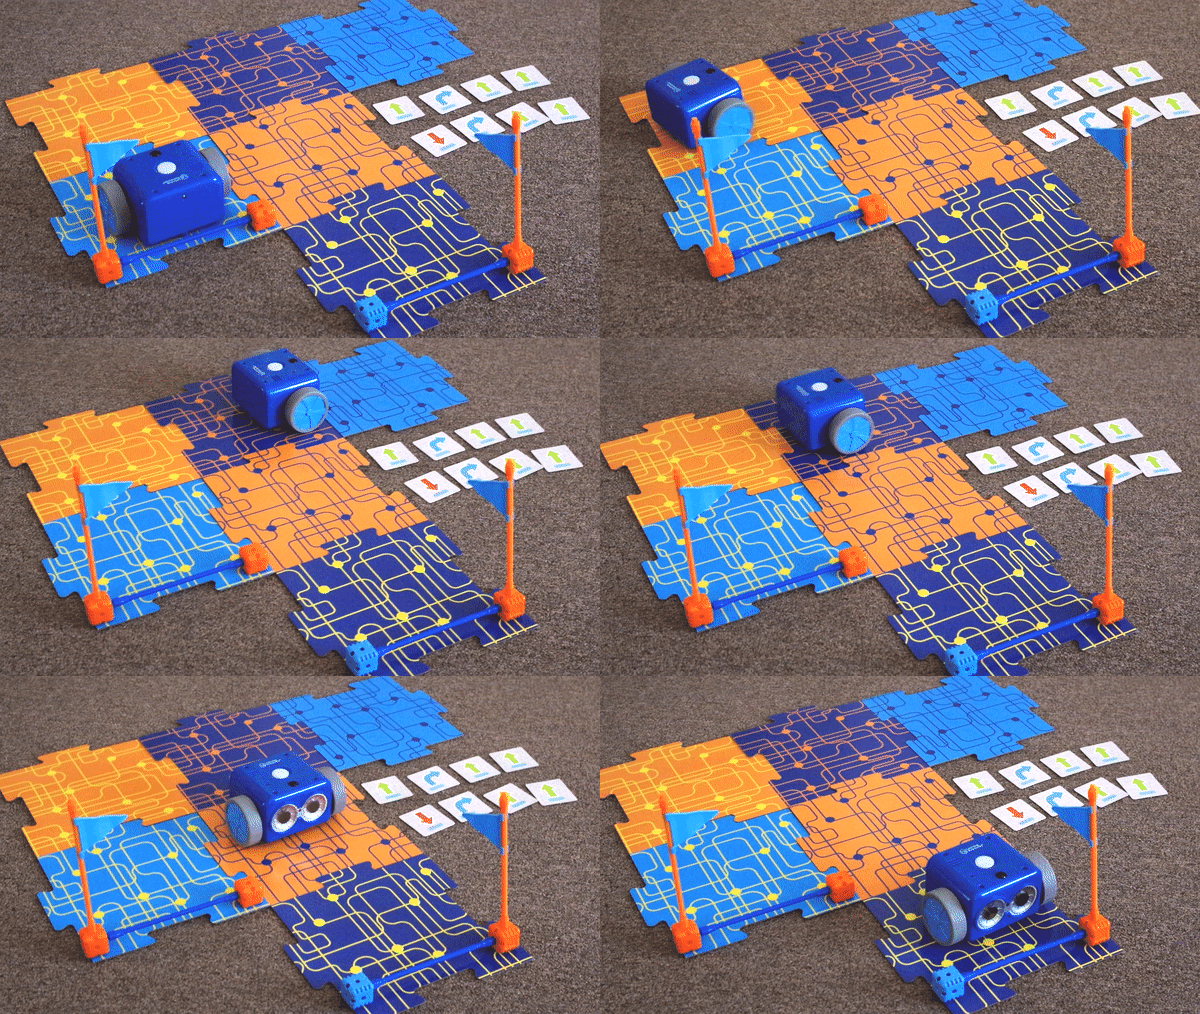
One type of challenge is to have Botley navigate from one end of a maze to another without falling off the colored play tiles.
Lastly, I recommend that, when your kids are done playing with Botley, you double check that both the controller and the Botley unit are turned off. I accidentally left the Botley robot on the “Line” setting over a long weekend, and by the time I’d realized my mistake, the three AAA batteries powering the robot had been completely drained.
The bottom line: Botley 2.0 is a great way to get kids on the path towards coding; with its easy-to-use controller, various playset pieces, and sassy robot, your kids will want to spend plenty of time exploring the world of programming with Botley.
STEM coding toys for kids ages 6-9
15. Potato Pirates

Ages: Ages 6+
App: N/A
Power: N/A
Parental involvement needed: Moderate, for initial setup and learning/applying game rules
Coding concepts: Following commands, order of operations, conditional statements, logical operators
How it works: Players raise and deploy pirate potato armies against one another with strategically played attack cards such as “Roast” and “Fry”. These attack cards are made much more devastating by playing them in conjunction with ‘while’ loops or cards with other logical operators. The last potato army still standing is the winner!
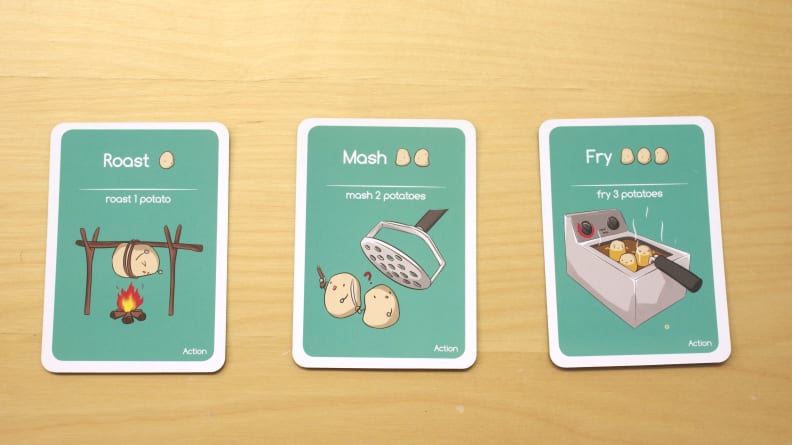
Our experience: Potato Pirates is a card game whose box hits the nail on the head with the phrase “Coding with carbs”. Between the adorable artwork on the cards, the funny commentary in the manual, and the soft fuzzballs meant to represent the pirate crewmates, this game is a lot of fun for people of all ages.
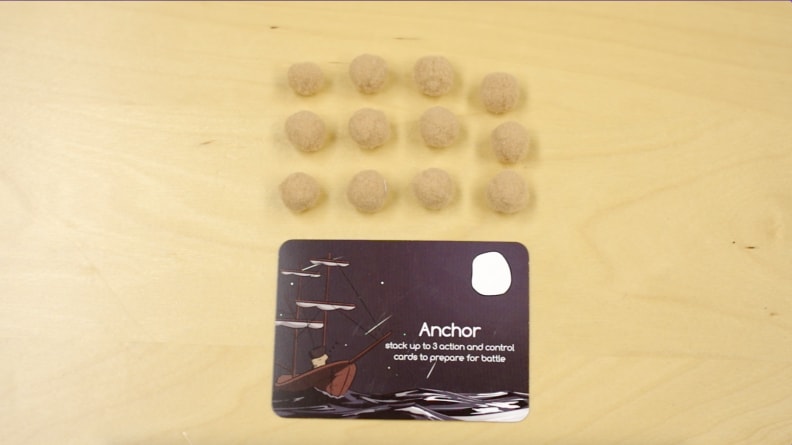
We really recommend that an adult or a coding-savvy teenager take the time to read and absorb the different card functions and game rules; there are enough moving parts to this card game that trying to pick it up on the fly will probably not work. Additionally, playing this game with only a few players can result in very short games (as some of the cards are especially devastating when the damage can’t be spread around and it is, at times, not clear how someone would rebuild a crew after it’s been attacked); short games mean that there is not really enough time for children to learn or appreciate the coding concepts. This game is best played with multiple kids who are in varying stages of understanding coding logic.

On a given turn, a player can prepare an attack (while a ship is “anchored”), or attack neighboring ships in hopes of killing all the potatoes aboard and sinking the ship down to Davy Jones’ locker. Attacks are prepared by combining damage cards, like “Roast”, “Fry”, and “Mash”, with control cards, such as “For 2 times” and “While a ship has more than 5 potatoes on board”. When ships are attacked, each ship takes damage in the form of removing potato fuzzballs from their associated ships.
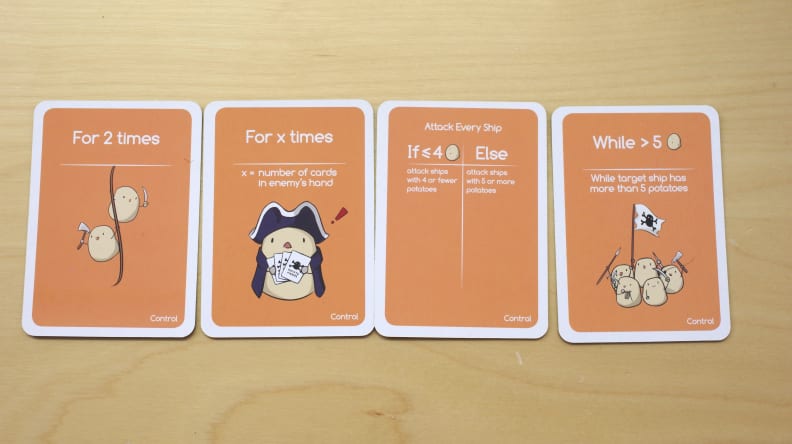
We found that kids generally had few problems with the simple control cards, but needed a lot of coaching and practice with the more complicated control cards, especially in attacks where more than one control card is played. In that case, attacks are calculated using loops inside loops, and both damage and player confusion can grow quickly.
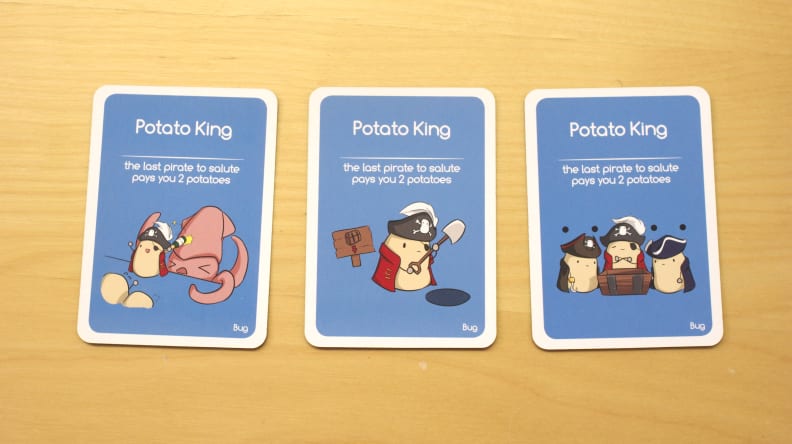
In addition to control and damage cards, there are cards that players can use outside of their turn, which can offset some of the idle time waiting for kids to take their turns, but can also add to overall chaos. Other fun aspects, such as saluting a person who plays a “Potato King” card, help with keeping those with short attention spans focused on the pirate spud fun.
The potato fuzzballs come in a cloth sack that should prevent you from losing them, but don’t be surprised if a few go missing, as throwing the fuzzballs at other players is doubtlessly a common outcome in the case if potato pirate crews are decimated.

The bottom line: Once your kids master this potato-themed card game, applying the same principles to computer coding will be a breeze.
Update: The Makers of Potato Pirates have launched a Kickstarter campaign to fund the sequel to Potato Pirates, Potato Pirates: Enter the Spudnet. This strategy-based sequel uses our potato pirate friends to demonstrate how the internet works.
16. Kano Disney Coding Kits

The Kano Star Wars The Force coding kit and the Kano Frozen II coding kit. Each coding kit comes with a control sensor unit that translates hand motions into coding actions.
Ages: Ages 6+ years
App: Kano The Force Coding Kit app and Kano Disney Frozen II Coding Kit app
Power: 2 AA batteries included with each kit
Hardware: Both the Frozen II Kit and The Force Kit are compatible with Mac OS desktops/laptops and the iPad, Windows desktops/laptops, and Amazon Fire tablets. The control sensor unit communicates to the app via Bluetooth.
Parental involvement needed: Minimal
Coding concepts: Following commands, order of operations, conditional statements, loops, variables, wait for input
How it works: With these two coding kits from Kano, you can use coding and an interactive light sensor to create blizzards, levitate Porgs, and complete plenty of challenges in these fun Frozen- and Star Wars-themed environments.
Our experience: If your young coder wants to explore programming principles with help from the characters in the Star Wars and/or Frozen movies, you can’t go wrong with these coding kits.
Kano has developed a series of movie tie-in coding kits. I was able to try out the Star Wars The Force coding kit and the Frozen II coding kit (the other kit available is the Harry Potter coding kit). You may notice that all of these movies involve characters who have powers that could be termed as “action at a distance”, that is, they don’t need to be touching something or someone for their powers to work. If you’ve ever wanted to wield magic like Elsa or the Force like Luke, these kits are your chance to do just that.

The control sensor unit that comes with each Kano coding kit allows a user's hand motions to be incorporated into each coding program.
Each kit comes with a control unit that has built-in light sensors. Using these sensors, the control unit can not only feed information about which sensors are blocked or not (i.e. the orientation and location of your hand), but also how close or far away your hand is from the top of the control unit.

Kano takes the privacy of its users seriously; the app randomly generates a username for your kid, and requires parental consent before your kid can use the coding apps.
Parents will be pleased with the security measures built into the Kano apps; not only are kids provided with a randomized username (they are encouraged not to use personal log-in or identification information), but parents must also read and approve a consent form that states that they are aware their kid is using this app.

Both Kano coding kit apps include challenges that will help your young coder familiarize him or herself with the coding logic and the special effects that come with integrating the control sensor unit into the program.
Once the control unit is assembled and connected to the app via Bluetooth, the fun begins. Each app has four sections. In the Challenges section, you complete movie-themed challenges (i.e. levitate an X-wing or create a blizzard) to develop your understanding of the coding structures.

In the Explore section of the Kano coding apps, you can share your code and download programs other coders have shared.
In the Explore section, you can share the codes that you develop in the Create section and save in the My Creations section, or you can download codes that other users have created.
I spend most of my time in the Challenges section of these two apps. While these coding kits are, in theory, geared towards kids as young as 6 years old, I would recommend that you give these kits to kids who already have experience with programming logic and/or knowledge of a coding language similar to Scratch or Blockly. Completing a challenge consists of assembling the code piece by piece, as directed by your guide (usually one of the characters from the movies).

The Kano app includes special coding commands that integrate the control sensor unit into each program.
The challenges are complicated by the fact that you can’t complete the tasks by coding alone. The control sensor unit is usually an integral part of the coding solution. Surprisingly, there are many ways that the control sensor unit can be integrated into each program.
In the Frozen 2 coding kit, you’re primarily designing codes to manipulate snow or ice particles (like making blizzards or frozen fractals).
The Star Wars The Force coding kit is more complex; you can wave a lightsaber, steer the Millennium Falcon, or levitate a pile of rocks. Additionally, the control unit sensor for the Star Wars coding kit includes a speaker that can reproduce most of your favorite sound clips from Star Wars, including the lightsaber hum and the Tie-Fighter laser blast noise.

In the Kano Frozen II app, users can create snowflakes and frozen fractals by adding and altering particles in certain patterns.
Once you’re done building the code and adding in specific coding commands that connects the input from the control sensor unit to the program outputs, you can see how your program works in a panel on the right-hand side of the app (which can also be shifted to full-screen mode). In this panel, you can change the background to any number of settings from each movie (e.g. Tatoonie or Elsa’s Ice Palace).
Testing out the code at the end of each challenge is a blast. You can bet that I made ginormous snowflakes and waved around a purple lightsaber a la Mace Windu. Also, who hasn’t wanted to force push C-3PO away at one point or another?

Some of the Kano coding challenges involve customizing existing programs.
Every third challenge is an opportunity for your coder to explore the code they just assembled more thoroughly. What would it take to add rocks to the background? How can he or she change the shape and size of the individual ice crystals? The app provides hints that will help to less experienced coders to figure out how to make these types of changes to the program. While most of these exploration opportunities are about customizing existing programs, some of the later challenges ask kids to devise a program that will accomplish a specific task (such as navigate the Millennium Falcon through an asteroid belt).
The coding assembly instructions are very clear and thorough, but there’s not a lot of explanation as to what each coding component does or why it’s placed in a certain part of the program; the challenges are more a series of tasks to complete than a series of coding lessons. Experienced coders will be able to follow this logic easily, but newer coders will be so excited to complete the given task that they’ll miss the finer points of the program and the coding logic.

In this Kano program challenge, the challenge is to use the control sensor unit to make the X-wing move across a star-streaked area of space.
Additionally, later challenges can get really complicated. For example, in the Star Wars coding kit, not only are you tasked with using your hand motions to pilot an X-wing, but you also have to design particles that streak past your space ship to create the effect of passing stars as you travel through space.
I found that the app could be a bit glitchy at times. Sometimes, the different backgrounds wouldn’t load onto the viewing panel, or it was difficult to reset a challenge if I failed to complete the task on the first attempt. Using the app interface takes some getting used to, but overall, the UI is relatively streamlined and intuitive.

Fans of the Frozen and Star Wars movies will like that characters from the movies will chime in frequently to chat or provide encouragement.
These coding kits have a lot of fun details that fans of the movies will enjoy. The characters are always there to give you guidance or encouragement, the illustrations are adorable, the backgrounds are faithful representations of scenes from the movies, and the challenges are fun and make sense in the context of the movie.
The bottom line: If you have kids who are experienced coders and are fans of Frozen, Star Wars, or Harry Potter, they’ll love these movie tie-in coding kits that allow them to wield the Force or magic to solve coding challenges.
Buy the Kano Star Wars The Force Coding Kit for $80
Buy the Kano Frozen 2 Coding Kit for $80
17. Dash Robot
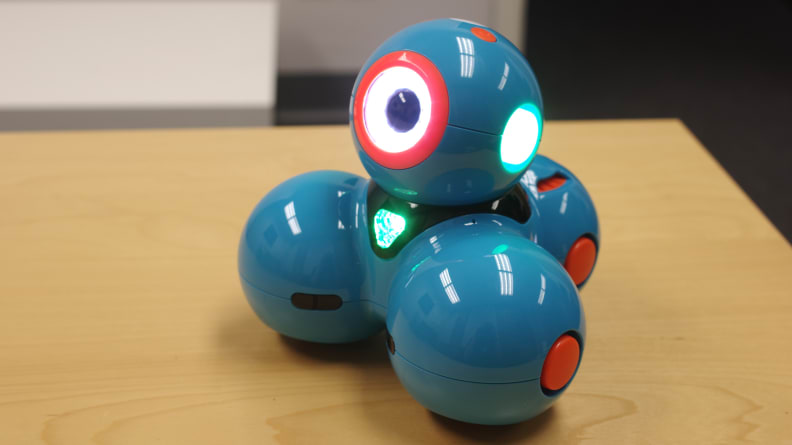
Ages: Ages 6+
App: Dash Path (iOS/Android), Dash Wonder (iOS/Android), and Dash Blockly (iOS/Android)
Power: charged via USB, connected via Bluetooth
Parental involvement needed: Minimal, once Dash is connected and coding basics are established
Coding concepts: Following commands, order of operations, logical operators, functions, function calls, conditional statements, wait for input, variables, counting loops
How it works: Dash is a delightful robot who teaches kids coding skills in three different apps: Dash Path, Dash Wonder, and Dash Blockly. These three apps have varying levels of complexity so that Dash is a fun experience for kids at different ages and coding experience levels.
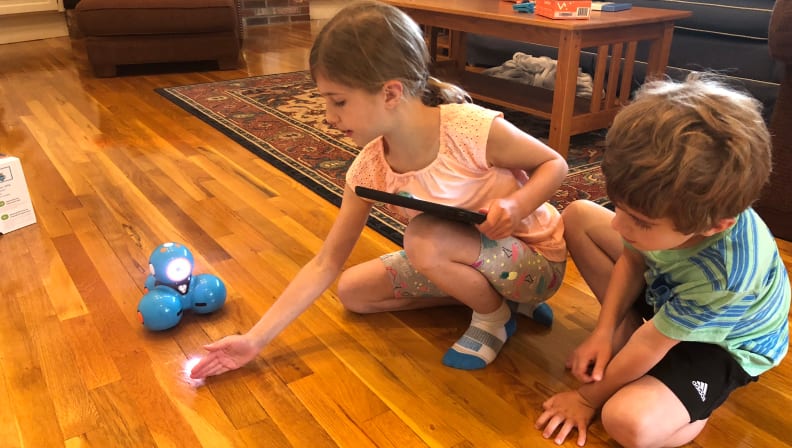
Dash Path is ideal for children who are a bit too young to venture into coding concepts. Kids can draw freestyle paths for Dash to follow in a variety of settings, from a farm, to a cityscape, to a plain grid. Our test family agreed that younger kids will really enjoy driving Dash around “like a racecar”. For more challenging paths, you can also add a number of animal, vehicle, and natural noises and motions for Dash to act out along the way.
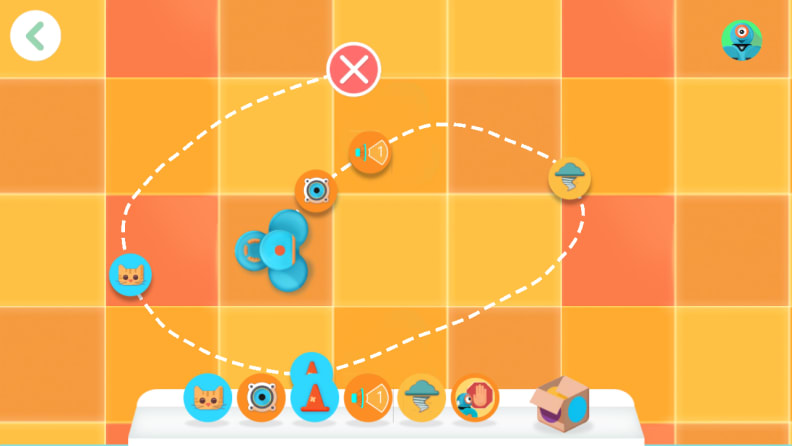
Dash Wonder is a bit more advanced, and has users building coding programs visually, by adding coding components, and then drawing line connections between the components to illustrate the order of operations.
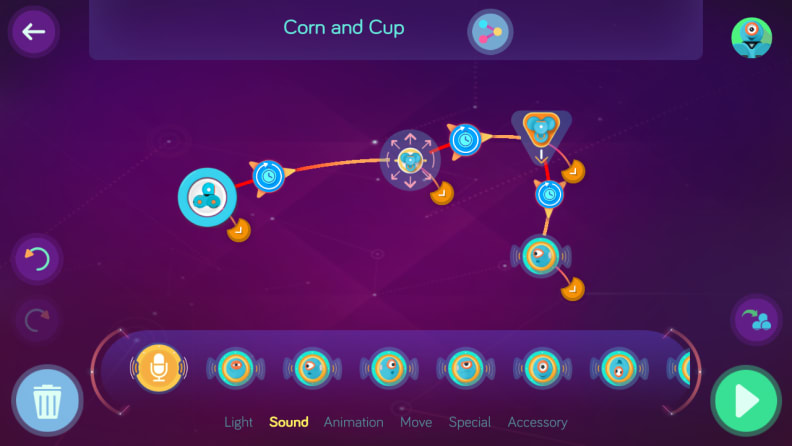
Dash Blockly is the most complex of the three apps; kids can build coding programs in a method similar to actual coding practices—they can build programs by assembling different coding “blocks” with various themes (actions, sounds, functions, etc.).
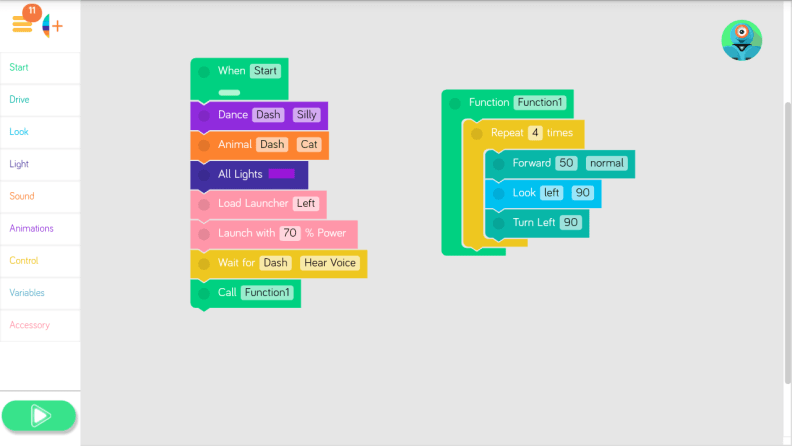
The Dash robot itself can also be modified with a number of accessories, including a xylophone, “learn to code” cards, a catapult launcher, and a sketch kit. With the sketch kit, both markers and a large white-board-like sketch mat are required.
Our experience: Dash is a robot whose adventures evolve in tandem with your kid’s coding abilities, and provides him or her with plenty of laughs and fun along the way.
Each of the three apps involves a set of really helpful tutorials to help get your kid up and running. We would recommend that an adult work through the first few lessons in each app, just so that the adult can get a feel for the logic behind Dash, and can help the little ones if they come up against a concept they can’t grasp by themselves.
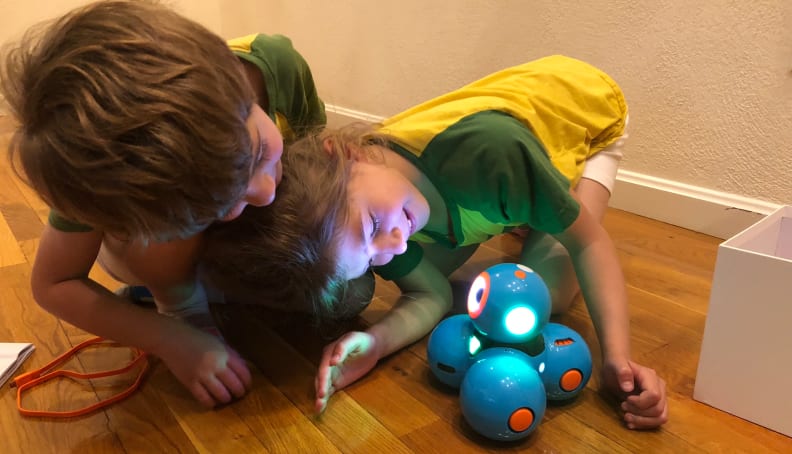
Dash’s vast library of motions, behaviors, and sounds is sure to delight coders both old and young. Who could resist watching Dash flail about in a tornado, and then promptly stop and let out a very earnest cat meow?
As with all robots aimed at kids, one key aspect that may be difficult to convey is the concept of relative direction. This is especially true for Dash, who can look left, right, up, and down, turn left and right by varying degrees, and move in all directions. A combination of some or all of these motions and actions may leave children feeling confused when Dash doesn’t exactly head in the direction they’d expect, but that’s part of the learning process.
We also had a lot of fun testing out the catapult and the sketch kit. With any of Dash’s accessories, be very sure that the attachments, which just snap onto Dash’s sides, are in the correct orientation indicated in the directions. Our test family had a bit of trouble getting the catapult attachment to sit exactly right, and experienced many failed ball launches as a result, but finally getting it right proved very satisfactory.
The sketch kit attachment (where you place a marker on Dash, and send Dash on its way on the sketch mat) is a bit more intuitive, but it took us a few tries to get the marker in correctly so that it was actually drawing along the sketch mat. As for the sketch mat, make sure that it’s on a surface from which it is easy to remove dry-erase markers.
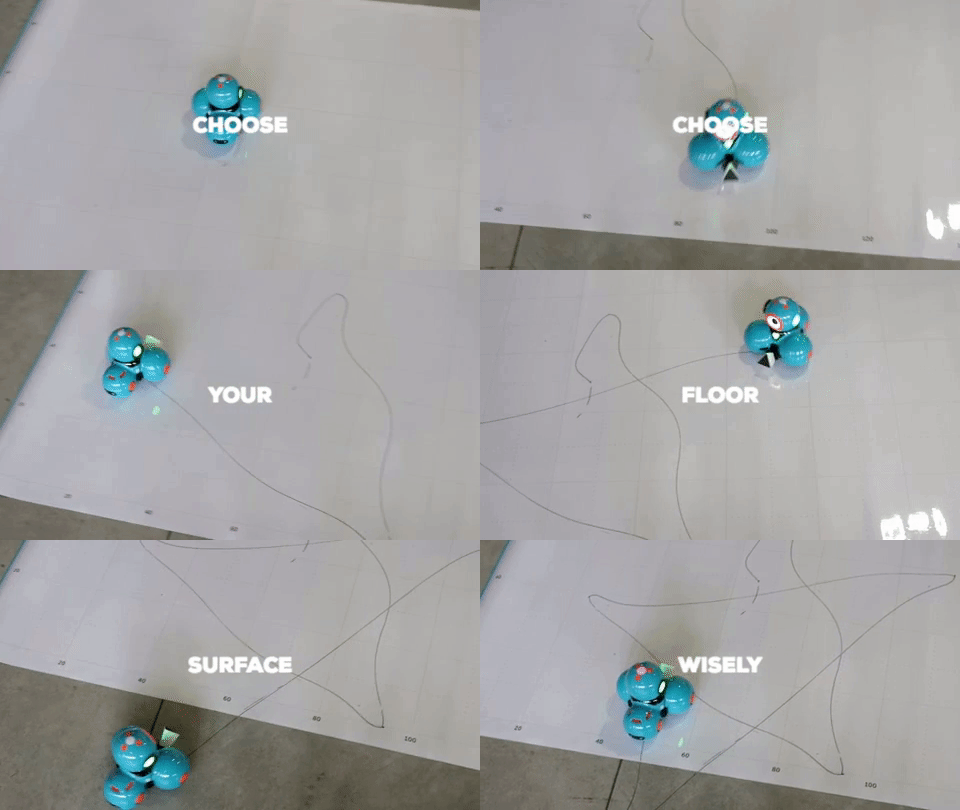
Our test family loved that there were tons of different ways to play with Dash, with interesting and fun challenges for both younger and older children. In particular, playing “Marco Polo” with Dash, who was using the kids’ own recorded voices to say the titular phrase, resulted in much giggling. In their experience, one of the best parts about Dash is that it is sturdy enough to withstand repeated bonking into walls and other obstacles on the floor.
The bottom line: By itself, Dash is a fun and engaging way to get kids interested in coding; with the range of accessories available, it’s easy to see how Dash could encourage children to find other real-life applications for coding.
Buy Wonder Workshop's Dash Robot for $150
18. FurReal Maker Proto Max
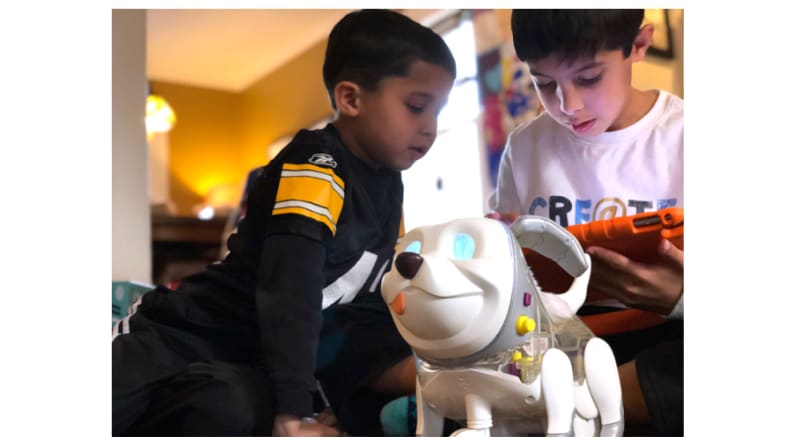
Ages: 6+ years old
App: FurReal Maker: Proto Max (iOS/Android), pairing via Bluetooth
Power: 4 AA batteries
Parental involvement needed: Minimal, once FurReal is assembled and coding basics are established
Coding concepts: Following commands, order of operations, macros, wait for input
How it works: FurReal Maker Proto Max is a dog-shaped robot who is a solid companion for kids who want to learn to code. After battery installation, FurReal provides assembly instructions on the LCD screen behind the head piece.
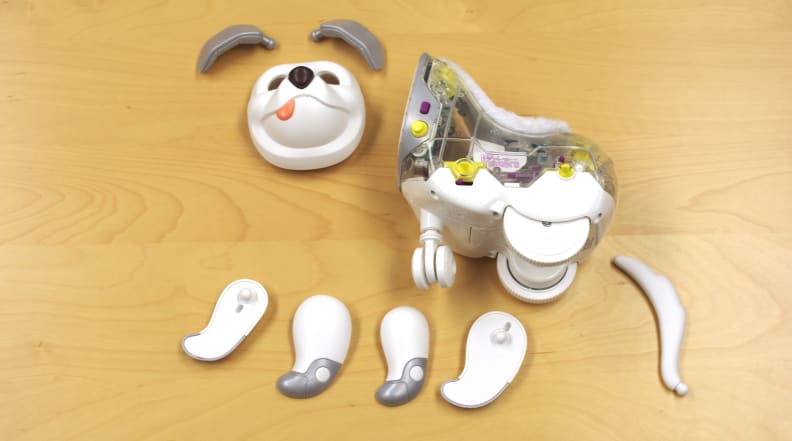
Once fully assembled, that screen is where FurReal's expressive (and customizable) eyes are located.
Without the companion app, FurReal is still a responsive robot who makes calm, happy noises when kids pet it on its furred back, or barks a warning when its tail is tweaked. Where FurReal really shines, though, is the coding and programming modules in the companion app.

In the "Code" module, kids use icons to build a sequence of actions, expressions, and sounds for FurReal to follow. After sending the commands over Bluetooth, FurReal acts out that code.
To program in FurReal's responses to physical touches on the robot itself, children use the "Program" module to build and upload macros that dictate how FurReal's different body parts react to being pressed or moved.

Macros can be programmed and then uploaded to FurReal. This macro involves FurReal's responses after its nose is pushed some number of times.
Kids can manually control FurReal's movement and reactions in the "Control" module.
The app also offers a few games for children to play without the robot, so the fun can continue on the road as well.
Our experience: The range of activities offered in the app is a perfect fit for kids in the stated 6+ years old age range. One of our younger testers really enjoyed using the "Drive" module to move FurReal around and explore its environment in real time, while the older kid had more fun watching the FurReal respond to inputs from the "Code" module.
The layout of the "Code" module is very intuitive, making it easy to understand that the FurReal can move, make a noise, and change its expression at the same time, and that those motions and expressions can change from one step in the code to the next. It may not be immediately apparent what each coding block does, however, so some experimenting may be required before kids can get FurReal to do exactly what they want.
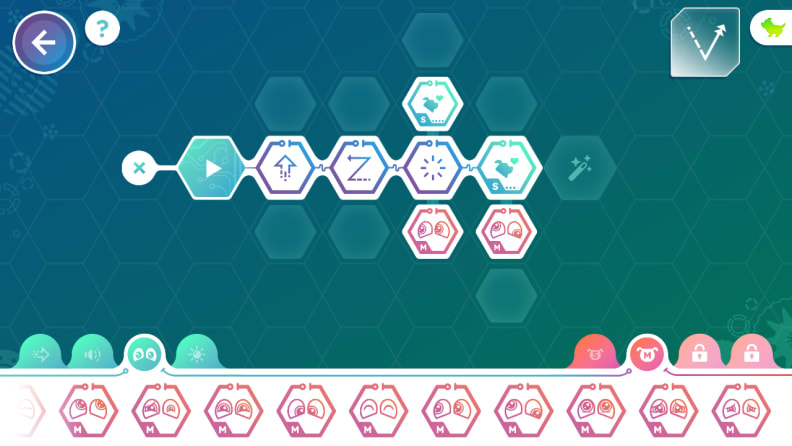
The "Program" module also presents a nice way to bridge the age gap between siblings: older kids can program the responses of the FurReal (i.e. the reaction after FurReal's nose is pressed five times in a row), and younger kids can try out the programming on the robot itself.

As with most robots that move around, FurReal is better used on a hard floor surface than on a table. Assembly and disassembly of the FurReal is pretty straightforward, and, in fact, FurReal actually responds when body parts are removed or reattached. We also really appreciated the patch of fur on FurReal's back; it encouraged touch and human interaction, rather than just remote programming.

The bottom line: FurReal is a beginning coder's best friend.
Buy FurReal Maker Proto Max for $25
19. Augie
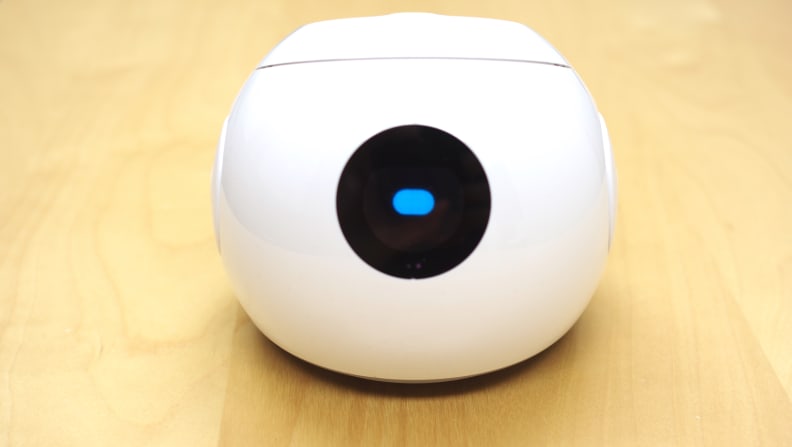
Ages: 6+ years old
App: Augie (iOS/Android), connection over Wi-Fi
Power: Internal battery and charger included
Parental involvement needed: Moderate, to initially use and understand the different modules of the Augie app; after that, minimal, once coding basics are established
Coding concepts: Following commands, order of operations, logical operators, functions, function calls, conditional statements, wait for input, variables, counting loops
How it works: Augie is an app-controlled robot with AR (augmented reality) capabilities.

Augie's intense processing requires a more solid connection between the app and the device, so it uses Wi-Fi, rather than Bluetooth pairing.
There are six modules in the Augie app:
- "Free Play" — the user manually controls Augie's motions and display
- "Trailblazer" — the user draws freeform paths for Augie to follow with his/her finger, and can add emojis and sounds
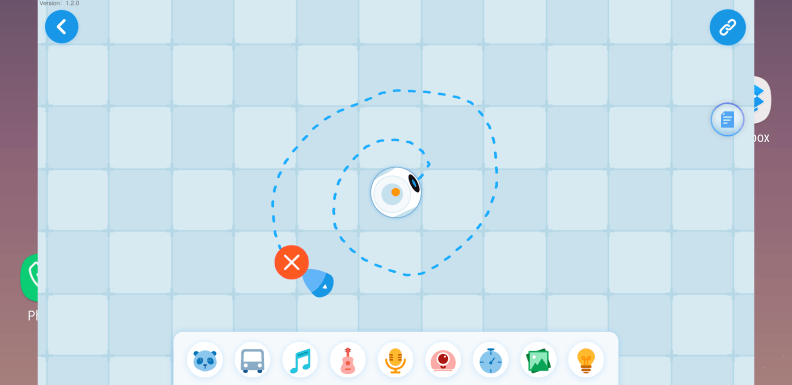
- "Coding Classroom" — a step-by-step guide for how to code the many varieties of Augie's motions, emojis, and sounds
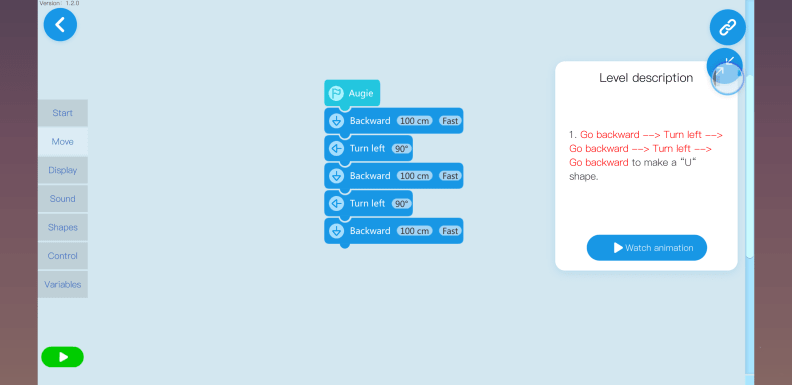
An example of a lesson in "Coding Classroom".
- "Coding Control Center" — where kids can write code for Augie to act out, based on the lessons from "Coding Classroom"
- "AR Adventures" — game play with Augie involving AR and donuts
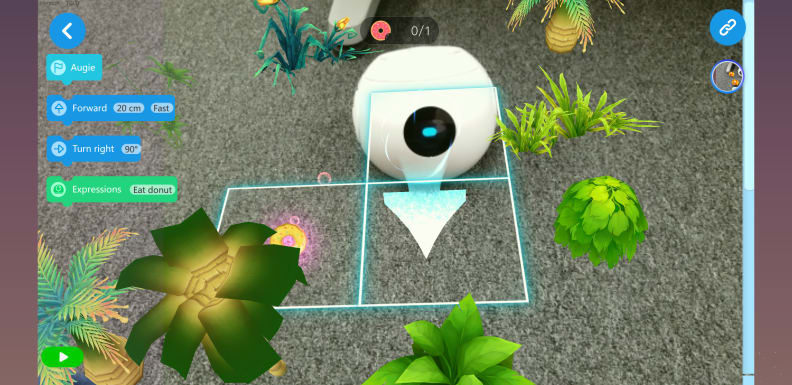
- "AR Coding" — a step-by-step guide for how to code the many varieties of Augie's motions, emojis, and sounds in AR
Our experience: Augie is one of the more complicated robots we got to test, despite being aimed at children as young as 5-6 years old. The app is really amazing and a lot of fun, but it comes with no explanation, so it will take an adult some time to familiarize themselves with the layout of the app, the purpose of each module, and the Wi-Fi setup before the kids can dive in. Augie retains and makes the Wi-Fi network information visible, which is convenient for quick reconnection, but might be a security concern for some.
Once Augie is up and running (on a hard, solid floor surface), it's very cool. The "Coding Classroom" module is amazing; it quickly but thoroughly teaches new programmers the uses of Augie's different tricks, as well as conditional statements, variables, and other coding basics.
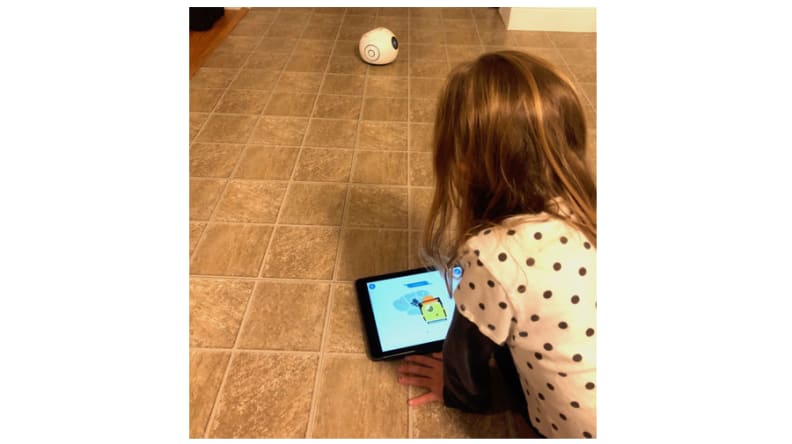
Augie has a hilarious variety of expressions and sounds; hearing a chicken clucking, immediately followed by jaunty clarinet music, definitely made my day.

The coding units on the screen are neatly colored and categorized; however, it can be difficult at times to see if two coding instructions have actually "clicked" together, which can cause some confusion when Augie stops after only performing a portion of the code.
Because Augie has an AR component, the app uses a lot of battery power and memory; if you're using Augie on a smart phone, be sure you have enough room on your phone memory-wise, a strong Wi-Fi connection, and a charger plugged in if you're using Augie in AR.
The AR itself is a lot of fun. In "AR Adventures", players must ward off small robots with laser beams, which will doubtlessly amuse kids and adults alike. However, maneuvering Augie in AR takes some getting used to, and may require the help of an adult before children can use it on their own.
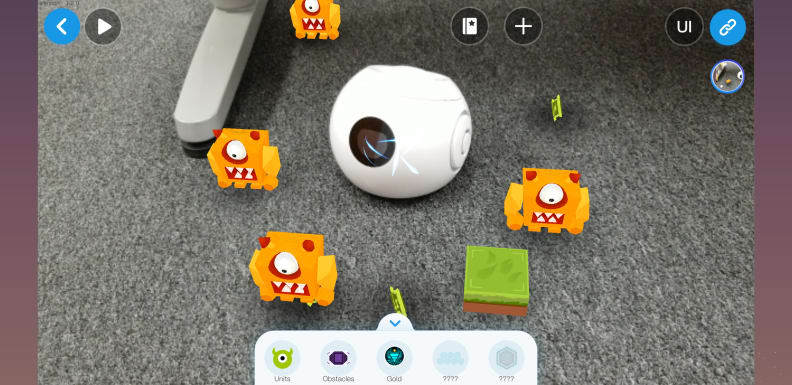
The bottom line: Augie's intuitive coding module will be a boon to young programmers, but parents or guardians will need to be on hand to get Augie up and running before kids can dive in.
20. Smart Buddies

Each Smart Buddies kit comes with a scooter (or "siggy") and a doll version of one of the eight teenagers who are the stars of the Smart Buddies app.
Ages: Ages 6+ years
App: Smart Buddies app (Android/iOS/Amazon Kindle)
Power: Internal chargeable battery, included
Hardware: This app is compatible with Mac OS, Amazon Kindle, and Android touchscreen devices. The siggy communicates to the app via Bluetooth, and is charged via micro USB cable.
Parental involvement needed: Moderate to get up and running, minimal otherwise
Coding concepts: Following commands, order of operations, loops, input from a sensor, debugging
How it works: Kids will have a blast learning basic coding concepts as they follow the lives of eight teenagers who are navigating through various coming-of-age challenges.
Our experience: A Smart Buddies kit is one of the best ways to kill two birds with one stone. Not only is this toy a great way to ease kids into programming, but it is also designed to force kids to think about valuable lessons that will stay with them as they grow older.

Zara and Maria are two of the characters that your burgeoning programmer can read about in the Smart Buddies app.
Each Smart Buddies kit comes with a doll-sized motorized scooter (known as a “siggy”), one of eight dolls (corresponding to one of the eight aforementioned teenagers), a quick-start guide, and a Teacher’s Guide. Kids program driving commands for the siggy into the app, and then watch the code play out in real time as the siggy zips around on their floor.
For those who want to use Smart Buddies in the classroom, the included Teacher’s Guide is very thorough. Each of the nine lesson plans includes a list of learning objectives, materials, vocab words, tasks, discussion questions, and reflection points. A number of STEM and mathematical resources are also included. Last but not least, there are different career exploration activities for professions like architecture, mechanical engineering, and computer programming, which tie in to the experiences and lives of the eight teenagers.
Smart Buddies hosts an online coding camp that provides ongoing lessons and fun for kids who have a Smart Buddies kit. During the coronavirus outbreak, Smart Buddies is also offering free webinars on Mondays so that kids can continue to learn and explore with their Smart Buddies kit on a more informal basis, even when they’re stuck at home.
After attaching the doll to the siggy and fully charging it, you’re good to go. While the siggy scooter seems like it won’t be able to stay upright by itself, once you turn it on and connect it to the app, the siggy stays upright by constantly inching back and forth. While it’s neat to watch, this means that the toy tends to wander a bit when it’s not in use (or when your kid is in the middle of coding something). The tech in the siggy itself is relatively sophisticated; when you pick it up to move it, the siggy spins its wheels quickly in protest. Once it’s back on solid ground, you have to hold the siggy upright for a few seconds before the back-and-forth standby motion starts up again.

As a way to motivate kids, the Smart Buddies app provides the stories of eight teenagers and their scooters; by driving the coding scooters around, your coder is helping these fictional teenagers to reach their goals and try new things.
In the Smart Buddies app, there are six modules. The Books section includes the tales of the eight Smart Buddies teenagers; each of the teenagers has to deal with a number of issues that will hit home for the kid coders. From going to a new school to dealing with bullying and learning compassion, the moral and behavioral lessons in the Books module and in the Teaching Guide are just as valuable as the Smart Buddies coding lessons.

In the Smart Buddies app, customizable coding commands click together like blocks.
The Free Play section allows kids to drive the siggy around freestyle by tapping certain sequences or using a joystick on the screen. In the Path module, you can draw a path on the screen and watch the siggy follow that pattern on your floor. In the Sandbox section, kids can explore the various coding commands at their leisure and program in whatever siggy motions they want. There are ten increasingly complex tutorials in the Learn module; as a form of debugging, kids can see an animation of what the siggy will do before they actually send the code to the toy itself. In any of the modules that involve coding, you can easily toggle between the Scratch-like coding blocks and the corresponding programming syntax more commonly found in actual coding languages.

For a real challenge, kids have to use their new coding knowledge to navigate their virtual siggy around complex mazes.
Once they’ve completed the lessons, kids are asked apply their new knowledge in the Missions module, where they must input the correct coding commands to navigate through complicated mazes and collect objects (such as tools or hot dogs).
Even on its default speed of 50%, the siggy moves pretty fast; be sure that your kids play with Smart Buddies on a large, flat surface. Smart Buddies has managed to pack a lot of interesting features into the siggy, including an obstacle sensor, various colored lights, and a headlamp (which, when lit, indicates that the siggy is connected to the app). In the app, you can also use coding commands to play music that comes out through the speaker in your tablet or phone.
While the commands in the app are a bit limited, it sounds as though more sophisticated coding concepts are discussed in and available through the ongoing Smart Buddies camps and webinars. In my experience, the app was a bit buggy; sometimes programs wouldn’t upload to the siggy, or individual coding blocks wouldn’t load correctly. I also had a couple issues with the Bluetooth connectivity, but it wasn’t anything that couldn’t be solved by moving closer to the siggy.
Despite these minor setbacks, I was very impressed with the Smart Buddies kit. The app is very user-friendly, the lessons provide a clear and concise introduction to the coding concepts, and kids will definitely enjoy watching the siggy zip around according to their programmed commands. The Smart Buddies doll is a high-quality toy all by itself, with smooth joint articulation and well-stitched outfits. The additional focus on collaborative work, moral lessons, and career information means that the Smart Buddies kit is a well-rounded experience for kids, whether they’re in the classroom or not.
The bottom line: With its simple coding lessons, engaging characters, and multiple ways to play with the siggy, the Smart Buddies kit is perfect for the beginner coder in your life.
Buy a Smart Buddies kit for $199
21. EDU:BIT

The EDU:BIT kit neatly combines computer programming with fun games like Snakes and Ladders.
Ages: Ages 7+ years
App: N/A
Power: power cable included
Hardware: N/A
Parental involvement needed: Moderate to explain coding and circuitry/electronic basics, minimal otherwise
Coding concepts: Following commands, order of operations, loops, conditional statements, input from a sensor, variables, debugging
How it works: The EDU:BIT kit integrates computer programming and electronic components to bring coding fun into the real world.
Our experience: For the kids (and adults) who want to see how code can shape the world beyond a computer screen, the EDU:BIT coding kit is a great place to start.

The EDU:BIT kit comes with a coding guide, a micro:bit board, a motor, a servo, and some game boards and game pieces.
The EDU:BIT kit seeks to unify computer coding with its circuitry and electronics applications. It comes with a micro:bit processor, which comes with a variety of cool sensors and components (e.g. push buttons, a potentiometer, an IR sensor, a distance sensor, an LED panel), as well as ports for the included DC motor and servo. The USB power cable connects the micro:bit board to your computer. The EDU:BIT kit comes with a step-by-step project guide that walks you through ten projects at increasing levels of difficulty (and fun). The projects call for some extra motor/servo parts, as well as game pieces and game boards that are included in the kit.
You can toggle between different coding languages to see how the coding blocks in EDU:BIT translate into real-world code.
To start programming, your kid just has to head over the Microsoft micro:bit webpage and create a new project. The micro:bit webpage allows you to toggle between the coding blocks, Javascript, and Python, so your kids can easily see how the block commands translate into commonly-used coding languages.
The guide included with the EDU:BIT kit is very thorough in terms of showing kids how to assemble specific pieces of code to accomplish a specific goal. Better yet, the guide takes great pains to explain why the logical organization of the project makes sense, and even provides QR code links to Youtube videos that explain the different circuitry elements. These broader contextual explanations are listed after the coding assembly directions, so if your burgeoning coder wants to know how a coding or circuitry element works before using it in his/her program, be sure to read the information at the end of the project before building the code.
Using micro:bit code, you can make the EDU:BIT LED panel light up in whatever pattern you want.
The micro:bit webpage has a ton of coding blocks and options. To access the coding blocks specific to the EDU:BIT kit, you just have to apply the EDU:BIT add-on (you will have to do this at the beginning of each new project). Similar to the Scratch coding language, you build programs by dragging, dropping, and assembling different pieces of code. Once you’ve built your program, you can save the code and flash it over to the micro:bit processor by dragging and dropping the saved program into the micro:bit’s file directory. Then, you can run the uploaded program to your heart’s content.
Note: I tried the EDU:BIT out on an Apple computer; every time I flashed a program over to the micro:bit board, I got an error message that my drive had been ejected incorrectly. If you see this as well, don’t worry, it’s a false alarm—the micro:bit board is not getting damaged during the flashing process.
Why wouldn't you want to code up a spinner for a finger-themed game of Twister?
The part I appreciated most about EDU:BIT is that the projects themselves are compelling and fun for kids. The minute I opened the EDU:BIT kit and saw a mini Twister board, I knew I was in for a great time. By following the directions to connect the motor to the micro:bit board, attach a finger to the top of the motor, and build a program that spins the motor for a random amount of time at the press of a button, I was able to create a finger-themed game of Twister. While your kids will doubtlessly get a lot out of writing programs and assembling the electronic components, the completed projects themselves are a lot of fun; they’ll definitely keep your kids entertained, and also make them curious about other sorts of coding/electronic applications. On the micro:bit website, it’s easy for your kids to save and share their projects with their friends, or to download and alter programs for other fun games and activities.
Your kids can easily find errors in their EDU:BIT code using the debugging module.
As someone who’s been coding for a while, another great feature I appreciate about EDU:BIT is the debugger. If there’s a problem with your child’s code, he or she can enter debugging mode, create stop points in the program, and step through each piece of the code to find and ultimately fix the issue. Working with a debugger will help your kids to develop problem-solving skills that will serve them well both as coders and as human beings.
The bottom line: If your kid already has experience with the logic of computer programming, they’ll appreciate the fun challenges and electronic components in the EDU:BIT kit.
Check out the EDU:BIT Kickstarter campaign
22. mPie Microduino Kit
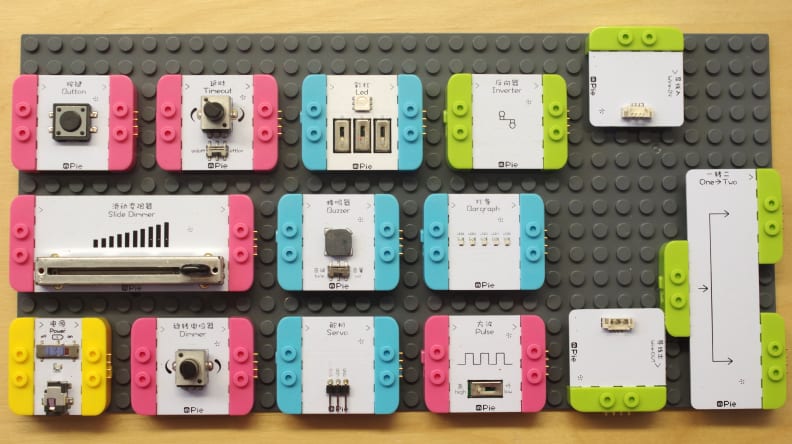
Ages: Ages 7+
Power: 6 AA batteries, 1 9-Volt battery, or USB connection to a computer
Parental involvement needed: Moderate, for initial circuit and model building; minimal once circuit basics are established
Coding concepts: Order of operations, wait for input
How it works: Using the different function modules, kids can construct simple circuits on a Lego sheet that do everything from lighting up when a button is pressed to power a lunar eclipse (via a servo/motor module that integrates a model). Simply follow the circuit assembly directions, build the matching models, and complete the exercises described in the manual.
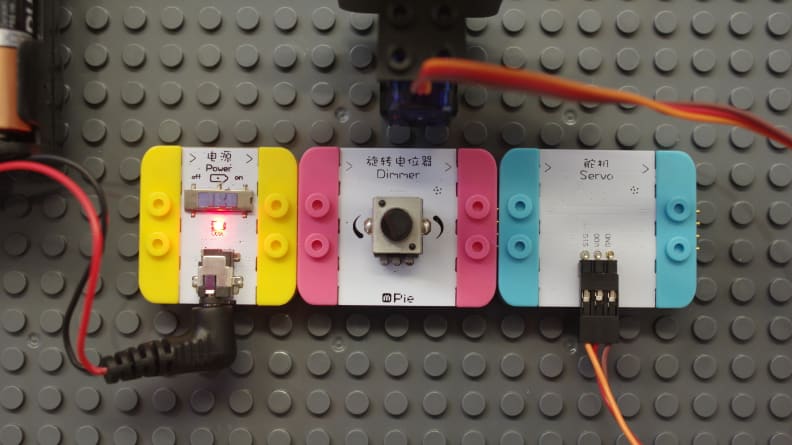
Our experience: While the mPie Microduino Kit is more focused on the circuit-building aspect of STEM, rather than computer coding, it really helps to illustrate the concept of the order of operations. The circuit simply will not work if the modules are assembled (via magnets, which connect with a very satisfying click noise) in the wrong order, a lesson that we found to be a bit too advanced for kids below the stated age range of 7 years old and above.
This kit is great for kids who have a more visual style of learning; the modules are large and colorful, and the models (everything from a flyswatter to an ambulance) really make the lessons tangible. If the ambulance's siren doesn't sound, then it's back to the circuit board. With mPie, burgeoning STEM enthusiasts can make mistakes and learn in a low-stakes environment that makes success (in one case, launching a catapult) taste all the sweeter.
It might be a good idea to have an adult on hand, at least at first; children who've never seen a circuit board before may take a while to cotton on to the idea (although they will doubtlessly recognize the Lego bump pattern of the board where the circuits are mounted). Little fingers also may not have the dexterity to assemble the physical models, which are attached to a small motor with elastic bands. Additionally, because the modules must be magnetically stuck to one another first, it can be difficult at times to mount the entire circuit on the LEGO board.
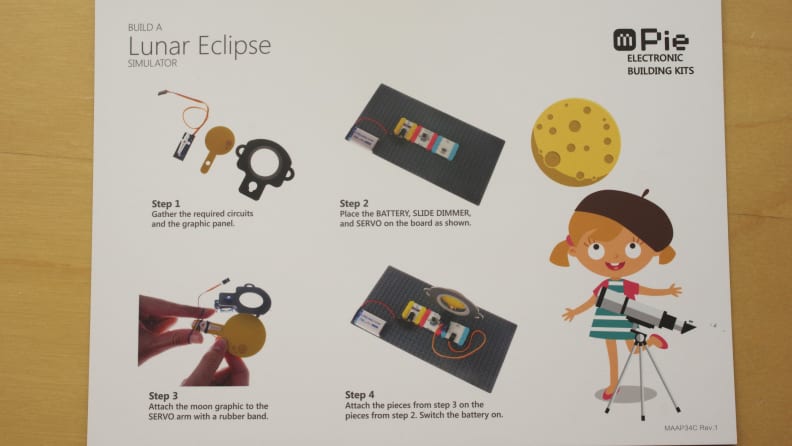
Included with the kit is a book that guides you, step-by-step, through the circuit design and building process. The lessons, while not "re-playable", are mostly easy to follow and can usually be done in less time than stated on the project cards. Our kid tester had a little bit of trouble with the directions on the "Fly Swatter" model, but was otherwise thrilled as she flew through each lesson.

The lesson book, in addition to the directions, also assigns activities that encourage reflection and imagination, which is always a good thing where growing minds are concerned.

The bottom line: The mPie Microduino kit can help kids to translate commands and the concept of "order of operations" into models that they can interact with in real life.
Buy the mPie Microduino Kit for $110
23. Artie 3000

Artie 3000 is a robot who, with the right code, can draw almost anything!
Ages: Ages 7+ years
App: N/A
Power: 4 AA batteries, not included
Hardware: Any device with internet access (the device runs on Artie's own Wi-Fi network)
Parental involvement needed: Moderate when first learning geometric relationships and calibrating Artie 3000, minimal otherwise
Coding concepts: Following commands, order of operations, conditional statements, loops, debugging
How it works: By coding specific commands in the right order, kids can make Artie 3000 draw beautiful designs or fun games on a piece of paper. Additional modules in the Artie 3000 module allow your coder to explore different coding languages, such as Javascript, Python, and more.
Our experience: Artie 3000 is great for kids who are interested in both computer programming and math. While the Artie 3000 robot itself is pretty basic, the Artie 3000 module comes with a number of extra coding languages for your young coder to explore.

Artie 3000 is a drawing robot who comes with four washable markers.
The Artie 3000 kit not only includes an adorable robot who can turn coding commands into pictures and patterns that you can see on paper, but it also includes four washable colored markers (although most washable markers of a certain diameter will fit) and a market alignment tool are also included in the box. Having now tested a couple of these drawing robots, I can tell you that the market alignment tool is a great idea.
The Artie 3000 website (www.codewithartie.com) has videos that will help those new to Artie 3000 get this robot up and running.
The first step to getting Artie 3000 up and running is to watch the tutorial videos at the Artie 3000 website. Artie 3000 has its own wi-fi network, which is convenient, but it also means that, in areas where your wi-fi reception is poor, that the same will be true for Artie 3000. One downside to Artie 3000 having its own network is that while you’re using the robot, you can’t be surfing on other webpages at the same time; the lack of non-robot-related wi-fi means that the pages won’t load.
Artie 3000 is best used on paper taped down to a hard, flat surface that is far from any edges; because Artie 3000 can’t sense table edges, I recommend that you play with Artie on a linoleum or concrete floor surface where any washable marker that bleeds through can be easily wiped away.

Calibrating Artie 3000 involves having the robot draw circles (where the ends of the circle should meet) and lines (where the lines should be a certain length).
Because Artie 3000 relies on precise distance and angle values, the robot has to be calibrated prior to using it. While the calibration process is a pretty straightforward one, in that the robot draws a line of a set length and then draws a circle, you might have to repeat the calibration process multiple times before you’re satisfied that Artie 3000 is drawing circles to the best of its ability.
Once Artie 3000 is calibrated, the fun can begin. Users can select pre-loaded programs that can draw a maze, a tic-tac-toe board, and basic geometric shapes and patterns. The Artie 3000 website also hosts downloadable patterns that range from more games to letters of the alphabet. The neat part is, Artie 3000 only requires mastery of three basic concepts: moving forwards/backwards, turning by a set number of degrees, and marker up/marker down.
Younger children may enjoy drawing designs in the Point and Click module, and watching Artie 3000 create them in real life.
There’s something for everyone in the Artie 3000 UI. Younger children can use Artie with point-and-click or remote-control functionalities, but they’ll probably find the freestyle coding functionality a bit more difficult. It can be fun to draw random designs, but if your coder ever wants to draw something with specific angles and dimensions, those projects might be hindered by a lack of knowledge concerning the geometric identities (i.e. triangle side lengths and use of cosine, sine, etc.).

It took me a couple of tries to work out the correct angles so that Artie 3000 could write the word "JAM".
For instance, it took me a few tries to get Artie 3000 to correctly write the word “JAM”, and I was using the geometric “soh-cah-toa” mnemonic to figure out how long each line segment should be.
Kids can debug their Artie 3000 programs using the "simulate" function, which shows the result of the code before actually having Artie 3000 draw it out.
Fortunately, the Artie 3000 UI includes a “simulate” function that allows you to visualize the coding results before you ask Artie to actually start moving across the paper; this function acts as a way for kids to debug their programs.
In the Artie 3000 UI, kids can write programs in Blockly that control Artie 3000 or onscreen avatars known as sprites.
Cleverly, if your kid ever finds him or herself bored with the more basic operations of Artie 3000, he or she can toggle over to the other panels in the Artie 3000 user interface. The panels include modules for coding in Javascript, Python, Blockly, and Snap! While the programs that you create in the Artie 3000 coding panel aren’t instantly converted into those coding languages when you switch to a new panel, you can create new scripts in these languages and see how the syntax differs from one language to another. Blockly and Snap!, which are variations on the Scratch coding language, can be used to control Artie 3000 or to investigate more sophisticated coding concepts by playing with sprites (onscreen avatars).
The bottom line: Artie 3000 provides programming-themed fun for both beginner coders, who can drive Artie 3000 around manually, and more advanced coders, who can make Artie 3000 draw specific designs and explore multiple coding languages in the Artie 3000 UI.
24. Cozmo
Ages: 7+ years old
App: Cozmo (iOS/Android), connected via Wi-Fi
Power: Internal battery and charger included
Parental involvement needed: Minimal, once coding basics are established
Coding concepts: Following commands, order of operations, logical operators, functions, function calls, conditional statements, wait for input, variables, counting loops, macros
How it works: Cozmo is a little robot who intuitively reacts to objects and people alike.
Cozmo's intense processing requires a more solid connection between the app and the device, so it uses Wi-Fi, rather than Bluetooth pairing.
Cozmo comes with three light-up cubes that Cozmo can move and manipulate.

There are four main components of the Cozmo app.

In "Feed", kids give Cozmo delicious treats in the form of the light-up cubes.
For "Play", users can ask Cozmo to do tricks or play games with it.
"Tune Up" involves calibrating Cozmo's different sensors and basically performing routine "maintenance".
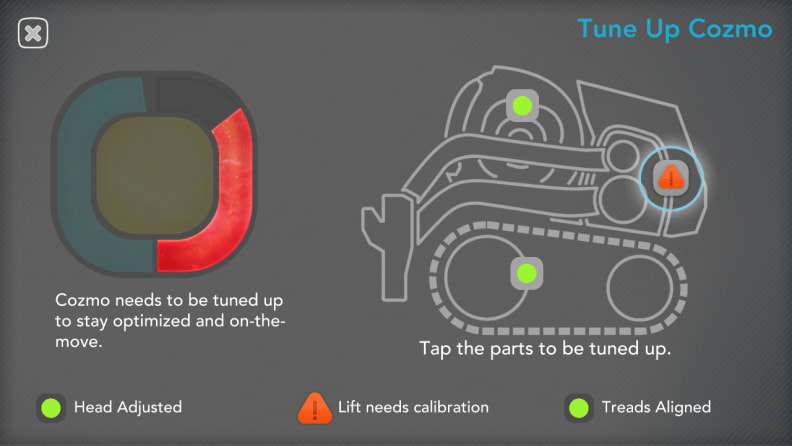
The "Discover" module includes "Code Lab", which is where kids can build their own code and watch Cozmo turn it into reality.
When not in use, Cozmo chatters and chirps, and often wanders around looking for obstacles and people with whom to play.
Our experience: Hanns Tappeiner, Co-founder and President of Anki, told me that famous robots like R2-D2 and Wall-E inspired Cozmo. Trying to replicate the emotional connection that people experience with robots in movies involved going above and beyond the bare minimum: "A robot should be making eye contact with you, remember where he saw your face, and keep track of the world around it." To make Cozmo as clever and interactive as possible, Anki didn't just focus on the robotics aspect; Cozmo's personality/AI and facial animations have their own respective development teams. The result? "Everyone treats Cozmo like a pet."
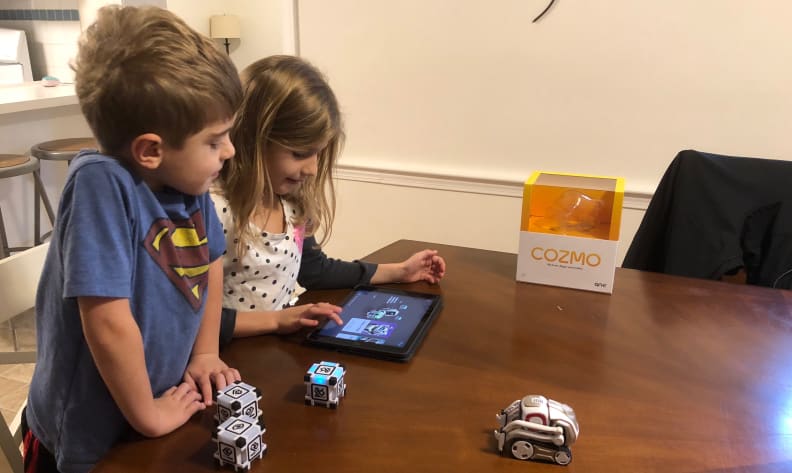
Indeed, that was the very first comment that the tester made to me about Cozmo. Cozmo is adorable and extremely responsive, and definitely acts like a curious, mercurial pet when it is not being actively directed from the app.
Cozmo's AI includes two neat features: facial recognition and spatial mapping. This means that Cozmo can register the difference between a frown and a smile on a kid's face. In fact, "wait for a smile" is a line that you can program into Cozmo's code.
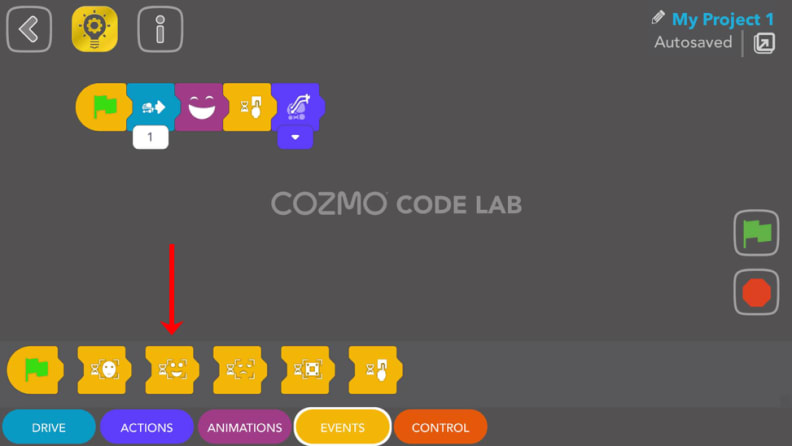
The red arrow indicates the coding block for "wait for smile".
As for spatial mapping, Cozmo not only scans for (and registers) the presence of the light-up cubes, but looks for the human faces of its friends. The mapping isn't perfect (testers reported instances of Cozmo not recognizing every instance of cubes being tapped or shaken), but it makes for lots of fun when playing games. One such game involves Cozmo pouncing on any wiggling fingers it sees.
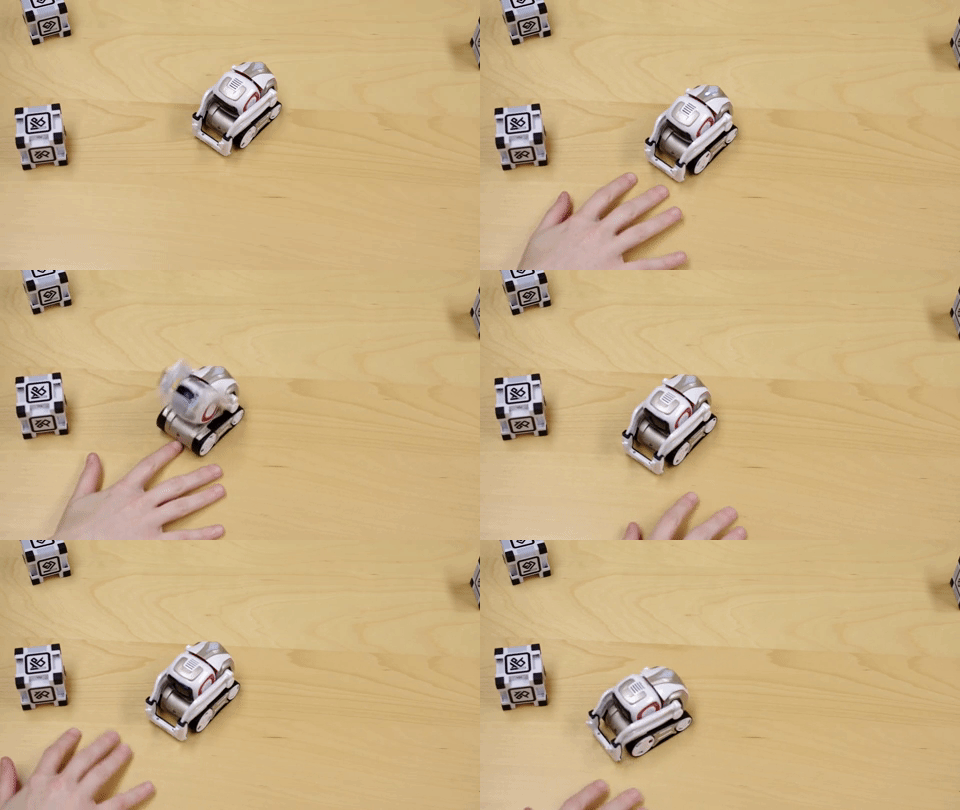
The included games and tricks are neat, but "Code Lab" is especially robust. After being walked through useful tutorials, users can do tons of cool stuff by combining a variety of icons representing different actions, emojis, noises, and logical operators. There isn't a lot of explanation for what each icon means, so it may take some trial and error for kids trying to get Cozmo to perform a specific sequence of actions, rather than those just exploring Cozmo's many different tricks and actions.
Additionally, in "Code Lab", the coding "blocks" (commands) are quite small, so they might be difficult to move or see for those with limited hand/eye coordination or imperfect eyesight, respectively.

For especially advanced coders, Anki will be releasing a "Code Lab" update that includes "vertical grammar", which allows kids to engage in multi-threading, or programming in different columns of code that will run simultaneously.
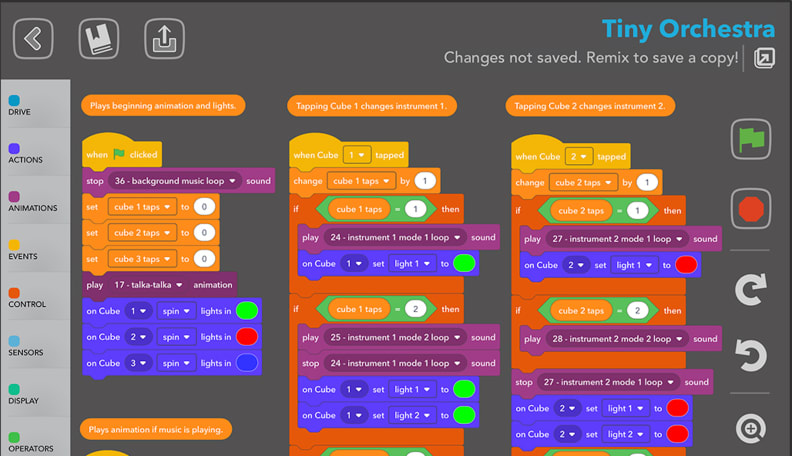
Cozmo is correctly advertised as being for older kids; younger children have difficulty letting Cozmo figure out its environment for itself, and often want to lift Cozmo up to help it complete its task. Additionally, Cozmo is as appealing to adults as it is to kids because Anki has created Cozmo SDK, a community for coders of all ages to make complex programs for Cozmo in Python, a common programming language.
With the rapid processing required to make Cozmo interactive, it's no surprise that the Cozmo app uses a lot of battery power; for extended use, be sure to have a charging cable plugged into your device. Lastly, a phone or tablet connects directly to Cozmo's Wi-Fi network, so when playtime is over, users will have to switch back to their home Wi-Fi network manually.
The bottom line: Cozmo is a lovable, emotive robot who can be a coding companion for older kids for the rest of their lives.
Update: In mid-2019, Anki went out of business. Cozmo appears to still be available for now, but customer support may be limited.
25. LEGO BOOST
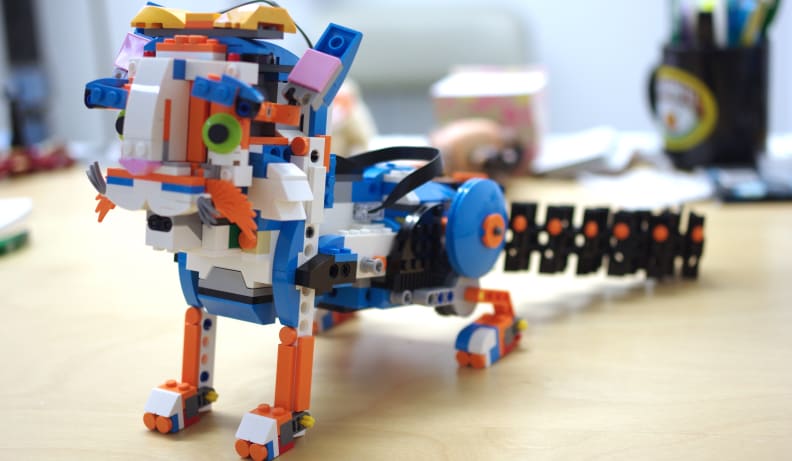
Ages: Ages 7-12
App: LEGO BOOST (iOS/Android), connection via Bluetooth
Power: 6 AAA batteries
Parental involvement needed: Moderate, for initial app navigation and setup; minimal once coding basics are established
Coding concepts: Following commands, order of operations, conditional statements, logical operators, wait for input, variables
How it works: The LEGO BOOST kit comes with over 800 pieces, a stiff paper grid map, and a Bluetooth-connected motor that also includes motion, color, and orientation sensors.
LEGO BOOST only works with certain smart devices (primarily tablets) and some computers.
With instructions from the companion app, you can build one of five mobile, interactive models (including a guitar, a cat, a robot, a bulldozer, and a mini factory). Obviously, as with any LEGO kit, there is also the option to build whatever your kid wants to create. Once one of the models (or your child’s freestyle creation) is built, kids can write lines of code by dragging and dropping icons that click together and watch as the LEGO models react in fun and creative ways.
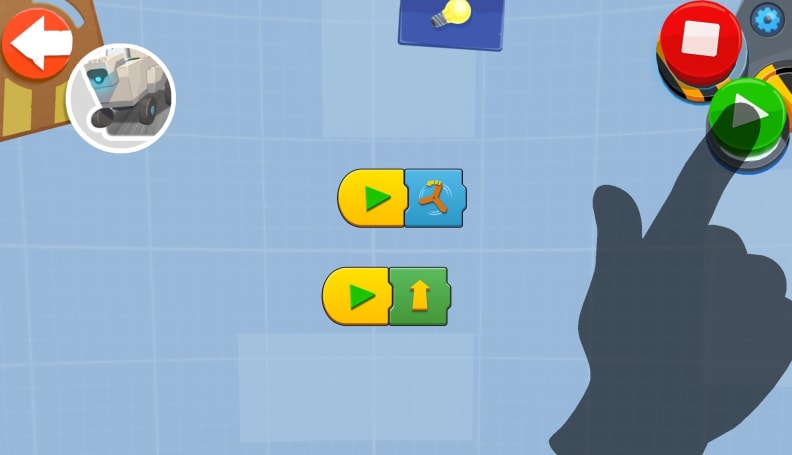
Our experience: As with all things LEGO, the fun is just endless with the BOOST kit.
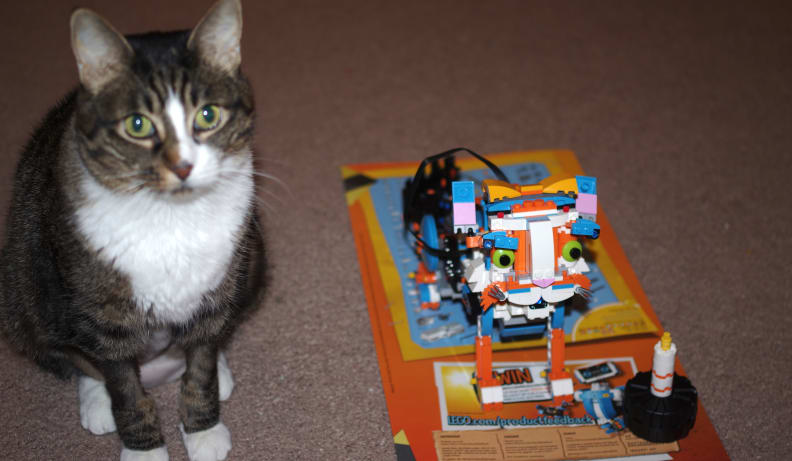
While this LEGO kit can naturally be enjoyed on its own without the app, kids who want to get the models moving and reacting to their environment will want to use the sleekly-designed app. The lack of written instructions in the kit and in the BOOST app can be a boon or a curse; kids will find it intuitive to navigate, while adults may want to dig around for some kind of written manual.
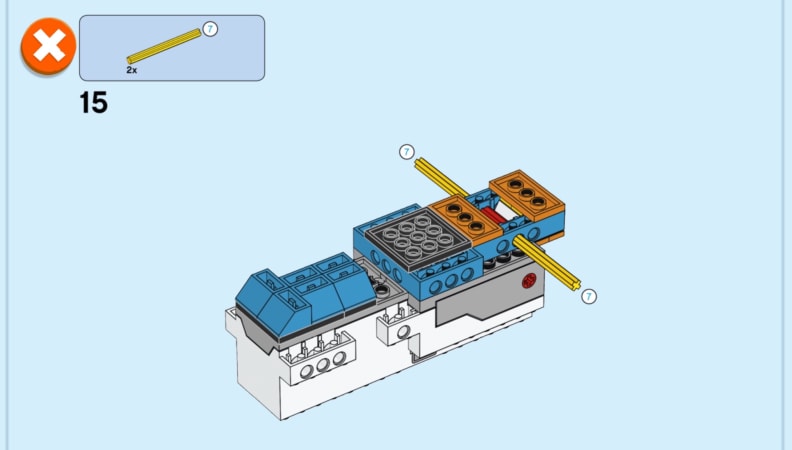
In the main menu, builders can select one of five models to create. Each model contains certain levels with step-by-step building instructions for assembling the model pieces; once kids get to a stopping point in building the LEGO model, the app then demonstrates the capabilities of that model with coding tutorials.
Users will need to do some experimentation with each coding block before its meaning becomes clear, but the tutorials are a good introduction to coding basics and the types of tricks each model has up its sleeve.
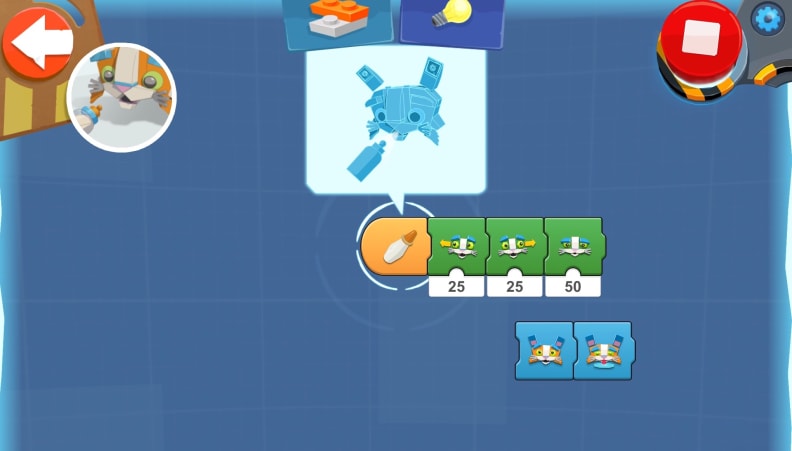
As you might expect, the models are awesome. I built the cat model in a few hours (admittedly, a large portion of that time was taken up in trying to find certain LEGOs), and it is truly amazing.
Granted, it’s been about decade since the last time my LEGO obsession reared its head, but clearly the block design and technology have evolved to new heights. With that block complexity in mind, have a pair of needle-nosed pliers on hand for easy model disassembly.
If your little ones are LEGO novices, think about starting them out on smaller, non-coding related LEGO kits, since those without the experience of reading LEGO assembly directions will be thrown by the lack of written instructions. Our testers, on the other hand, are all devoted LEGO lovers, had an absolute blast building the first car model. The six-year-old, even though he is outside the stated age range, easily picked up the drag-and-drop coding elements.
Once the LEGO builders in your life are more advanced in coding, they can try the freeform coding section of the LEGO BOOST app, where kids can make creations move and react to their heart’s content.
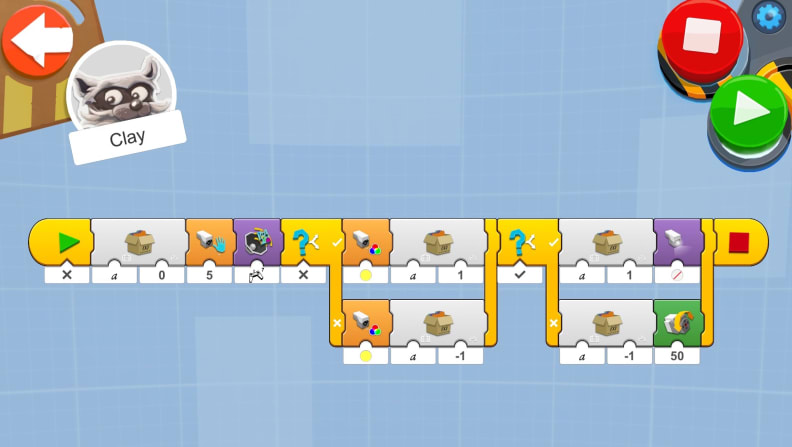
The bottom line: The LEGO BOOST kit is perfect for the LEGO lover in your life who is just entering the world of computer programming.
Buy the LEGO BOOST kit for $199
26. Sphero SPRK+

Ages: 8+ years old
App: Sphero Edu (iOS/Android), pairing via Bluetooth
Power: Internal battery and charger included
Parental involvement needed: Minimal, once the app is set up, navigation of the app is understood, and coding basics are established
Coding concepts: Following commands, order of operations, loops, conditional statements, strings, logical operators, wait for input, variables, functions
How it works: Sphero SPRK+ is a spherical robot that rolls and reacts according to the code created in the Sphero Edu app.

SPRK+ comes with a charging base, "maze tape", and a protractor. The maze tape acts as as a boundary that SPRK+ will detect and navigate along, but never go beyond. SPRK+'s various sensors (accelerometer, gyroscope, GPS, and orientation) provide feedback to the app, and act as inputs for further commands.
The SPRK+ coding language is a solid match for real programming languages; comments or warnings can be set up if SPRK+ performs certain actions or experiences certain circumstances (i.e. freefall, an obstacle, etc.).
Our experience: Watching this little spherical robot roll and bounce is a great deal of fun.
We suggest, however, that parents take the time to get the app up and running themselves, as there are some initial sign in and connectivity steps that may cause kids to get bored. It also takes a little bit of time and experience for adults to figure out how navigate and use the app, and then show the kids how it's done.

Once SPRK+ was up and running, it was a blast. We found the coding language to be extremely detailed; on a block of code for motion, kids can control the direction (estimated with the protractor, from 0° to 360° of a circle), speed (out of a possible speed of 255, for a tidbit of binary), and the duration of that movement (up to 999999 seconds). Users can code in blocks, draw paths with their fingers, or actually code SPRK+'s movements and actions in Javascript.

Code for SPRK+ can be written in blocks, freeform by hand, or also in Javascript (not shown).
For a bit of fun, children can also add in light and sound effects. Watching a little robot roll towards me at high speed with a chainsaw noise playing out of my phone was slightly more intimidating than I thought it would be.
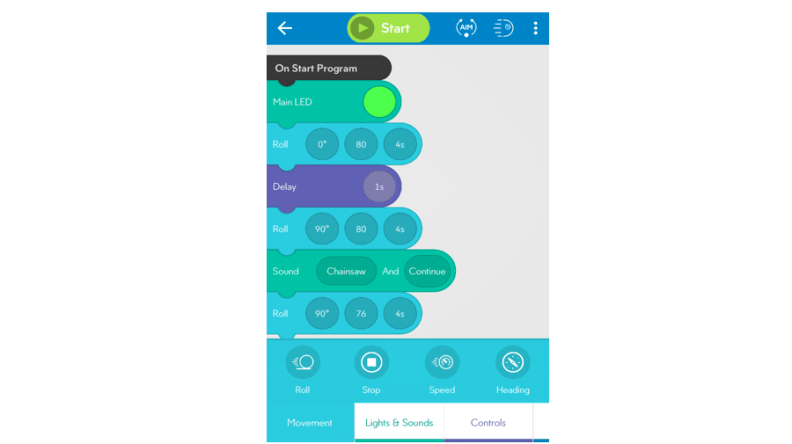
SPRK+ coding components include lights, sounds, and movement.
As a bonus, because SPRK+ is basically a robot inside a water-tight compartment, there is even a lesson plan on the Sphero activity website (also found through the "Sphero" tab on the app) for teaching SPRK+ how to swim. We really appreciated SPRK+'s durability, as it is possible to have SPRK+ fall from smaller heights without breaking, or even without disrupting the code. That said, it's best to use SPRK+ on a hard floor surface with a lot of open space.
SPRK+ is definitely for older kids, though, because one subtle point may make navigation more difficult for younger kids: the concept of relative direction. In the app, SPRK+ can be "aimed" with the indicator light is on its behind, and then the relative angles can be determined with the included protractor. However, the "forward" direction (or 0°) is less obvious because SPRK+ is perfectly spherical. With time and practice, though, it should become less of a problem point.
The bottom line: SPRK+ gets more fun and more complex as kids get better and better at computer programming.
Update: Sphero just released the Sphero Mini Activity Kit, a kit similar to Sphero SPRK+, but geared more towards children as young as five years old.
27. Disney Codeillusion
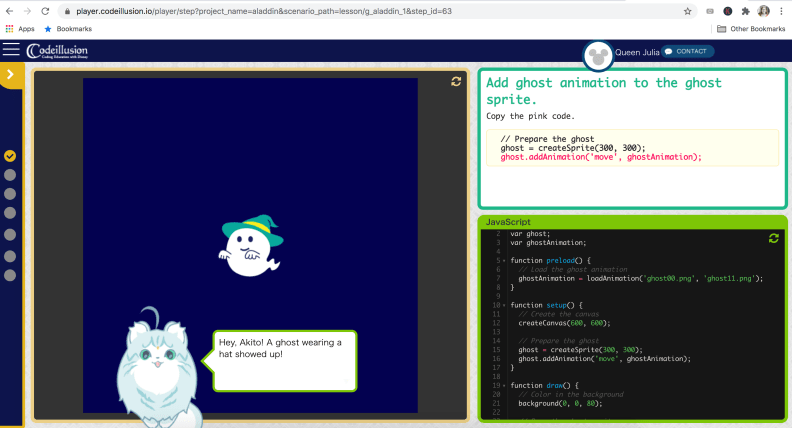
Disney Codeillusion is basically a coding bootcamp for Javascript, HTML, and CSS.
Ages: Ages 8+ years
App: N/A
Power: N/A
Hardware: N/A
Parental involvement needed: Parents just need to get kids up and running on the Codeillusion website
Coding concepts: Computer basics, following commands, order of operations, loops, conditional statements, variables, functions, arrays, website design
How it works: With the help of tons of fun characters (both Disney and otherwise), your kid will learn how to use programming to design websites, make digital art, and build computer games.
Our experience: Regardless of your kid’s previous experience with computers or programming, Disney Codeillusion will take your kid from programming zero to hero.
Truly, with respect to its breadth and depth, Disney Codeillusion is akin to a computer programming bootcamp. The best part is that Codeillusion is aimed at coders of all ages.
Disney Codeillusion comes in two flavors: Disney Codeillusion Prime and Disney Codeillusion Enchanted. These two products share the same coding lessons, but Codeillusion Enchanted kicks the whole experience up a notch by making these coding lessons part of an immersive experience where you are a transfer student in a magical school. While in school, you have to solve puzzles, learn how to interact with your peers, and, of course, go to class and learn “magic” (i.e. computer programming).
I got the chance to try out Disney Codeillusion Enchanted, and all I can say is that it is an amazing experience from start to finish. After logging onto the Codeillusion website and opening your account, you start your Codeillusion journey when you wake up as Akito, a transfer student at the Technologia School of Magic, who isn’t quite sure about a lot of things: girls, his past, or even how he ended up at the Technologia School of Magic in the first place.
The role-playing aspect of Disney Coldeillusion Enchanted allows you to meet and interact with tons of neat characters.
There is a real role-playing aspect to Codeillusion; while some people who are more seriously engaged in the coding aspect of Codeillusion may try to quickly toggle through Akito chatting with his fellow transfer students and trying to unravel the mysteries at the Technologia School of Magic, the interactions will doubtlessly draw you deeper into the story.

Disney Codeillusion Enchanted comes with a book, postcards, and puzzles that are tie-ins to the Technologia School of Magic story.
Codeillusion Enchanted comes with a physical storybook that includes puzzles, stories, and documents referred to in the story of the Technologia School of Magic. It all has a very Harry Potter vibe to it, so if you waited with bated breath for your Hogwarts letter on your eleventh birthday, you’ll doubtlessly love the experience.
The Technologia School of Magic storyline is all just the cherry on top of an ice cream sundae that is made out of really useful and very thorough coding lessons. There are three types of lessons: Media Art, Web Design, and Game Development. For the first two types of lessons, you learn how to use HTML and CSS to make beautiful images and websites. In the Game Development modules, you learn how to use Javascript commands to make objects (or sprites) move and interact with one another.
In Disney Codeillusion, Mimir guides you through each coding lesson step by step.
At the outset of each lesson, you know the approximate length of time the lesson will take (usually 20-30 minutes, but sometimes up to 50 minutes), as well as the topic of each lesson. Mimir, one of the sassier characters you meet at the Technologia School of Magic, is your guide in these lessons. She asks you to complete tasks within each lesson one step at a time, sometimes asking you to remember specific coding commands from previous lessons, and sometimes giving you a copy of the code that needs to be implemented. If you enter a line of code correctly, you get a validating “ding-dong” noise.
In Disney Codeillusion, you can use your coding skills to help Aladdin, Abu, and Carpet escape a flaming lava pit.
Overall, I found these lessons to be very effective; as someone with no previous experience in HTML or CSS, the step-by-step directions and immediate feedback from the preview window made it easy to see the connection between individual lines of code and the resulting text and image changes. In the Game Design modules, you can help sprites and Disney characters navigate through obstacle courses, among other things.
In Disney Codeillusion, there are three types of lessons: Web Design, Game Development, and Media Art.
For the coders who are also Disney fans, you’ll love hanging out with Goofy, Mickey, and Donald Duck, as well as using your new coding skills to lend a hand to characters from Zootopia, Enchanted, Aladdin, and more.
Who wouldn't want to get an invitation to a magic festival?
In Disney Codeillusion Enchanted, your coder’s progress through the different lessons is interspersed with prompts to solve puzzles and read documents included in the Technologia School of Magic storybook; having these physical tie-ins to the digital coding adventures really makes it a fun and immersive experience.
Your kid coder will definitely need to take breaks while working through Disney Codeillusion.
Codeillusion often encourages the coders to take breaks in between lessons, and it is right to do so; between the coding lessons, the interactions with other characters, and the puzzles that need to be solved, it can could easily take hours to work your way through three or lessons. As such, I recommend only running through a few lessons a day in order to allow time for your brain to digest these new programming concepts. With anywhere from fifteen to twenty coding lessons in a chapter, and ten chapters (and potentially more in the future) in the Disney Codeillusion Enchanted kit, this is a long-term time investment, rather than a flash in the pan. For those who just want to focus on the coding lessons, and would rather skip the role-playing and the puzzles, the Disney Codeillusion Prime kit might be a better fit.
There are a few practical points to consider when using Disney Codeillusion:
- Codeillusion is only usable in the Google Chrome browser.
- If you’re using Disney Codeillusion on a laptop, it will deplete your battery quickly.
- Using Codeillusion for extended periods of time will definitely stress your computer out; during testing, my laptop was hot to the touch, the fan whirred loudly, and after a while, there was a noticeable lag in the Codeillusion program.
Based on my experience, I recommend using Codeillusion on a desktop computer (or a plugged-in laptop) for a couple of hours at a time.
The bottom line: Disney Codeillusion provides coding lessons in HTML, CSS, and Javascript that are both thoroughly instructive and a ton of fun. These coding lessons are the main focus of Disney Codeillusion Prime; those looking for more of a gamified role-playing experience will appreciate the Disney Codeillusion Enchanted kit.
Buy Disney Codeillusion Prime for $500
Buy Disney Codeillusion Enchanted for $900
28. Sony KOOV Trial Kit

One of the first robots you can build with KOOV is a police car with a siren that can avoid bumping into objects.
Ages: Ages 8+ years
App: KOOV app (iOS)
Power: 3 AA batteries, not included
Hardware: Compatible with most iOS, Mac OS, and Chrome devices, connection via Bluetooth
Parental involvement needed: Minimal
Coding concepts: Following commands, order of operations, conditional statements, loops, variables, input/output, wait for response, functions
How it works: KOOV is a robotic coding kit that teaches kids not only about the different coding elements, but also the philosophical goals and logic of computer programming.
Our experience: If you want a kit that really gets down to the nitty gritty of the “how” and the “why” of computer programming, the Sony KOOV kit is the kit for you and/or the young coder in your life.

The KOOV Trial Kit includes blocks, sensors, LED lights, motors, a battery pack, and the KOOV core, which is the input/output board.
I was fortunate enough to get the chance to try out the Sony KOOV Trial Kit. This robotics kit has everything you’ll want when it comes to building robots: a number of colorful, kid-friendly building blocks, motors, wheels, LEDs, sensors, and an input/output control center (the “KOOV core”).

The KOOV app has four sections: Free Production, Robot Recipes, Collection, and Learning Courses.
While you have to sign up to use it, the KOOV app is really spectacular. It has four sections: Learning Course (where your coder can follow very basic step-by-step lessons for building programs and robots), Free Production (where coders can build programs and robots from scratch), Robot Recipes (where kids can build robots without following specific lesson plans), and Collection (where administrators can oversee the progress of multiple users).
While the KOOV app is expansive, the Trial Kit (which is limited by the number of building blocks and sensors) can only be used with certain lessons in the Learning Courses and Robot Recipes. The KOOV app is clearly designed for a classroom setting—there are options for multiple users, many different possible robots and lessons, email reports on a kid's progress, and short one-question quizzes to ensure that the kids have really retained the main point of each lesson. Even better, it’s just as easy for a kid to use this at home, and have the “administrator” be a parent instead of a teacher.

To demonstrate how a program is made up of lots of little programming steps, KOOV asks kids to think about the difference between a sibling and a robot trying to perform the same task.
I spend most of my time in the Learning Course section of the app, and this is where it really shines. Each individual robotics project includes a series of lessons. The very first lessons involve discussing why robots need specific instructions when given a task, and it invite kids to think logically about how they would write the code before even getting to the actual coding section.

KOOV asks kids to think critically about how they will complete the coding mission before actually allowing them to start coding.
I really liked the critical thinking part of the lessons, because it asks kids to reflect on the “why” and the “how” of each coding project, rather than just the “what”. Children who can master the philosophical and internal logic of coding will have a much easier time with computer programming and other logic-based skills in the future.
Once you get started with the lessons, the coding and assembly instructions are very clear. Once assembled, you can choose to run your code in “Test Mode”, where you send the code to the robot via the Bluetooth receiver in the KOOV core (where you can make it stop or start running the code with the tap of a button), or you can upload the code to the core so that the robot can operate freely without a connection to the computer.

The KOOV lessons in the Learning Courses walk coders through the project step by step.
By using coding blocks, similar to those found in languages like Scratch or Blockly, your young coder can easily drag and drop coding commands into loops and conditional statements. The KOOV app also demonstrates the importance of the different I/O connections, which will set kids up in the future if they’re considering moving on to more complex coding or circuitry kits.
Throughout the coding lessons, the app provides helpful hints and gently lets your coder know when they’ve entered a line of code incorrectly. After they complete a mission, your kid is awarded with badges for learning about specific topics or completing specific tasks.

One of the robots I built, following the directions in the Robot Recipes section, was a shrimp with a red LED light.
The robots are fun to build and play with—almost all of the robots are fun animals or vehicles that kids will recognize. The fact that the KOOV Trial Kit comes with LED lights, a proximity sensor, and a buzzer means that children will not only get to watch their code come to life, but they’ll get to watch their creations react in real time to real-world obstacles.
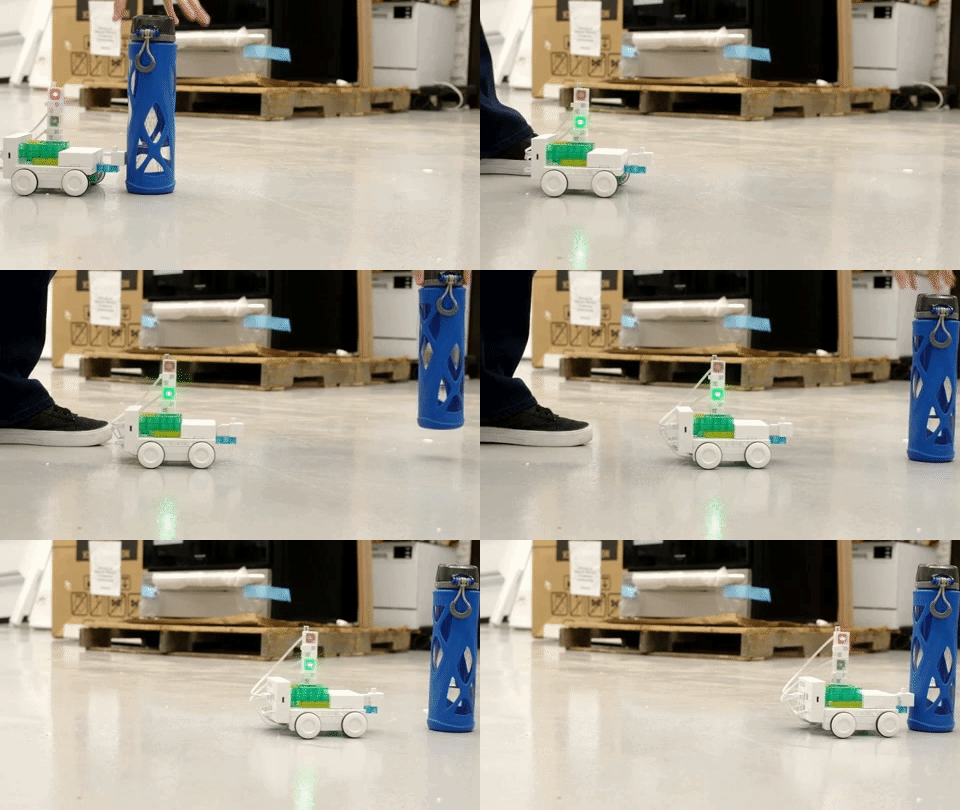
The KOOV robot I built would stop or go depending on whether its path was blocked by an object or not.
I also spent some time coding a robot (not a good-looking one, but a functional one) in the Free Production part of the app. This is where kids will really get the chance to test their mettle—I actually found the robot assembly process more difficult when I wasn’t following step-by-step instructions.

Sometimes connecting KOOV blocks can be tough because connecting one set of blocks may prevent another block from being attached in an "occupied" block hole.
Because the blocks are of non-standard configurations (think Legos, but with the connecting bumps on multiple sides of the block), it can be tough to build the exact size and shape of the robot you want because you only have a finite number of blocks. Granted, those blocks connect to one another very easily, but it is possible for connecting one block in one orientation to prevent another block from being connected to the original block, which can be a bit frustrating at times.
This minor issue aside, more advanced coders will have a lot of fun building their own robots once they’ve stepped through the lessons and gained a little confidence in the coding process. They can even share their creations with other KOOVers in the Free Production part of the app.
The bottom line: KOOV is a great environment where parents and teachers can guide younger kids through the process of learning how to code, and give more experienced coders the chance to build fun robots and explore more complex coding concepts.
Buy the Sony KOOV Trial Kit for $250
29. Droid Inventor Kit
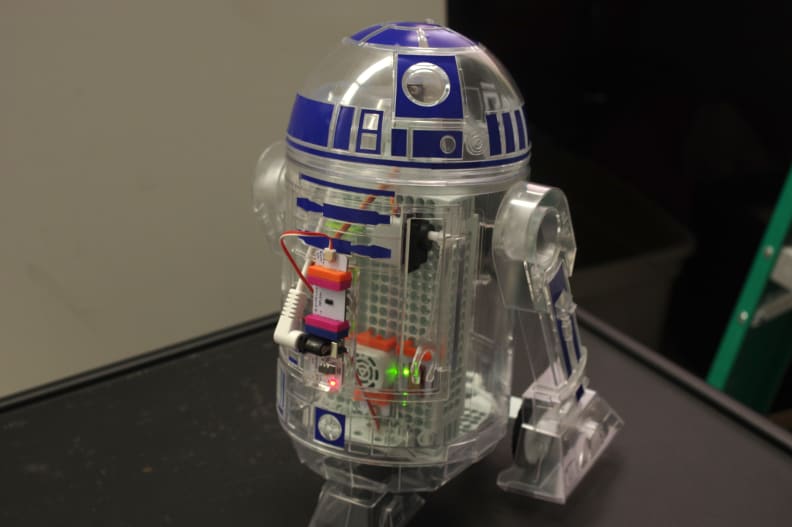
Ages: Ages 8+
App: Droid Inventor Kit app (iOS/Android)
Power: 9V battery, connected via Bluetooth
Parental involvement needed: moderate for robot assembly and coding basics, minimal once model is built and coding basics are established
Coding concepts: Following commands, order of operations, logical operators, conditional statements, wait for input, counting loops
How it works: The Droid Inventor Kit from littleBits will be an instant hit with Star Wars fans both young and old. Using both circuit-building skills and coding skills, you can make R2-D2 dance around or attack intruders, or you can create your own customized robot.
Our experience: The Droid Inventor Kit helps you to unleash the Rebel fighter within you and your kids. The kit involves six circuit components that can be mounted in a variety of arrangements to a Lego-like structure to build droids that can move easily both on hardwood and carpeted floors.
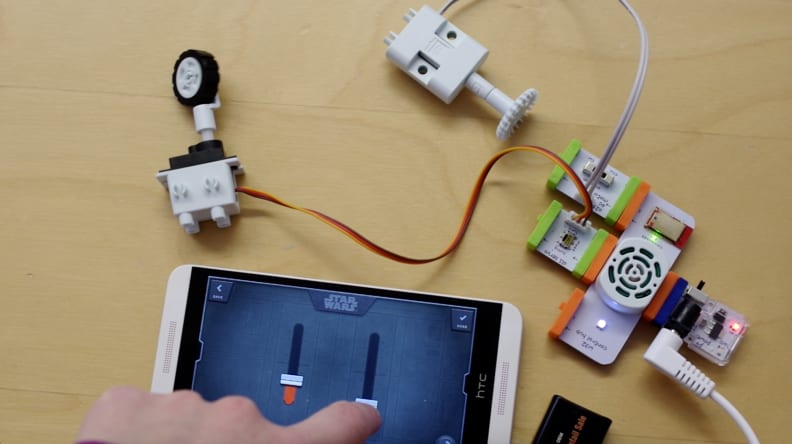
By adding wheels and cranks to two of the circuit’s servos, your kid will slowly start to see how circuit inputs and connections help R2 to navigate around. Once you add in the app experience, though, a whole other world of possibilities opens up.
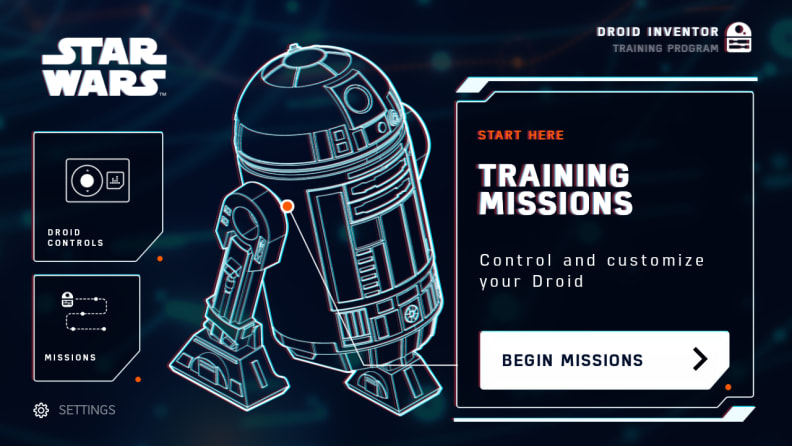
The Droid Inventor Kit app is divided into two sections: “Droid Controls” and “Missions”.
In the “Droid Controls” module, you can play with the different circuitry components individually. Some controls include:
“Sound Board”, where kids can make their own recordings and explore R2’s surprisingly sophisticated range of noises
“Joystick”, where you can just drive the robot around freestyle
“Security Mode”, where you can watch R2 freak out when something registers on its proximity sensor
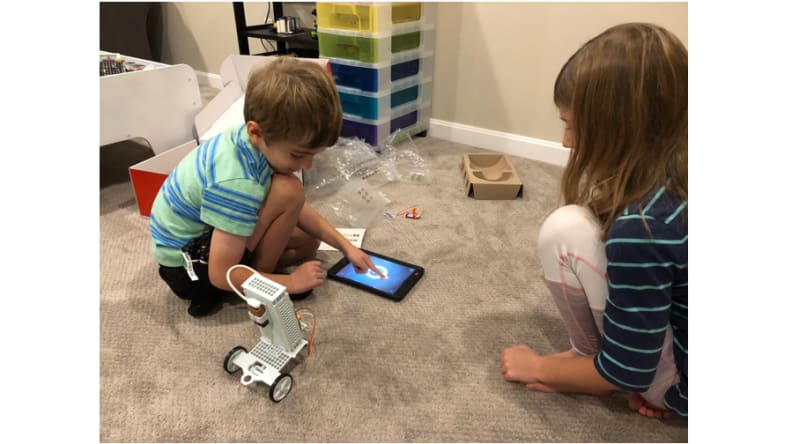
In the “Missions” module, where each mission involves easy-to-follow video instructions that you can pause and replay at any time, children first assemble a very basic circuit, mount it onto the circuit board (the circuit modules click together magnetically and are built such that they can snap into the board), and have a very naked version of R2 move around.
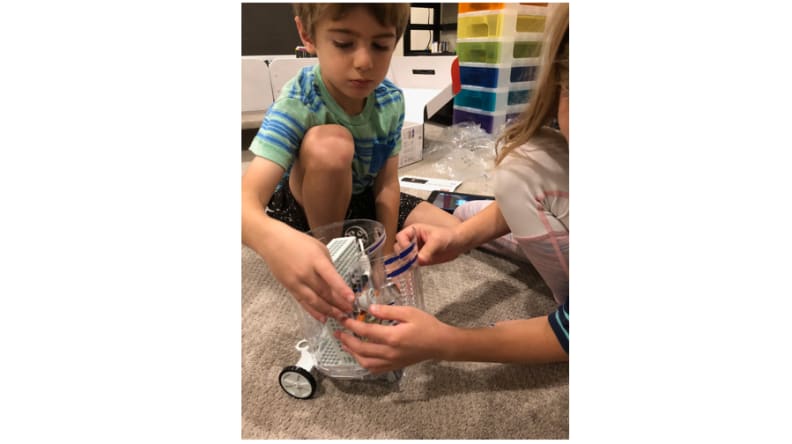
The next mission involves assembly of R2-D2’s shell. Once users see how everything snaps together, it’s off to the races with a series of lessons that introduce the coding basics in the context of R2’s movements and reactions. One point of frustration in the missions is that while you can pause and replay videos, you cannot go back a step in the sequence—you have to exit out and restart the mission again, which can prove time-consuming if you’re building something elaborate and skipped a step by accident.
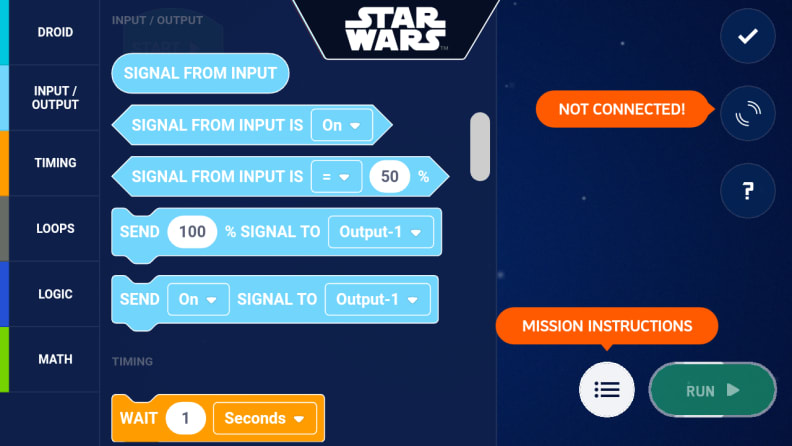
(The coding itself is based off of Scratch Blocks, so those familiar with the Scratch logic will catch on quickly, but those new to coding will still find it easy to move coding elements around with their fingers.)
Naturally, these missions get more complicated until kids really start to understand the real-life effects of code built on a screen and the endless possibilities that can arise from combining the same coding elements in different ways.
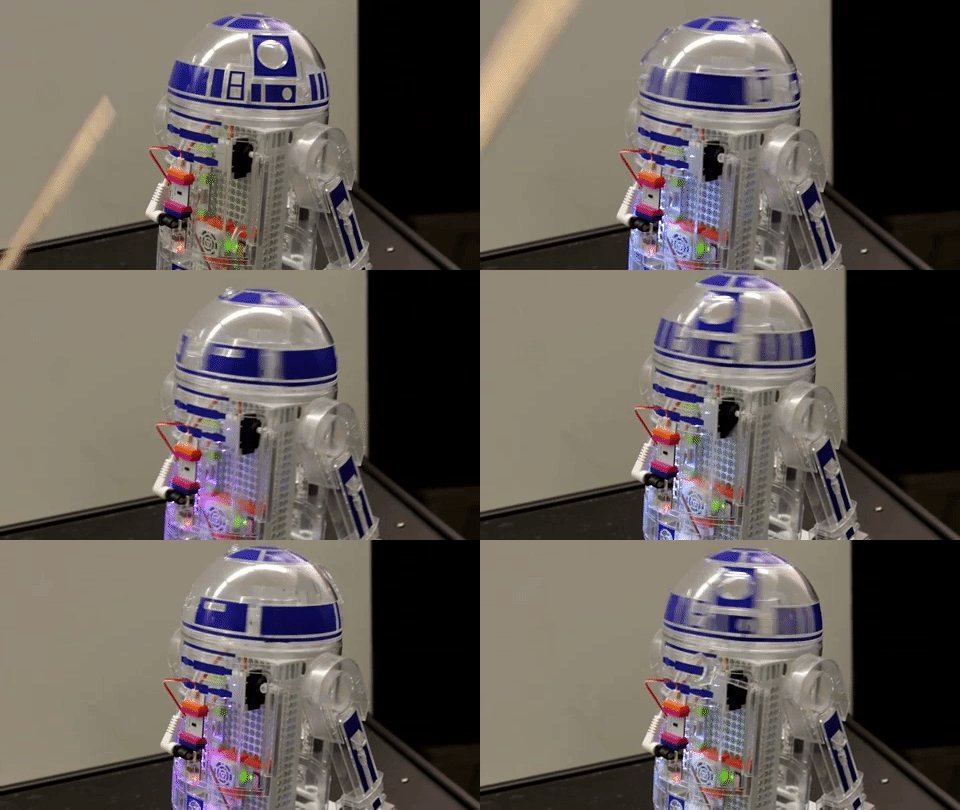
One of the best parts is getting to the part where you can make R2-D2’s head spin around with a simple press of a button. It’s satisfying to watch its head swivel around like it’s looking for Stormtroopers to take down.

The last mission, “Code Master”, allows for access to all of the programs coding blocks, and lets your child program R2 to his or her heart’s desire. I found the range of possible coding blocks to be somewhat limited compared to other comparable toys, but that’s because users are encouraged to go to DIY.org and gain access to more coding blocks and share their programs with a worldwide community of coders (you may need to pay a subscription fee to access certain content). Additionally, circuit components and coding blocks are completely compatible across all of the different littleBits coding kits, including the Avengers Hero Inventor Kit.

Last but not least, there’s also an art component to the Droid Inventor Kit—you can create and decorate your own robot shell. With the included stickers, it’s easy to make R2 look like any robot you can think of. Additionally, there’s even a place to mount a marker on R2’s back end so that it can draw patterns on paper sheets on the floor.
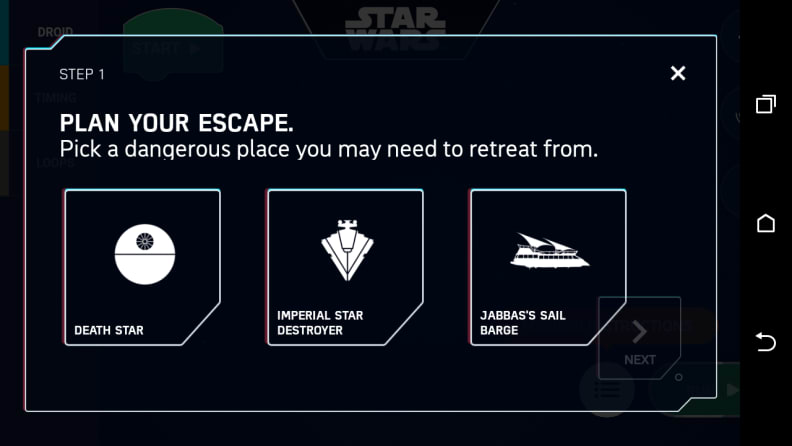
The Droid Inventor Kit has a ton of Star Wars-themed touches, which will really draw in those who grew up wanting to wield a lightsaber.
The bottom line: The Droid Inventor Kit by littleBits is easy fun for both kids and adults. With step-by-step coding instructions for coding and circuit beginners, to freestyle coding for those who are more advanced, you and your family should be able to play with R2-D2 for years.
Buy the littleBits Droid Inventor Kit for $100
30. The Mover Kit

Ages: 8+ years old
App: Log on and create a Maker account, upload programs via USB
Power: Internal battery and charger included
Parental involvement needed: Minimal, once Mover Kit is assembled and coding basics are established
Coding concepts: Following commands, order of operations, macros, conditional statements, wait for input
How it works: With a small computer and motion sensors, the Mover Kit allows kids to combine physical activity and programming in this toy that can be worn like a watch.
The Mover Kit needs to be assembled; the instructions are pretty straightforward, but parents may or may not be needed at this step, since the components may seem delicate to kids' fingers.
The coding aspect of the Mover Kit is accessed via a Maker account at the Technology Will Save Us website. Programs coded in the Maker account are uploaded to the Mover Kit (and the Mover Kit is charged) with a USB cable. The Javascript that corresponds to the block code is also visible on the same page as the project.

Block code and the corresponding Javascript code for a Mover Kit program.
Programming for the Mover Kit is driven by the two types of data: the device's orientation and its movement (or lack of movement). Three primary "gestures" are recognized by the Mover Kit: "Pow", "Whirl", and "Shake".

Sensor input drives the programs in the Mover Kit.
Our experience: The Mover Kit is the perfect marriage of computer programming and non-screen play time. For the coding aspect, kids compose their programs on the computer by dragging and dropping the different coding elements into the project area. Each program is mostly driven by the sensor data of the Mover Kit; the information from the sensors (like which way the device is facing and the aforementioned gestures) is the input, and the light show from the LEDs embedded in the Mover Kit is the output.
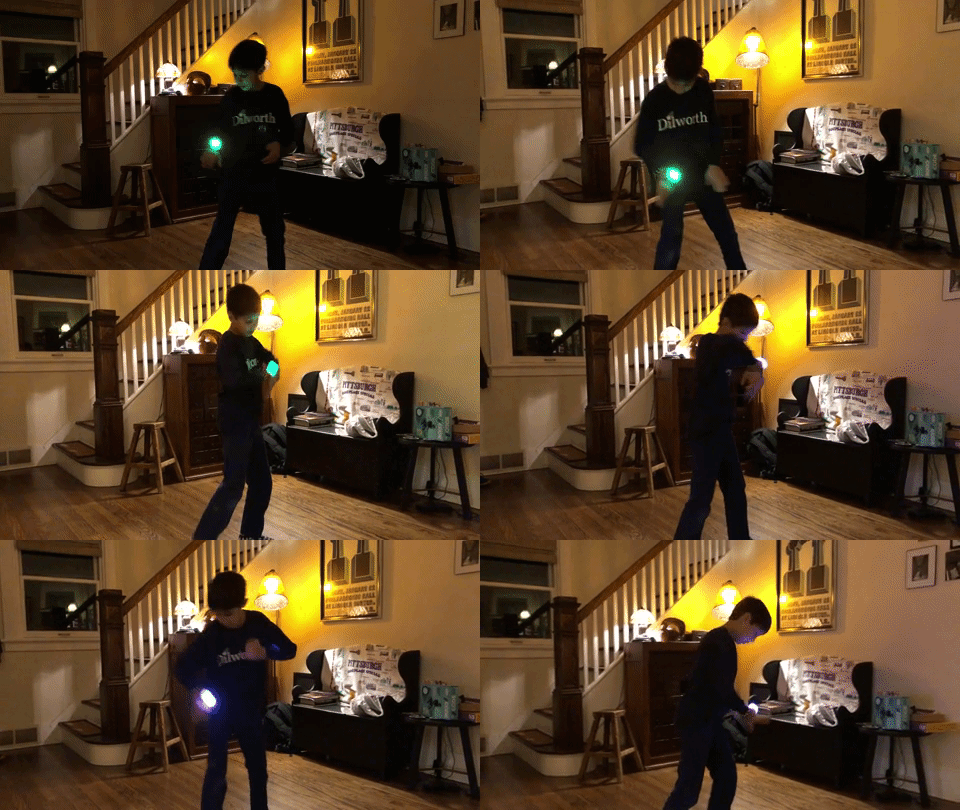
As the name of the Mover Kit implies, the sensors are activated by movement. Kids will enjoy seeing the ultimate fulfillment of their coding skills once the lights activate according to the uploaded programs. The Maker part of the Technology Will Save Us website has tons of neat sample projects, including shadow puppets and Gandalf's staff.
This is toy is correctly targeted at older kids who are just learning to code, as more advanced programmers may want more complex feedback than blinking colorful lights. That the coding is done on a website, rather than in an app, means that the programming aspect may not be as accessible to younger children.
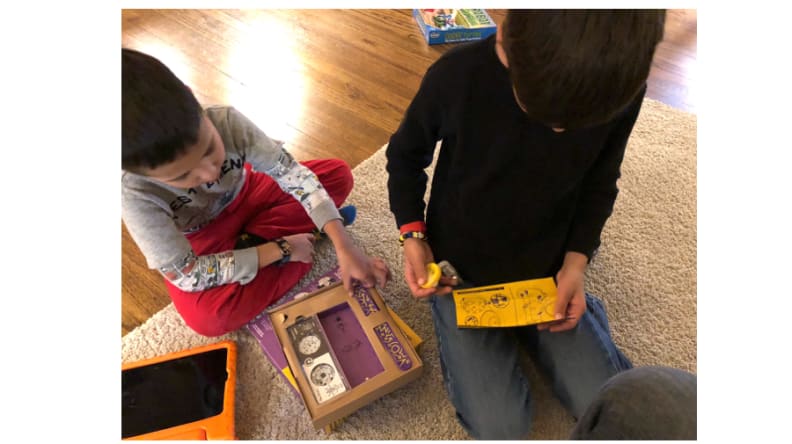
Kids and parents alike will both really appreciate the creative aspect of the Mover Kit; the device doesn't necessarily have to be worn on the wrist, but can be mounted anywhere with its velcro strap, not the least of which is inside a lightsaber (i.e. paper towel tubes).
The bottom line: The Mover Kit is the perfect intersection of creative and programming fun for older coders who are just starting out.
Get the Mover Kit for free by joining Club Make
31. JIMU Robot Buzzbot & Muttbot Kit

Ages: Ages 8+
Power: Rechargable battery, connected via Bluetooth
Parental involvement needed: moderate for robot assembly and coding basics, minimal once model is built and coding basics are established
Coding concepts: Following commands, order of operations, logical operators, functions, function calls, conditional statements, wait for input, variables, counting loops
How it works: The JIMU Robot Buzzbot & Muttbot Kit is a DIY robotics kit that, in addition to showing kids how to build and operate the standard models (the aforementioned Buzzbot and Muttbot), also encourages them to build their own models and explore the relationship between computer code and the real world.
Our experience: The Buzzbot & Muttbot Kit is a great gift for a child who has a bit more experience in coding and/or robotics, and is looking for a fun challenge. Unless your kid has tried some of the beginner JIMU Robot kits (e.g. Explorer kit, Tankbot kit, etc.), chances are that (s)he will need help with the robot’s assembly.

I chose to build Muttbot, and it took me 2-3 hours to fully assemble. The assembly directions (in the “Build” section of the app) are very thorough and involve little animations that really help to show exactly which pieces go where. In anticipation of long assembly times, the app actually allows you to bookmark or scroll to a given set of directions, a function that I really appreciated. That said, if you take a break during assembly, it may be difficult to get 8 or 9-year-olds to come back to finish the robot. If your kid doesn't have that kind of attention span, consider the aforementioned smaller, easier JIMU Robot kits.
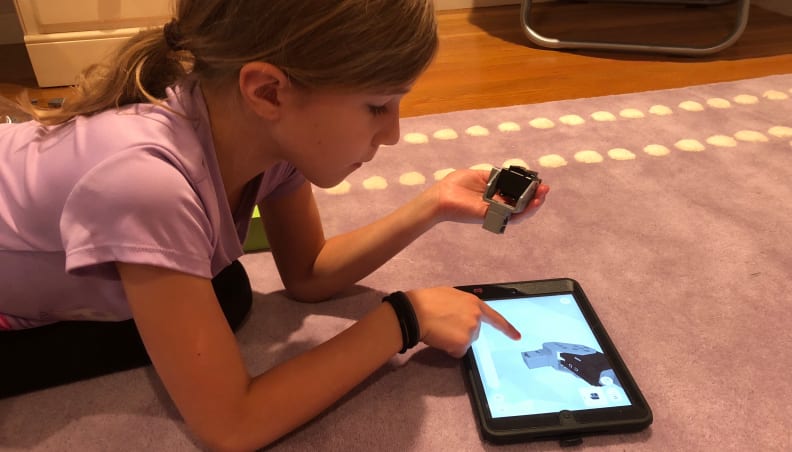
I would really recommend that an adult or older kid help with building the first JIMU robot; there are a number of very small pieces, as well as pieces that are only subtly distinct from one another. These two factors combine to make the task of building the robot a bit more difficult than those robotics kits aimed at younger, less experienced builders. On the other hand, to help with those smaller pieces, this kit cleverly includes a “fastener removal tool”, which really helps to speed up disassembly.
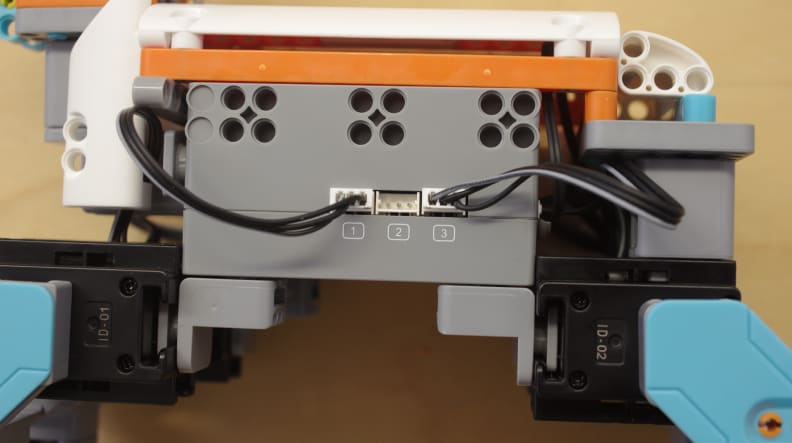
Additionally, connecting the servos (small motors that provide rotation) to the internal battery requires hand-eye coordination and hand strength that may surpass the abilities of younger children.
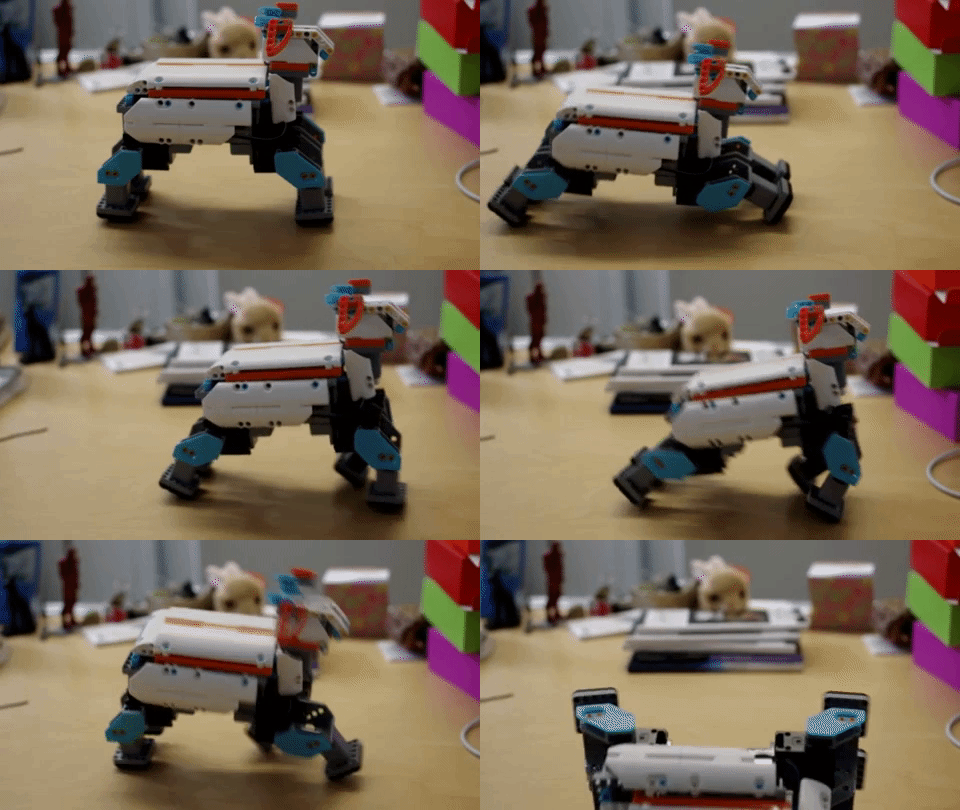
(On a similar note, I didn’t realize until a significant part of the way through assembly that the pieces actually snap together securely [even though it’s mentioned in the directions], so to prevent pieces of Muttbot falling off while the robot is in motion, push all pieces together until you hear a “snap” to ensure that everything is properly attached.)
Once the robot is built, though, your kid is in for a wild ride. In the JIMU app, there are three options for exploring Muttbot’s capabilities:
•**Control**, which allows you to drive aspects of the robot manually
•**Actions**, where you can try out the robot’s build-in actions
•**Coding**, where you can control the robot via coding with virtual blocks that “snap” together to form full command chains and functions
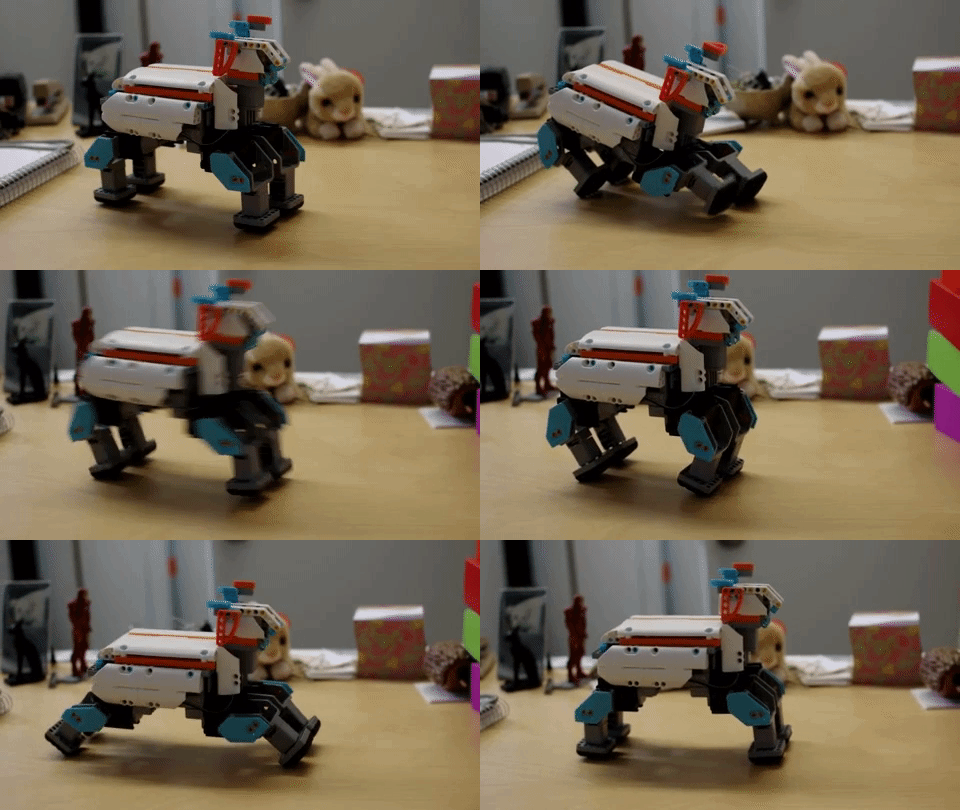
When I told Muttbot to “play” (in the “Actions” module), I was instantly surprised by how much movement was actually involved. Muttbot pranced like a champion breed at a dog show, and then jumped and stretched with the grace of a cat (albeit a robotic one).

I felt like the proverbial kid in a candy store when I was in the “Coding” section; there were tons of options for variables, control statements, actions, and sensors (sensors are not included in this kit, but in expansion packs). However, there are no coding tutorials available in the app, so unless your kid already has a solid understanding of coding logic, you may need to sit down and explain the purpose of each piece of code. Alternatively, start your child off with some of the more basic robotics/coding kits mentioned earlier in this article.
The “Control” section is for those who want to build and customize their own robots with the pieces in the kit. In this module, you can explore and hone your understanding of each aspect of the servos and other built-in actions, to the point where you can tell a specific servo to rotate a certain number of degrees in a certain time frame. In that same vein, for those looking for ideas about other fun models you can build with the Buzzbot & Muttbot kit, you can see other users’ projects (and add your own!) in the “Community” module in the JIMU app.
The bottom line: The JIMU Robot Buzzbot & Muttbot Kit has a steep learning curve, but it will really help the more advanced coders to flourish and inspire them to imagine and create robots beyond the basic models.
Buy the JIMU Robot Buzzbot & Muttbot kit for $70
32. //CODE Board Games
Ages: 8+ years old
App: N/A
Power: N/A
Parental involvement needed: Moderate, to understand the gameplay, minimal once gameplay and rules are established
Coding concepts: Following commands, order of operations, conditional statements, logical operators, functions
How it works: On the Brink, Robot Repair, and Rover Control all come with a small game board, game pieces, a mission book, and a solution manual. Each "level" is its own individual mind teaser, where only a specific combination of colors or moves is the correct solution.
In "Rover Control", kids must color in certain branches of a map, arrange charging stations, and account for different possible colored paths (i.e. conditional statements) to ensure that the rover hits certain checkpoints and ultimately reaches the stated endpoint for that level.
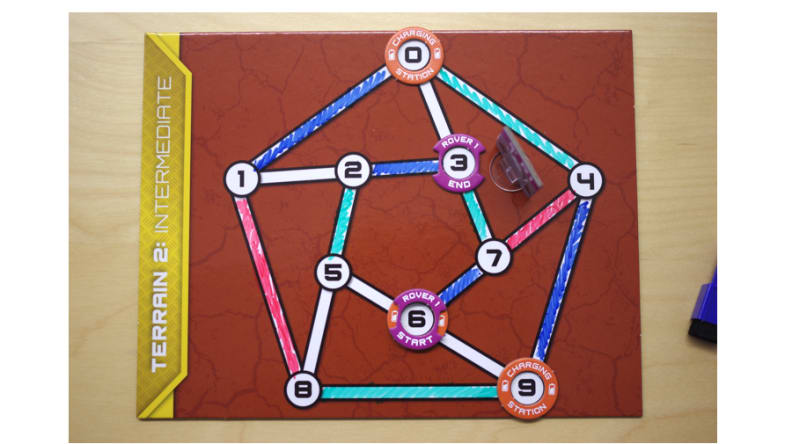
"Robot Repair" involves fixing a broken robot by turning on and off certain color switches so that the logical statements in the mission book for that level are satisfied.
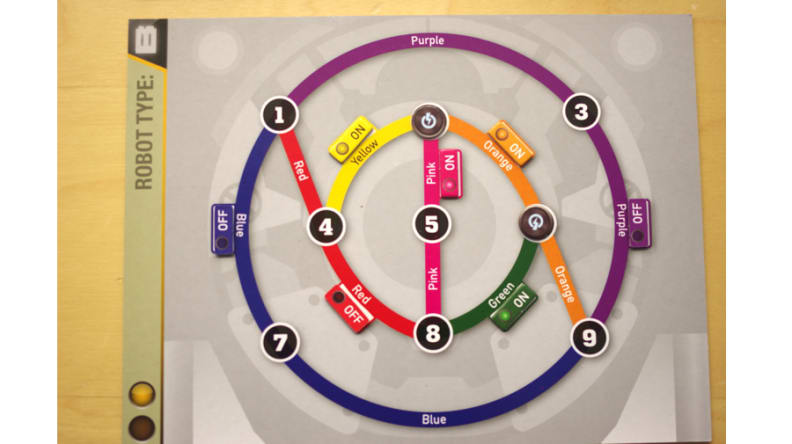
For "On the Brink", players must set up functions (made up of robot movements) corresponding to each colored space on the game board, such that the rover safely makes it to the end of the maze (without surpassing the aforementioned brink).
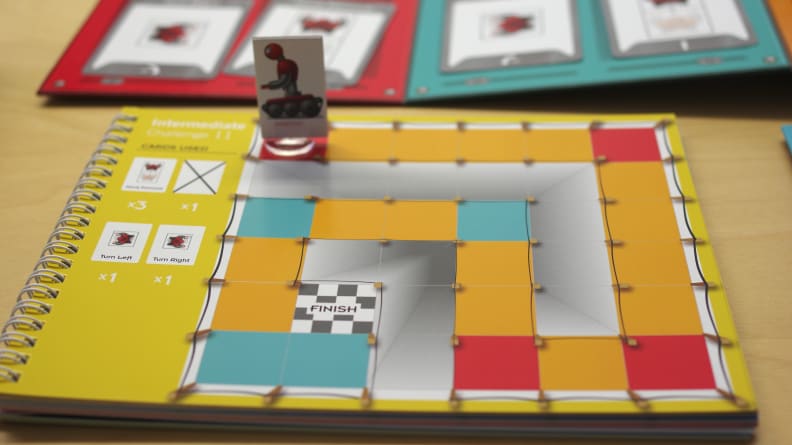
Our experience: On the Brink, Robot Repair, and Rover Control are three board games that are a great next step for kids that have outgrown the concepts in Robot Turtles. Each game really hammers home the various situations in which logical operators (Robot Repair), functions (On the Brink), and conditional statements (Rover Control) are useful.
The games are complicated enough that we recommend that a parent or an older adult take some time to get to know the rules and particulars before handing it off to a kid. The gameplay is challenging at first, but often, looking at the first few solutions is very illuminating. Thanks to the various rules and the increasing difficulty of the levels, these are definitely games that older kids and adults can play together. While only one player can play a single level at a time, it's fun for everyone to collaborate and try to solve each puzzle together. Adults both with and without coding experience will definitely learn a thing or two as well.

Our testers really enjoyed the fact that these are screen-free games. For those parents who limit screen time for their kids, these games are a great way to get some solid face-to-face quality time.
The bottom line: The //CODE games are a fun challenge for more advanced programmers and anyone who loves a good logic puzzle.
Buy //CODE - On the Brink for $20
Buy //CODE - Robot Repair for $20
Buy //CODE - Rover Control for $23
33. The Boolean Box

Ages: Ages 8+
Website: Directions for assembling this kit/learning to code in Scratch/learning to use a circuit board are located at the Boolean University link on the Boolean Girl website. You will need to create a login ID.
Power: Wall charger for Raspberry Pi computer; 4 AAA batteries for wireless mouse and keyboard
Parts required, but not included in kit: a computer monitor or TV with an HDMI input
Parental involvement needed: moderate for computer setup, circuit assembly, and coding basics; minimal once these basics are established
Coding concepts: Following commands, order of operations, logical operators, conditional statements, wait for input, variables, counting loops, using code to control circuit components in the real world
How it works: The Boolean Box kit is an amazing kit that introduces programming, circuit design, and logical thinking in fun, bite-sized lessons that will be fun for both new and advanced coders.
Our experience: I love the Boolean Box. I definitely wish I’d had it as a kid; it would have saved me a lot of angst in my “Electronics and Computers” class in college.
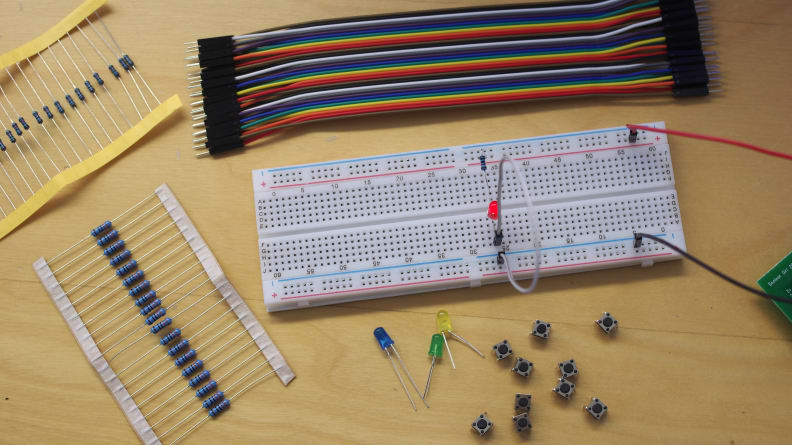
Components of the Boolean Box include a breadboard, wires, resistors, push buttons, and LEDs.
The Boolean Box comes with a Raspberry Pi 3 computer chip, a wireless mouse, a wireless keyboard, a breadboard (AKA a circuit board with many, many ports), wires, two types of resistors, buttons, LED lights, a chip with input/output ports, an HDMI cable, and a power cable. This may seem somewhat overwhelming at first, but easy-to-follow directions located at the Boolean University website calmed my initial panic and helped me to get Raspberry Pi up and running in no time.
With Raspberry Pi 3, the Boolean Box introduces young coders to a whole learning environment, not just a single toy with a single purpose. Once the computer is up and running, you’ll have access to Scratch (the primary programming language in this kit), EduBlocks (a module that allows kids who’ve learned Scratch to start programming in Python), 9va-pi (a vector animation and drawing program), and a terminal window (a way to control computer functions through typed commands, rather than operating the computer with a mouse).
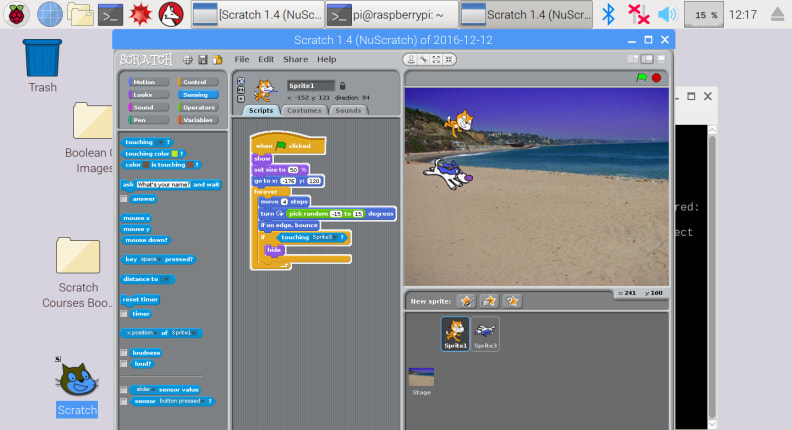
A Scratch coding game where a dog chases a cat.
Before jumping right in, though, I would encourage you and your kids to take some time to explore the ins and outs of Scratch first. From the main Scratch panel, you can investigate the different coding components (“Motion”, “Control”, “Looks”, etc.), the different "sprites" (characters that follow coding instructions on the screen) and backgrounds, and the x-y coordinate system that describes the location of those sprites on those backgrounds.
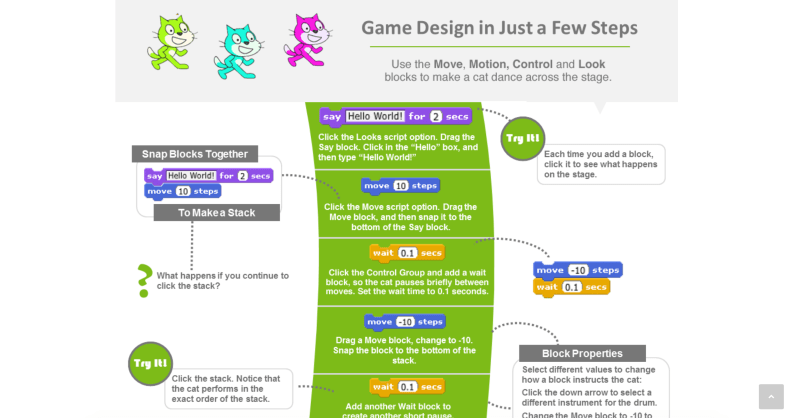
The Boolean University website involves clear and helpful coding and circuity directions.
The lessons on the Boolean University website are illustrative and thorough. What I really like about the lessons is that you can skip around as needed; if your kid is already an accomplished Scratch programmer, then he/she can breeze through those lessons and start building interactive games using the circuit board in no time. On the other hand, if this is the first time your kid is trying to code, the introductory lessons are pitched at just the right level.

Simpler lessons include making the cat sprite “dance” and creating a game where a dog chases a cat around the screen; more complex projects involve designing a simple circuit both onscreen and on the circuit board, as well as making a rudimentary up/down/left/right game controller that tells the cat sprite where to go.
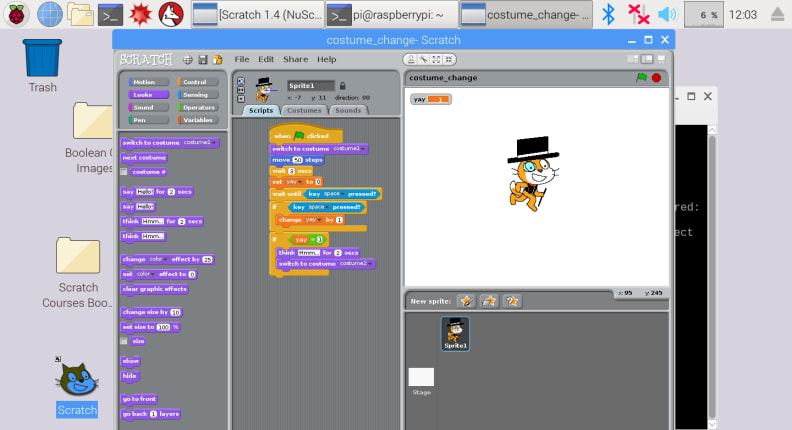
In addition to teaching coding concepts, there’s also a large art and animation component to this kit. Children can draw on top of existing sprites, or design new sprites altogether. Cleverly, the kit is also designed to allow coders to change the appearance of sprites through Scratch commands, as well as by manual drawing. I personally had a fun time gussying up the basic cat sprite so that it now had a top hat, a vest, and a monocle.
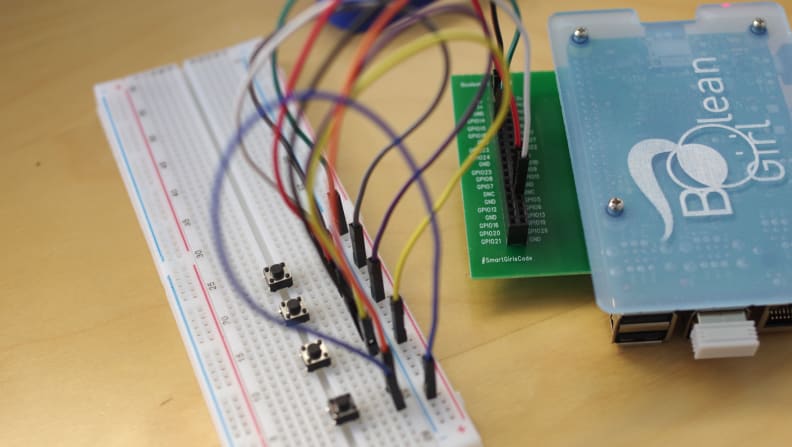
My favorite part of the Boolean Box, however, is the circuit board. Even though the circuitry components are very basic (LED lights, push buttons, wires, etc.), being able to write code that dictates commands to or receives input/output from a circuit board is going to be mind-blowing to kids encountering that phenomenon for the first time. It’s one thing to code a program on a computer; it is quite another thing to be able to affect (or see the effects of) that code in the real, non-digital world.
One thing I would advise is to be aware that the components of the circuit board may not look identical to those in the directions; my breadboard, chip with input/output ports, and resistors were different enough from the pictures in the lessons that it threw me off for a bit. If you’re not sure whether the circuit board is working or not, it might be a good idea to have a voltmeter or a multimeter on hand, just in case. While it was a bit confusing, it also forced me to troubleshoot, a skill that can only help kids later on in life.
The bottom line: By incorporating Scratch coding, circuit design, and artistic elements, the Boolean Box has something fun for everyone, and will be a blast for kids at all levels of coding proficiency.
Update: Boolean Box has recently released two new products, the Boolean Box Plus, which has all of the components of the original Boolean Box, but also includes a monitor, and the Boolean Box add-on Lights, Cameras, Sensors!, which includes a number of photo and light sensors.
34. Hack
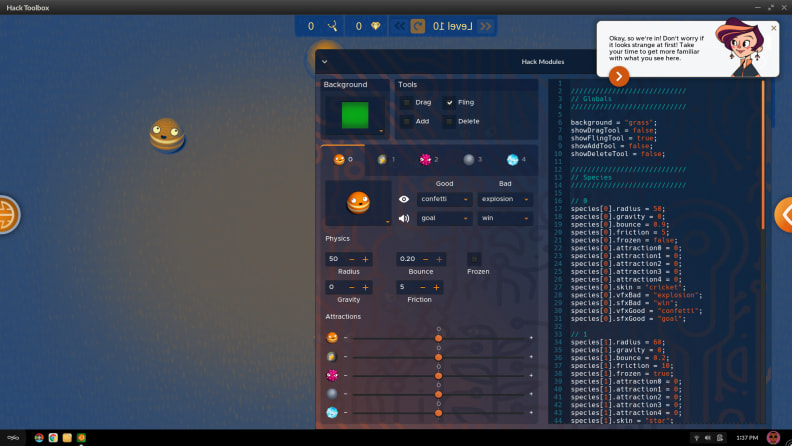
Hack is a series of coding games and tutorials built into an Asus laptop.
Ages: Ages 8+ years
App: N/A
Power: Laptop cable and ethernet dongle included
Parental involvement needed: minimal, once the basics are established
Coding concepts: Following commands, order of operations, functions, conditional statements, random number generators, arrays, debugging
How it works: Hack is an exciting (and growing!) digital environment full of coding tutorials cleverly disguised as fun games that will make your kid want to advance to the next level (and learn increasingly sophisticated coding techniques along the way). Hack is built into the operating system of an Asus laptop, and comes with its own ecosystem of highly relevant and useful apps.
Our experience: Hack is a novel and fun way of teaching kids to code. The Hack Starter kit consists only of a few directions and an Asus laptop.
Meet Ada, Riley, Faber, Saniel, and Estelle, who will be your guide as you explore the Hack environment.
In the home screen, there’s an orange tab that, when clicked, sends you to the Clubhouse, where cool characters like Ada (presumably after Ada Lovelace, one of the first computer programmers), Riley, Estelle, Faber, and Saniel guide you through the coding games and tutorials.
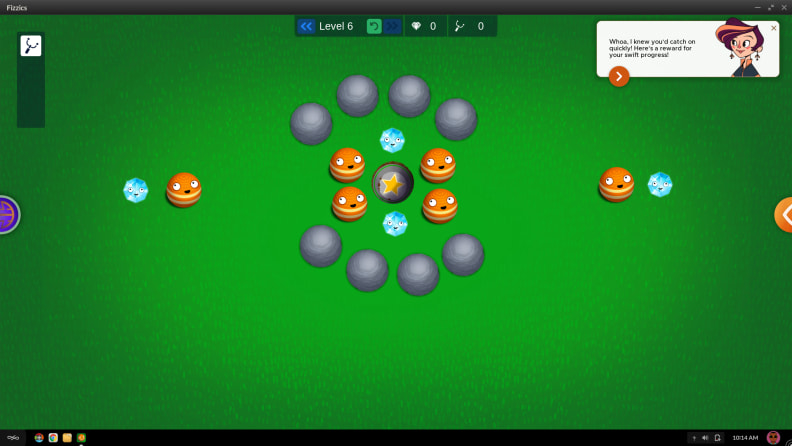
Fizzics is a fun Hack game requiring you to use a slingshot to launch a ball around obstacles, collect gems, and hit the target.
Your first stop is Fizzics, which is where you use a slingshot, among other tools, to bounce a ball around an obstacle course to collect gems and hit the target. While this game is basic at first, looks can be deceiving. By clicking on the tab on the left side of the screen, the entire screen is flipped so that you see the game interface from behind, revealing the programming that makes up the game.
Stuck on a level of Fizzics? Press the Hack button and manipulate the level's code so that you can win!
With a few button presses, you can make the bouncy ball have negative gravity, force the bouncy ball and the spiky obstacles to repel one another, or make the gems so big that they take up the entire screen. While these options are first presented as buttons you can click, eventually, Hack introduces the ability to view the actual computer code for this game, in the form of array attributes.
Naturally, your first thought is to manipulate the code to make the levels easier, and that is exactly what you’re supposed to do. By changing array values, you can work your way through the levels when you don’t have the option to just launch the bouncy ball with the slingshot. In real life, when you pause a game, change all the rules, and then resume gameplay, that’s called cheating. With Hack, it isn’t cheating: this is how players actually learn how to code. In most cases, you can only advance by manipulating the code behind the game on a level-by-level (or sometimes second-by-second) basis. The true genius of Hack lies in the fact that not only does it teach kids vital coding concepts, but it makes them feel like they’re getting away with something while they do it.
While spending time with the inhabitants of the clubhouse, you’re pulled in to the mystery of a rogue AI intelligence that is cat-shaped and is causing all sorts of shenanigans in the Hack universe. As you move through challenges that unlock new coding options, games, and puzzles, the plot continues to unfold; both the mystery and the new puzzles will definitely keep kids engaged; I know I was still thinking about some levels hours after I’d powered down the computer.
The other games and apps you explore on this coding journey are just as fun, challenging, and Hack-able as Fizzics.
System is a Hack app that provides kid-friendly explanations for the different parts of a computer.
The System app gives you clear and kid-friendly explanations for how a computer works.
Dodge asteroids and squids while collecting astronauts in the game of Lightspeed. If at first you don't succeed, hack the level!
In Lightspeed, you manipulate the game parameters so that your space shuttle more easily avoids deadly asteroids and undulating squids.
In Sidetrack, you only have eight moves to successfully navigate a maze full of holes and bug robots.
Sidetrack is a maze/puzzle game where you advance to the next level by coding in specific movements in sequence so as to avoid the bug robots and bottomless pits.
Sometimes, during the games, the computer would slow way down or freeze altogether; there were also times where the game guides provided by the characters in the clubhouse stopped working. Additionally, sometimes updates to games or the Hack operating system took a few tries to actually take hold. Typically, these problems were remedied by restarting the computer a couple of times.
For the most part, navigating the Hack environment is pretty straightforward; the clubhouse tab on the right side of the screen glows when there’s new information or challenges available. However, one polarizing aspect of Hack is that there is not a lot of guidance or hints provided if you’re not sure what the next step of the game is, or if you’re stuck on a level and don’t know how to advance. The Hack creators want their customers to work through each puzzle without help, so if you need assistance beyond the hints the characters drop, you’ll need to email the Hack support team to get access to documentation that can help you troubleshoot or move to the next level.
Sets of challenges in these apps are organized into “episodes”, of which there are currently four; Hack is a subscription service that, for $9.99 a month, will continue to provide your child with new adventures and more complex coding concepts.
Even if you don’t choose to use the subscription service, though, there are tons of built-in app options that are both amazingly useful and seriously fun. I downloaded The Passage, which is a coding adventure game in the style of Jill of the Jungle, a computer game I loved as kid.
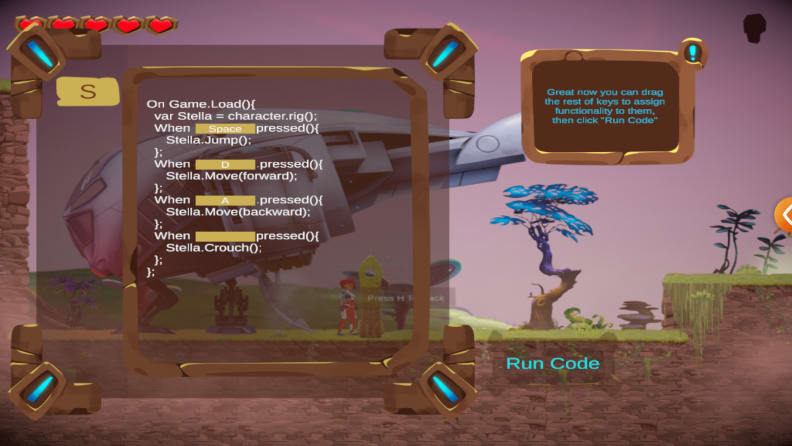
The Passage is an adventure game where you have to hack game elements to make it to the next level.
The Passage is a great place to learn coding by trial and error, since putting the wrong numbers or variables into the code can mean the difference between dying in putrid water or making it to the next level. While it’s not exactly low-stakes, the worst thing that can happen, like in all computer games, is that you start back at the beginning of the level.
Hack's built-in app library has something for everyone.
With everything from resume tools, textbook apps, lifestyle tips, animation tools, and games of the coding and non-coding variety, it’s easy to find something for everyone in Hack’s app environment.
In addition to the Hack programs, the laptop is also perfectly usable by itself. The Google Chrome browser is standard, and navigating through the tools and menus is fairly intuitive; it’s easy to see why this computer is recommended as a good first laptop for kids.
The bottom line: With or without the subscription service, Hack makes the process of learning how to code fun for both beginner and intermediate coders. The app ecosystem is a great bonus, and the laptop is perfect for those just starting to learn how to navigate a computer system more complicated than a tablet.
Update: Endless, the operating system on which the Hack laptop runs, has recently released a series of free games. The Terminal Two games have beautifully incorporated the different coding exercises so that they are just part of the fun gameplay, rather than boring lessons you have to sit through to get to the good stuff. Whether your kids are exploring Terminal Two at home or at school, be sure to check out the free educator's guide. One of these games is The Passage, one of the games I really enjoyed during my experience with the Hack laptop. These games are available to download for free on PCs, Macs, and iPads.
Buy the Hack USB for PC for $40
STEM coding toys for kids ages 10+
35. LEGO Education SPIKE Prime Kit

Who wouldn't want to build a LEGO break dancer? The challenge: code the robot's movements so that they are in time to the beat!
Ages: Ages 10+ years
Power: Internal chargeable battery, battery and charging cable included
Hardware: This app is compatible with Mac OS, Windows 10, Chromebook, iPad, and Android devices. Control unit communicates to app via Bluetooth or micro USB cable.
Parental/Teacher involvement needed: Moderate for novice coders, minimal otherwise
Coding concepts: Following commands, order of operations, loops, wait for input, conditional statements, variables
How it works: If your kids have some experience with programming, they’ll appreciate the new challenges and fun builds in the LEGO Education SPIKE Prime Kit.
Our experience: LEGO Education SPIKE Prime Kit is a LEGO Education kit that allows kids to explore the practical applications of computer programming, especially when it comes to engineering and data science problems.
The SPIKE Prime Kit is billed as a kit that is used in the classroom, although there’s no reason why a parent couldn’t purchase it and use it at home. It’s targeted at kids in grades 6-8, and is basically the intermediate LEGO Education coding kit that sits, difficulty-wise, between the LEGO Education WeDo 2.0 kit (aimed at elementary schoolers) and the LEGO Education MINDSTORMS kit (aimed at late middle school/early high school kids). (Note: While you can naturally use the LEGO blocks in any kit you like, the sensors in the LEGO Education SPIKE Prime kit are not compatible with the hub of the LEGO Education MINDSTORMS kits.)

Parents will love that the LEGO Education SPIKE Prime kit is well-organized, and designed to make it easy to find parts quickly and clean up afterwards.
The LEGO Education SPIKE kit comes with an internal battery that powers the Bluetooth hub (which doubles as a light matrix and a gyroscope), and it can be charged with the included micro USB cable. In addition to the usual neat LEGO blocks, this kit also includes two smaller motors, one larger motor, a color sensor, a light sensor, and a force sensor. As with most LEGO kits, there are replacement parts and an expansion kit available for purchase as well. Parents and teachers will also appreciate that the kit contains multiple trays with labels that indicate which parts belong in a given tray. In my experience, that definitely cuts down on the time it takes to find a specific piece, or the time it takes to clean up when I'm done.
After charging the battery, downloading the app, and connecting the hub to your device via Bluetooth or the micro USB cable, you’re ready to start assembling and designing code for exciting LEGO machines. Once the app is up and running, you can either follow the directions in the “Start” option to start figuring out how to work with the hub and the various sensors, or you can get onboarded with the help of a LEGO specialist.

These challenges, found in the "Extra Resources" section of the LEGO SPIKE app, ask kids to work together to arrive at novel solutions for LEGO-related tasks.
Kids can choose to follow the lessons in the “Units” section, which includes four separate sections dedicated to inventing, entrepreneurship, life hacks, and building robots for the First LEGO League. Other challenges that are more focused on teamwork and communication can be found in the “Extra Resources” section.

Each LEGO SPIKE challenge comes with an estimated time duration, some key summary phrases, and a video that gives kids an idea of what to expect in that specific lesson plan.
The various sections of the app are very well-organized and are clearly meant to facilitate learning; each challenge includes an estimated time duration (anywhere between 30-90 minutes), a few key words that tell you what the lesson plan is hoping to convey, and a video that summarizes the highlights of the challenge. For teachers looking for additional resources, detailed lesson plans and key objectives for each challenge can be found on the LEGO Education website.

The LEGO Spike Prime app gets both kids and teachers up and running on how to use the hub and the sensors with a few introductory exercises.
The shakedown exercises involving the hub and the sensors are informative and easy to follow. They’ll help get the adults in shape when it comes to supervising and helping out the students as they work through the lesson plans.
To be clear, the challenges in the app do not teach kids about coding basics; in these lesson plans, it’s assumed that the users have some level of familiarity with the different commands and the logic that underlies all computer programming. These lesson plans are mostly demonstrating how programming can help to solve real-world problems. The coding language in the LEGO Education SPIKE Prime app is based on Scratch, so even if this is your kid’s first coding kit, there are plenty of neat resources online that can get you up and running on Scratch.

In the LEGO SPIKE app, coding for the "Break Dance" challenge involved synchronizing motors and music.
After building the (really awesome) robots, kids are tasked with altering the existing code to meet certain challenges presented in the lesson plan. For example, when I built the Break Dancer, the main challenge was for me to figure out how to synchronize the turning of the Break Dancer’s arms and legs. Once that was accomplished, I had to create break dancing music and get the Break Dancer to show off its moves in time to the beat. More advanced coders will appreciate the option that allows you to add comments to specific coding commands in the form of sticky notes, as well as a real-time update as to the current orientation of the motor wheels.

Depending on the code you write in the LEGO SPIKE app, Kiki will make different sounds when it senses bricks with specific colors.
Other lesson plans tend to focus on communication and imagination. When I built Kiki, a robot who uses the color sensor to play certain sound clips, a story unfolded when the Kiki read different color bricks in a specific order. The coders are then asked to hypothesize what they think happened in the story based on the auditory clues, and then customize the code so that Kiki tells a new sound story when it encounters bricks with specific colors.
While kids can definitely work through these challenges solo, a lot of the different challenges are centered around discussions and brainstorming with a teammate; the kit itself recommends that a single LEGO Education Spike Prime kit is best used for 2-3 kids at a time.

Building instructions for the different LEGO robots can be found in the "Build" section of the LEGO SPIKE app.
For those looking for room to build their own robots and coding programs, head on over to the “My Projects” section, where you have access to all of the different coding commands (which cover the different sensors, the light matrix/gyroscope on the hub, and different commands related to light, color, sound, and motion). If you’d prefer to just build with LEGOs, the “Build” section gives you all of the directions for the various robots and devices mentioned in each coding lesson.
Note: While the hub does have a speaker, sounds in the coding projects may be routed to the speaker of the device you’re using for programming. If you don’t hear a sound when you expect to, double check the volume on your device.
I did have a few minor issues. I recommend keeping the battery for the hub charged as much as possible, since I had connectivity issues that the LEGO Education SPIKE Prime FAQ page assures me are related to the low battery status of the hub. The hub also disconnected every time my iPad went to sleep. If I woke it up quickly enough, the Bluetooth connection would be reestablished automatically, but otherwise, I usually had to turn it off and on again to re-initialize the Bluetooth pairing.
Lastly, and this won’t be a surprise to any LEGO users, but consider keeping a pair of needle nose pliers on hand for disassembly. I had real difficulty removing some of the axle pin connectors and other smaller pieces from the bigger LEGOs with just my fingers.
The bottom line: For middle-schoolers who know the coding basics and love building amazing things with LEGOs, you can’t go wrong with the LEGO Education SPIKE Prime kit.
Buy the LEGO Education SPIKE Prime Kit for $330
36. Let’s Start Coding Ultimate Kit
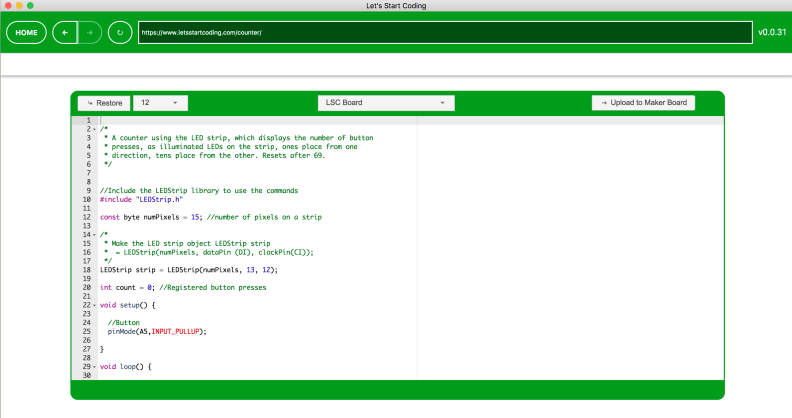
Ages: Ages 12+ years
App: Let’s Start Coding program (compatible with Mac, Windows, and Chrome operating systems)
Power: N/A
Hardware: This kit is easier to use with a physical keyboard.
Parental involvement needed: moderate, if kids are just starting to code and/or experiment with electronics, minimal otherwise
Coding concepts: Following commands, order of operations, conditional statements, loops, functions, input/output, wait for input, variables, debugging
How it works: The Let’s Start Coding Ultimate Kit is a no-frills kit that walks your kid through increasingly complex coding and electronics concepts through neat projects such as building a police siren and a clap on/clap off light system.
Our experience: The Let’s Start Coding Ultimate Kit is a great kit for self-motivated kids who just want to learn about electronics and computer coding without the window dressings of characters or animations.
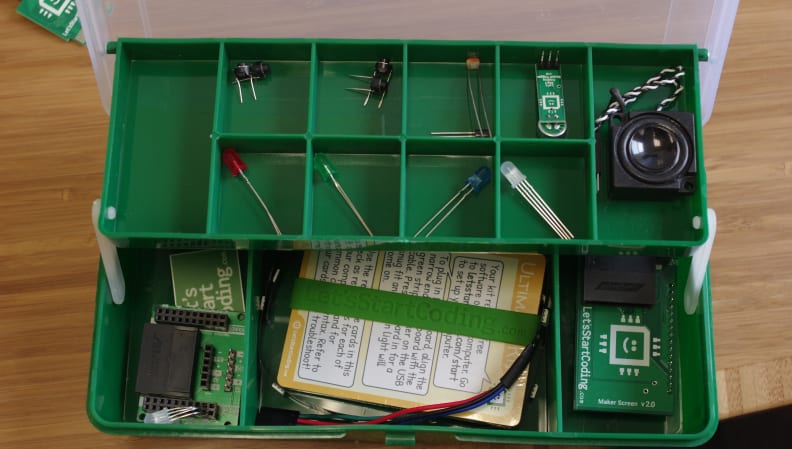
The Ultimate Kit comes in a plastic carrying case, and contains LED lights, push buttons, light/sound/temperature sensors, a speaker, an LED strip, two boards, an LCD screen, and an extendable USB connection. Also included in the kit are helpful cards that explain the name and purpose of each component.
After downloading the Let’s Start Coding program, you have three options: you can ensure that your setup is working correctly, work your way through fourteen lessons that establish the coding and electronics basics, or select one of a series of beginner, intermediate, and advanced projects to start with and adjust to your heart’s content.
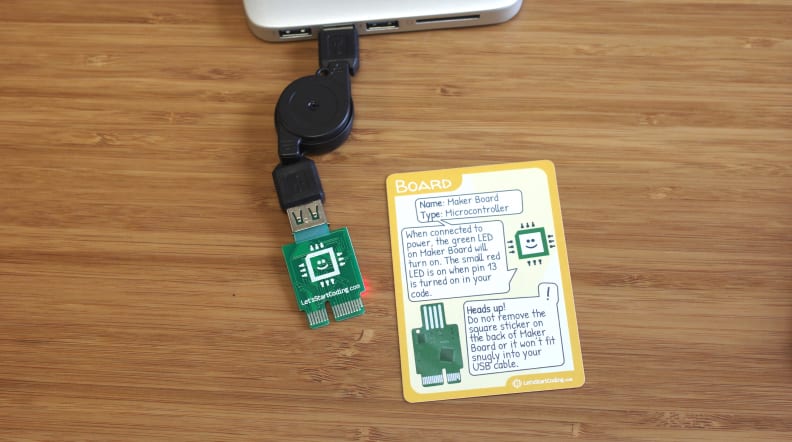
The setup instructions walk you through the process of plugging the Maker Board into your computer via the extendable USB cable and the logistics behind uploading computer code to the Maker Board. After a successful transmission of the latest code, a big “Success!” banner flashes across the screen, which is helpful for diagnosing connectivity issues.
The lessons are well-organized; however, if your kid has never seen a breadboard before, or if he or she doesn’t understand the concepts of pins, ports, and ground, I’d recommend walking your child through those basics before getting started with the lessons.
Each lesson starts with a list of the hardware and coding components used in the lesson. Clicking on a specific coding element will bring you to a glossary that explains the purpose, inputs, and outputs for each element. While the inclusion of a video showing the assembly of the electronic components is a useful visual, you can’t skip ahead or backwards through the video, you can only pause or play.
Scrolling further down, you’ll find the window in which you actually type and edit your code. The code for the most basic form of the project is already included; you just have to upload it. This code itself is based on the C++ coding language, and reads like an actual piece of code you’d find in real life—it includes line numbers and comments, in addition to the coding elements.
After the coding window comes the challenges, and this is where new coders get the chance to test their mettle. In earlier lessons, the challenges ask you to slightly alter specific components of the code, then upload it and see what happens. This trial-and-error approach is very valuable because kids can make changes to the code, then see how those changes play out in real time; it’s a powerful way to teach the purpose and subtleties of specific pieces of code.
In later lessons, you’re tasked with adding electronic components or otherwise noticeably changing the existing code. In addition to an understanding of the different electronic and coding components, these challenges require a serious attention to detail since changes often have to be made in multiple parts of the code to achieve success in any given challenge. Debugging challenges train your young coder to keep an eye out for syntax errors, and error messages are more helpful than they would be in real life.
After you’ve completed the challenges, there’s a second video section that walks you through the original code line-by-line. That video segues into other videos that discuss the specific functions found within the code, as well as hints as to how to solve the challenges. After the videos, a section elaborating on the new coding concepts is followed by a quick quiz that tests your understanding of the information conveyed in that lesson.
Once you’ve completed the lessons, you can start to use some of that newly acquired knowledge on fun projects like building an alarm clock or simulating a dice roll. While there might not seem to be many electronic components, with the help of the computer code, this kit can be used to produce an infinite number of fun projects, even beyond those described in the Let’s Start Coding program.
While there really isn’t a specific place you can go in the program to just start with a blank screen and write your own code from scratch, you can essentially pick any lesson or project, go into that code window, and write your code there. However, if you leave that window and return to it, any changes you made previously will not be saved.
Because the Let’s Start Coding system is made up of lessons, rather than the games or puzzles some other brands use to teach coding skills, I’d recommend the Ultimate Kit to parents whose kids really want to learn how to code. There is no reward system in place when your kid completes a lesson; he or she reaps the internal rewards of learning a new piece of code and applying it to the next lesson.
The bottom line: If your older kid wants to learn about computer coding and electronics, and he or she learns best in a more structured environment, the Let’s Start Coding Ultimate Kit is a great place to start.
Buy the Let’s Start Coding Ultimate Kit 2 for $125
37. Juku Light Games Coding Kit
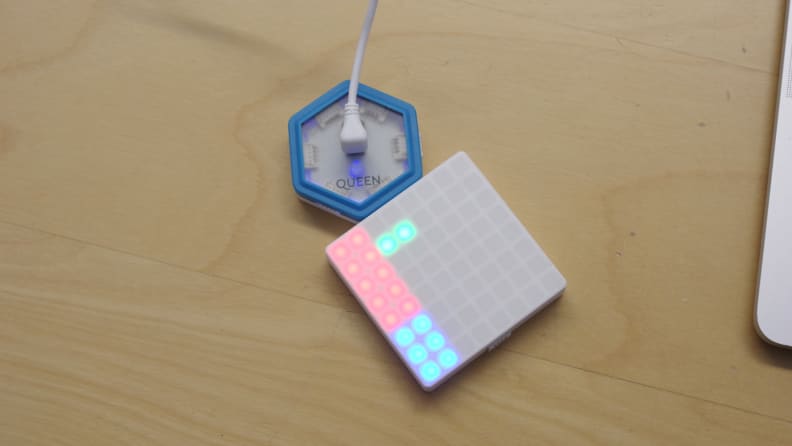
Ages: Ages 12+ years
App: Juku program (compatible with Mac and PC operating systems)
Power: Micro USB laptop connector is included
Hardware: This program is designed for use on an actual computer, rather than on a portable device.
Parental involvement needed: minimal
Coding concepts: Following commands, order of operations, conditional statements, loops, functions, input/output, variables, x-y coordinate system
How it works: The Juku Light Games Coding Kit allows the more advanced coder in your life to create and code his or her own arcade-style game using only a joystick, a microphone, a control unit, and an LED light grid.
Our experience: The Juku Light Games Coding Kit will be a real crowd-pleaser if your kid can already write programs in Scratch, or if he/she prefers to learn how to code in a more immersive environment.
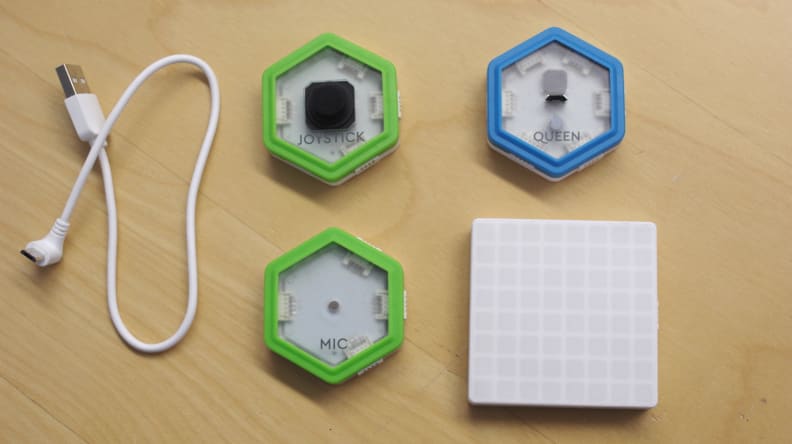
This kit includes four magnetic modules—a Queen module (the command unit), the Joystick module, the Microphone module (mostly used as a game button as the microphone registers the sound of the player tapping it and translates that into action in the code), and the LED light grid.
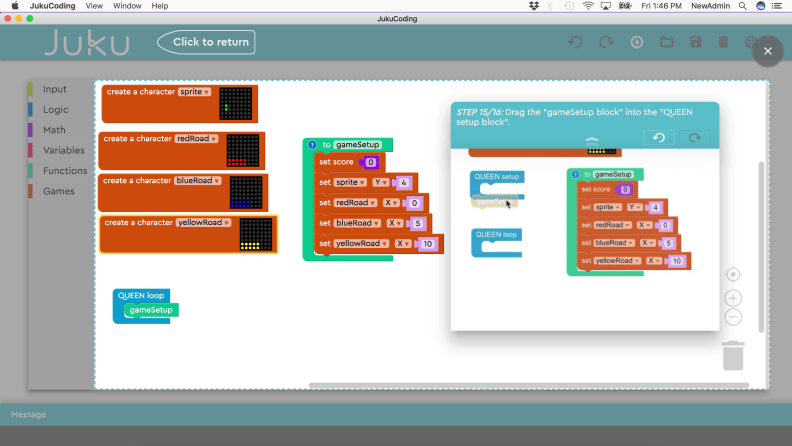
After downloading the Juku program (and potentially installing some additional drivers, depending on your operating system), selecting the correct kit, connecting the LED light grid to the Queen module (they attach magnetically), connecting the Queen module into the computer via the micro USB cable, and starting with the first tutorial, you’re immediately tossed into the deep end of the coding pool. Unlike the other coding toys on this list, there’s no step-by-step explanation of each coding concept and piece of syntax in these lessons; as either an advanced coder or an older kid, you’re expected to keep pace with the rapid instructions to pull different pieces from the set of Scratch coding blocks on the left-hand side of the program and follow the directions to assemble a specific program.
You get a chance to catch your breath when the program is assembled and uploaded; it’s only then that you’re able to figure out exactly what it is you’ve just coded. Once the code has been uploaded, the Juku program shows a short video clip that portrays what should be showing up on the LED light grid if you’ve done everything correctly, as well as a list of troubleshooting tips if your results don’t match those shown in the video.
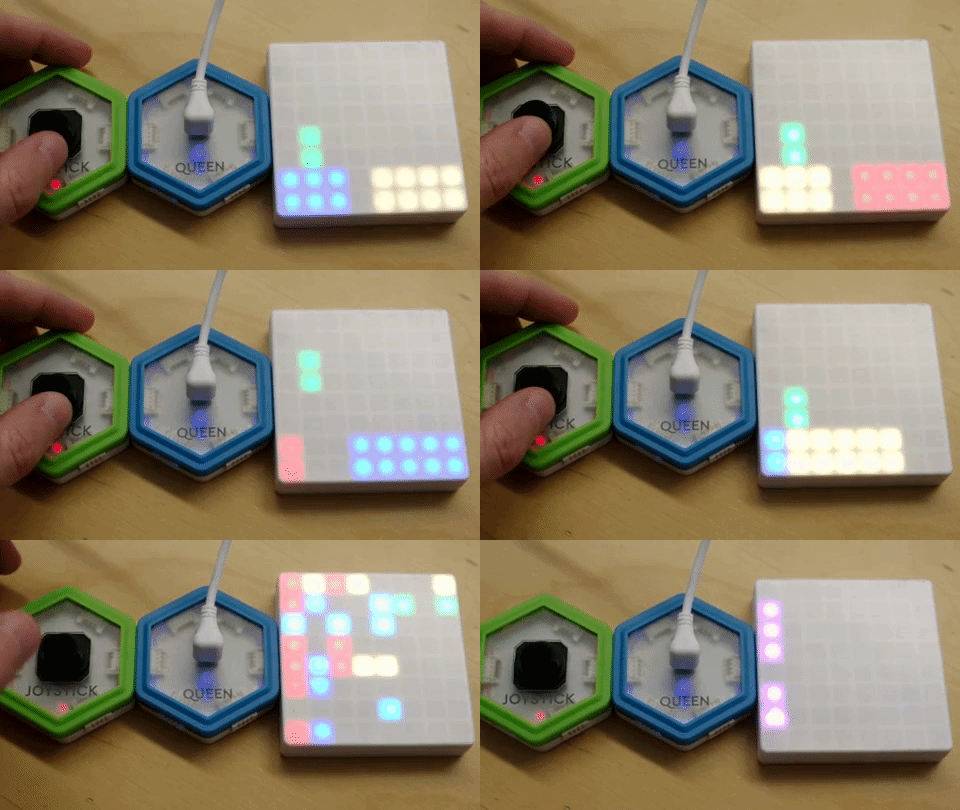
The first four tutorials help you to build basic versions of games similar to Space Invaders and Super Mario Bros. Once you’ve gotten a feel for how the tutorials work, you can start to explore the Juku coding environment a little bit (like the different categories of coding pieces, how to expand or shrink your coding environment, etc.) in between uploading programs.
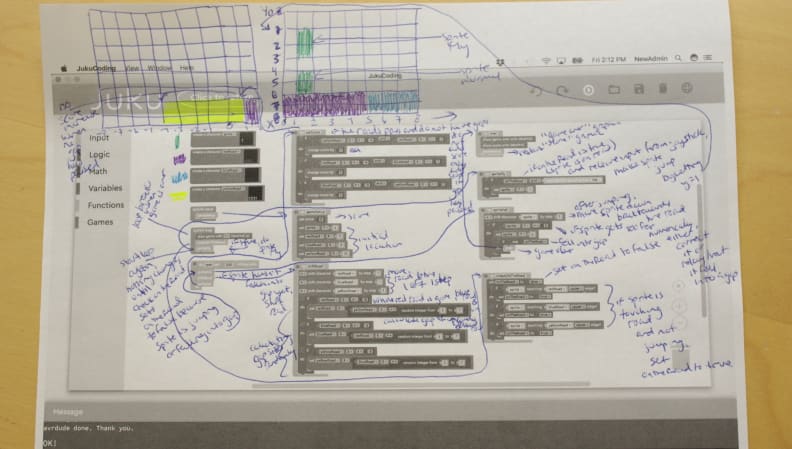
While the tutorials were neat introductions to what this coding kit is capable of, there’s very little coding guidance beyond that; users are encouraged to go back into the tutorial programs to figure out how the code works and how different functions relate to one another. This kit is not aimed at younger children or novice coders, but those who are looking for a challenge will really appreciate this style of learning. If your kid loves to play computer games, a setup where he or she can alter or create games on a tiny LED light grid will prove to be irresistible.
One minor quibble: during the tutorials, it’s not always apparent which modules should be attached to the Queen and LED light grid modules until after the code has already been uploaded, and the little video shows you how the modules should be arranged. However, all you have to do is attach the correct modules and re-upload the code, and it should work as expected.
The bottom line: If your kid has the coding basics down, and is looking for a new challenge, the Juku Light Games Coding Kit gives your kid the chance to explore game logic, and to see how coding concepts translate onto the light grid in real time.
Buy the Juku Light Games Coding Kit for $100 at Office Depot
Even though it seems like kids are born knowing how to operate an iPad, these coding games will help children of all ages to take their computer programming understanding to the next level. Once kids get going on these toys, they'll only have one question for the adults in their lives: can you keep up?
Prices are accurate at the time of publication, but may change over time.
