How to properly clean a mechanical keyboard
Keep your keys clean and clicking for years to come
 Credit:
Reviewed / Christopher Coke
Products are chosen independently by our editors. Purchases made through our links may earn us a commission.
Whether you’re a gamer who lives at their keyboard or are a casual clicker that enjoys scrolling social media, all keyboards get dirty eventually. If you’ve picked up a fancy mechanical keyboard, the last thing you want to see is it getting covered in the dust and debris of daily living. Worse, small particles can eventually make their way into their internal components, hurting their performance.
Fear not, because cleaning those keys is easier than it seems. Better still, you probably have most of what you’ll need in the house already. Cleaning your keyboard can be done in as little as 20-30 minutes, so set aside some time and get the job done right. Here’s how to clean and maintain your mechanical keyboard and keep those keys looking new.
What you need:
- Soft bristle brush
- Wire keycap puller (optional)
- Compressed air or electric duster (optional)
- Damp cloth
- Soap and water
Assess the mess
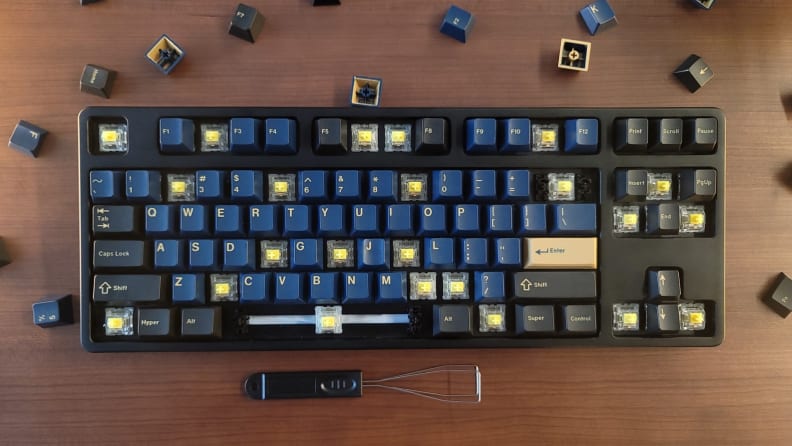
You can easily remove mechanical caps with nothing but your fingers—just pinch and pull!
Before getting started, the first step is to assess what kind of shape your keyboard is in. Surface-level dust and debris will be easy to spot, but you’ll also want to take a look underneath your keycaps. This will allow you to see how much has built up on the deck of your keyboard. What needs to be cleaned and how deeply will decide your next steps.
If your keyboard uses “floating keys” like many gaming keyboards, this step will be easy. Floating key keyboards lack a top case and allow you to see the switches underneath the keycaps, usually to show off RGB backlighting. In this case, lift your keyboard to eye level and examine it from the sides.
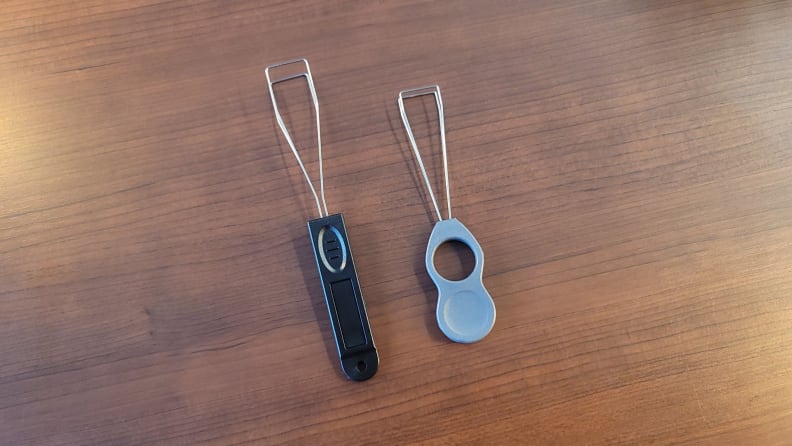
If your keyboard does not allow you to see the switches, you’ll need to remove keycaps to see what’s hiding beneath. Many keyboards come with plastic keycaps pullers such as these. While these work fine, they can permanently scratch your keycaps, so try to avoid them if possible. Instead, we recommend using a wire keycap puller.
It’s safer for your keyboard, faster to use, and is sometimes sold in a bundle with cleaning supplies. Of course, it’s also possible to remove them by hand (pinch the sides and pull up) but this is more challenging and time-consuming. Simply pull a handful of keycaps off across the keyboard and take a peek at the condition underneath.
It’s important to note that if you’ve spilled a drink on your keyboard, basic clean-up and maintenance may not be enough to rescue sticky or non-working keys. In this situation, you should immediately unplug the keyboard, dry the spill and follow the steps below. If the issue persists, you may need to replace the affected switches, which is more involved and can require soldering.
Maintain the clean
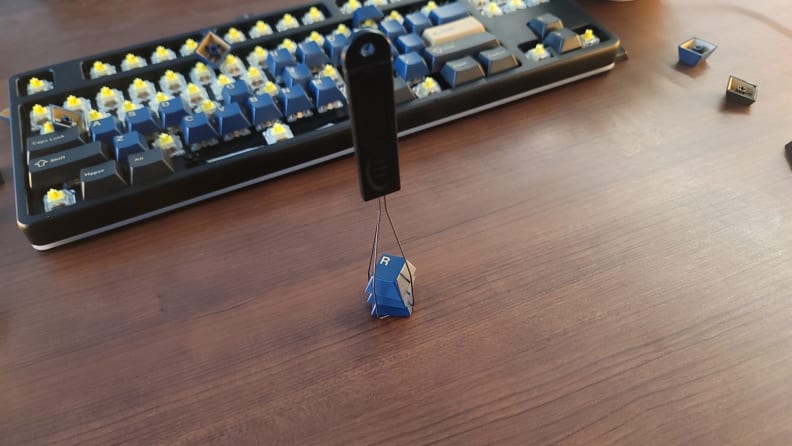
If you need or prefer to use a tool to remove your keyboard's keycaps, a wired keycap puller is best.
If all you have is a little surface-level dust, cleaning your keyboard will be fast and easy. Since your keyboard uses sensitive electronic components, avoid using household dusters that rely on static. While a single shock isn’t likely to wreck your keyboard, there are no guarantees, so it’s better to play it safe.
Instead, wipe the entire surface with a damp cloth. Begin by wetting a rag and squeezing out any excess water. Wipe any visible surface, including the keycaps, back, and sides of the keyboard, and anywhere else you may have dirt build-up (such as the cable). If you’re worried about germs, diluted alcohol can be added to the mixture. Avoid using anti-bacterial wipes if your keyboard uses a textured top plate as they can leave unsightly strands that will need to be picked off later.
With that done, turn your keyboard upside down over a trash can and use your palm to gently hit its back (like burping a baby). This should dislodge most of the larger particles. Then, use a can of compressed air (or your own lungs) to blow underneath the keycaps to get rid of any remaining dust. For even faster clean-up, an electric duster is an effective option.
Swab the deck
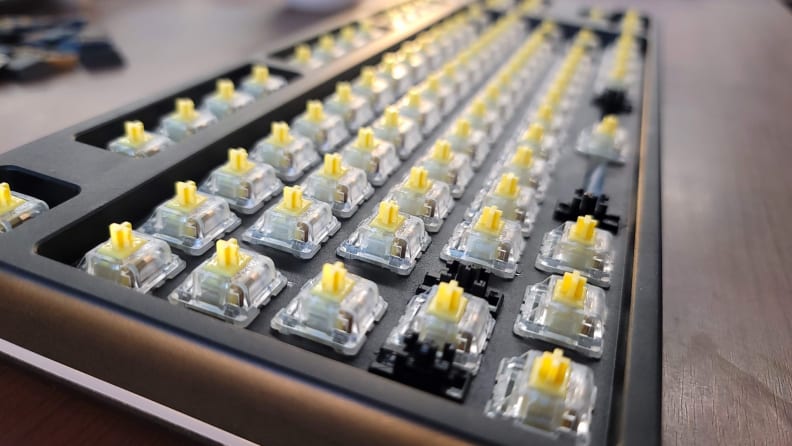
If your keyboard needs more than a simple dusting, remove all the keycaps.
If there is still stubborn debris, you’ll need to take things to the next level. To do that, you’ll need to remove all of the keycaps. Take note of the larger keys and how they connect to the stabilizers below. Usually, this is as simple as pressing onto an additional two dummy switches (moving plastic pieces with the same cross top but no actual switch underneath), but can sometimes involve snapping onto or hooking a wire to sit properly.
With the keycaps removed, you’ll be able to see the entire plate and all of the switches. At this point, most leftover dust can be easily blown out over a trash can, but larger particles can sometimes get caught along the edge of switches. You can pick these out with any fine point tool, such as a toothpick, but the better solution is a nylon-bristled brush. Sweep out anything that remains.
While you’re there, it’s a good idea to wipe the deck using a damp rag. This will remove any residue that might not be visible to the naked eye. It’s safe to clean the tops of the switches, just take care not to press any water into the crevices. Gentle wipes will effectively get the job done.
Clean those keycaps
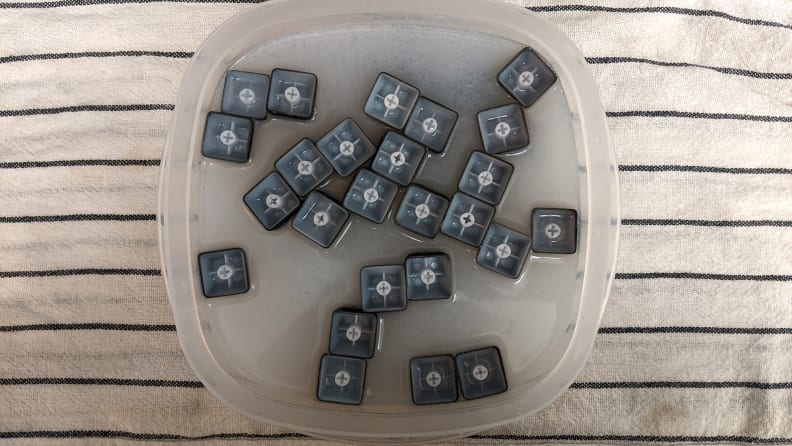
The easiest way to clean your keycaps is to remove them all and put 'em soapy water.
Before putting the keycaps back, give them a closer look. Keycaps have a tendency to pick up finger oils which can accumulate over time. This is especially true of white keycaps which will discolor with extended use. If your keycaps are in need of a scrub, this is the perfect opportunity to do so.
Do not put your keycaps in a dishwasher or use any other device that uses water too hot to touch. Excess heat can cause ABS plastic (common to gaming keyboards and many affordable mechanical keyboards) to soften and potentially warp. Keycaps should always be cleaned and dried by hand.
Put the keycaps in a bowl of warm soapy water. Use a rag to scrub the top and sides of each keycap. You’ll see the results right away on white keycaps that have begun to discolor but others may need to be dried to assess your progress. When you’re done, place the keycaps face-up on a dry towel and allow them to completely dry before reinstalling them on your keyboard.
Why bother cleaning your keyboard?
If you like to eat at your desk and can't remember the last time you cleaned your keyboard, you probably need to clean it!
It might seem silly to devote so much time to cleaning your keyboard, but it’s worth the effort. For many people, a keyboard is the most vital tool on their desk. While it may not stand out when it’s in good shape, a dirty keyboard is one that doesn’t feel good to use, mentally and sometimes even physically.
It’s important to remember that the biggest benefit of a mechanical keyboard—its mechanical switches—also makes it a significantly more complicated piece of tech. A full-size keyboard has no less than 104 moving parts that can each get gunked up by dirt and grime. Though it doesn’t always happen, if an errant crumb makes its way inside of a switch, that key can become scratchy, sluggish, or even miss keystrokes.
Keeping your keyboard clean doesn’t take long and doesn’t need to be done all that often. But when it does, it’s best to do the job right. With proper maintenance, a mechanical keyboard can last years into the future, looking and performing its best.

