Home brewing with my dad is the perfect Father's Day gift—and you can do it, too
Raise a glass to many misadventures
 Credit:
Reviewed / Mark Brezinski
Products are chosen independently by our editors. Purchases made through our links may earn us a commission.
Here comes Father's Day again, and along with it, the big question of how to celebrate him. The old standbys, like a tie or socks, are—let's face it—boring gifts, and even unique ones may not be as special as time spent with the old man. He may just prefer some craft beers and conversation, which is why this year I decided to spend some quality time with my dad and a home brewing kit.
My dad has been brewing beer from kits for a few years now, ever since he retired. It's the perfect way to spend a weekend afternoon (and then a few more afternoons, once the beer ferments) together. I caught up with him recently to get him to show me how the whole home brewing process works.
The best elements: yeast, hops, and Dad knowledge
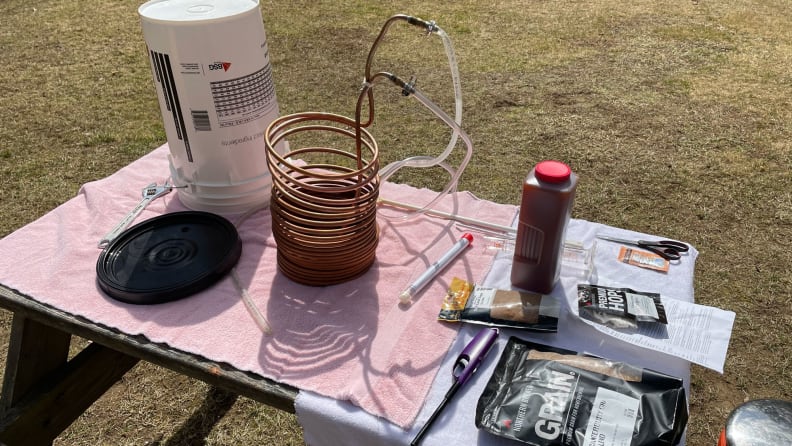
All the ingredients you'll need to brew beer (dad not included).
First thing's first: My dad's been doing this for a while, so he has some equipment he's purchased that's unnecessary for a beginner. Many craft brewing kits come with all the gear you'd need to make the beer—buckets, tubes and all—so pick up one of these and you won't have to worry about any additional hardware.
For reference, we brewed the Northern Brewer La Petite Orange. Spoiler alert: It came out great.
There's only two steps of prep work before the brewing begins. Leave the pack of yeast in a warm place for about three hours, which gives it ample time to shake off the cold and get ready for its job further down the road.
Then sanitize your equipment. Don't be scared; it's not hard. Basically, you fill up a bucket with water, add some sanitizing liquid, and give everything a few dunks. We used a "no wash" sanitizer, which is safe to ingest, but it can feel slightly jarring to dip a sudsy piece of equipment into something you'll eventually drink.
Things get heated
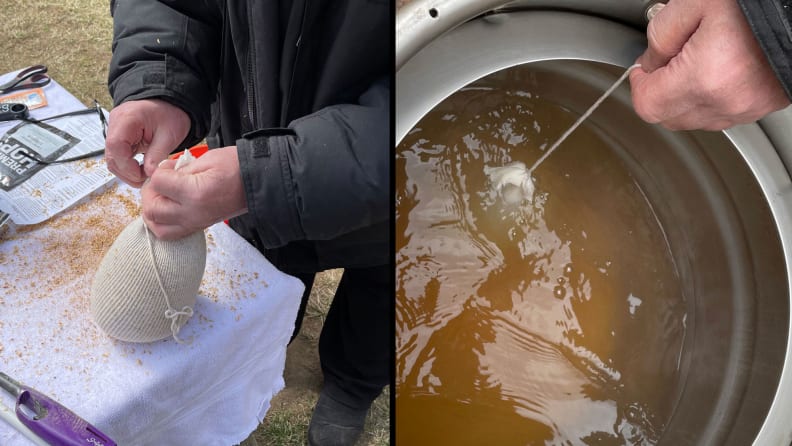
Ideally the grain would stay inside the steeping bag. Otherwise, this step is easy: Just keep dunking the bag into the boiling water and watch it change from clear to caramel.
Once the yeast is good to go, start boiling the water (our recipe called for 2.5 gallons, but some kits can make up to 5 gallons. We used a giant, propane-fueled kettle, but any pot that can hold enough water does the job.
Once the water is on the burner, start getting your grains ready. If your kit comes with uncrushed grains, you'll need to crush them before putting them into your mesh steeping bag. If they're already crushed, you're good to go.
If you've ever brewed tea before, this feels familiar—only giant-sized. You dip the grain-filled bag into the water and keep it moving around while the water comes to a boil. Once the water boils, you're done with the grains. I was ready to toss them, but Dad told me to hang onto them for his tomato garden—apparently they're great nutrients. Who knew?
Add sugar and malt and everything nice
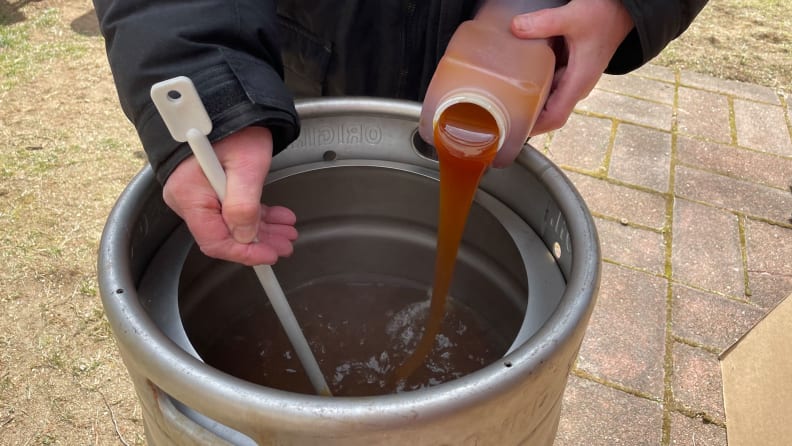
Keep stirring as you add the malt: It will help keep the sugars from scorching.
Dad says it's time to kill the heat and add the sugars, starting with the malt. At this point, turning off the heat is really important, because malt is a sugar and accidentally scorching the malt can really mess up its flavor.
Keep stirring as you slowly add the malt to ensure it dissolves evenly as it drizzles in. This is necessary because there's a chance undissolved malt will sit on the bottom of your kettle.
Congratulations to you and us! We've upgraded to a wort, which is the brewer's term for unfermented beer.
Our afternoon takes an unexpected turn
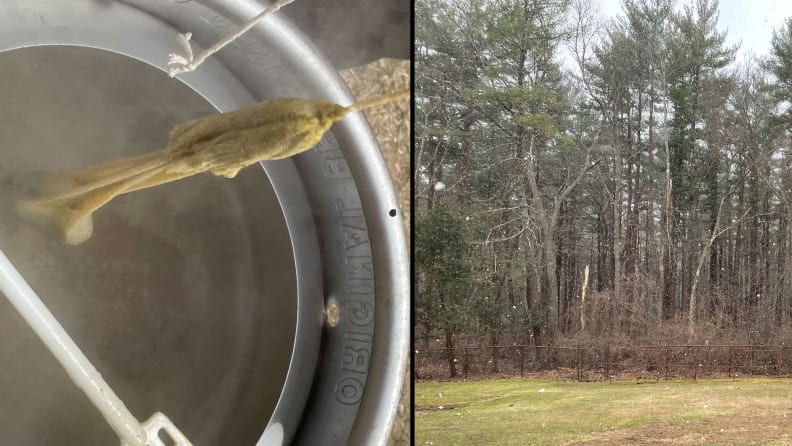
Ideally the hops would stay inside the steeping bag. And the weather won't pull an abrupt seasonal 180°.
Return the wort to a boil. It's time to add the hops—again, in a steeping bag—and repeat the same process as you've done with the grains, only for longer. Our recipe called for an hour.
While we waited for the magic to happen on our warm, sunny April afternoon in Boston, it suddenly started snowing. A rarity for sure, and even more rare to hear it accompanied by extreme wind and thunder.
My dad wondered aloud if this was tornado weather, but neither of us know what tornado weather looks like. We discussed if we should abort the brewing process, because this was some serious weather. But no! We had to continue. It was us versus the elements, and we refused to give up.
"If we hear a tornado we'll go inside." My dad shrugged. The battle lines had been drawn.
While our afternoon didn't become a casualty, our hops did. They somehow got loose from the steeping bag. The liquid was fairly opaque, but we could see bits of hops swirling to the surface as we stirred. I initially worried that our batch of beer was ruined.
"It'll probably be fine. We'll just make sure to run it through a fine strainer afterwards," he said. A seasoned pro with nerves of steel.
Thankfully, our soon-to-be-beer survived, and the thunder-snow disappeared into a warm, sunny day again. We only briefly celebrated our victory over the elements, because now it was time to cool the wort and we had to act fast.
Cooling off
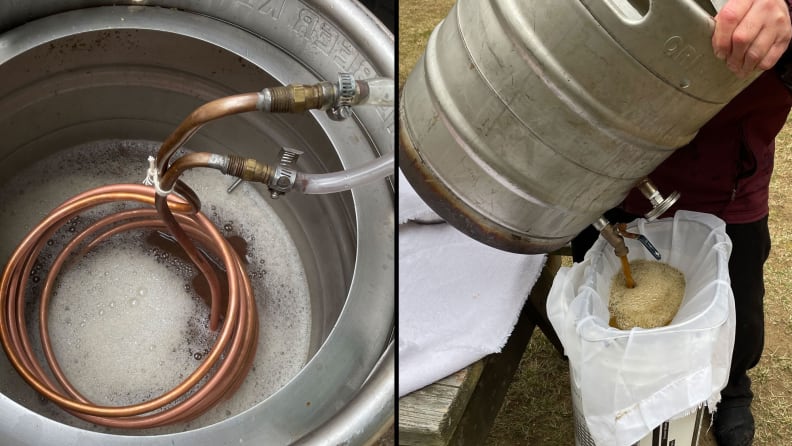
The wort chiller will rapidly cool off your brew by piping cold water through it. Once you've brought down its temperature, it's time to transfer it to the fermentation bucket. Straining is recommended, even if your hops bag didn't explode.
Apparently, when brewing beer, you need to accelerate the cooling process of the wort by either by putting your kettle in an ice bath in the sink or by using a wort chiller (and no, I'm not talking about the liquid nitrogen you'd use to remove a skin blemish). Cooling the beer down quickly will help the proteins in the wort clump together so you can filter them out easier. It keeps your beer from looking cloudy.
And, since my dad has the hardware, we chose the latter.
Wort chillers work by hooking one end up to a water source and sending cold water through it. It winds its way down through the coil and back up again, before being discharged out a tube on the other side and into your sink (or, in our case, onto the ground). My dad warned me to be careful of the outlet tube: The water comes out scalding at first.
Once everything's cooled, all that's left is transferring the wort out of the brewing kettle and into your fermenting jug. You want to make sure you strain the mixture through cheese cloth—just to get rid of any grains or hops that escaped their bags. It happens to the best of us.
Fermenting: Set it and forget it
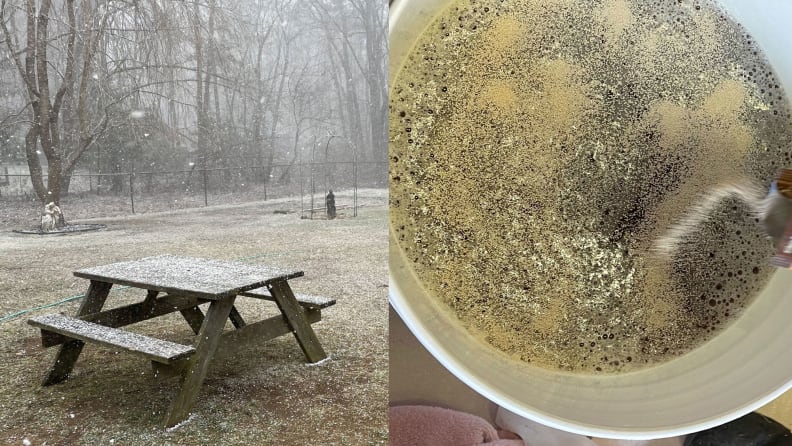
We finished our brewing in nick of time. Fortunately, we'd kept the yeast inside, so it was still warm and began fermenting immediately.
Just as we were wrapping up our brewing, the thunder-snow returned. Fortunately, the final touches needed to be done inside anyhow.
With the wort safely in your fermenting jug, there are only a few more steps before storing the beer away for a few weeks to let the yeast work its magic.
We added a few gallons of cold water to help dilute our concentrated wort, and then stirred it vigorously, because during this process you want to make sure you're aerating the mixture. You can also use an aeration system, which adds in air as it syphons the wort into the fermenting jug.
Sprinkle the yeast on top and mix it in. It should start bubbling almost immediately.
"See how fast it starts working? That's why you take it out of the fridge beforehand. Otherwise it takes a while to get going," my dad explained.
Time to seal the fermenter. Make sure the lid is on tight and don't forget to fill the one-way valve with some water. My dad pointed out he actually uses vodka instead, as it ensures the seal will stay sterile. We'll be leaving the jug in a warm, dark place for three weeks, so there is a small risk that there could be microbial growth in the one-way valve during that time. I think this is a negligible optimization, but my dad is extremely meticulous about his hobbies.
Brief bonus beer bottling time with Dad
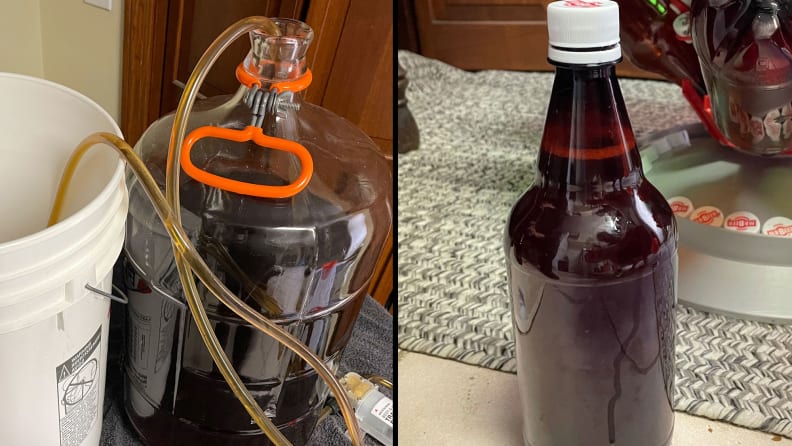
We used an aeration system to simultaneously syphon over the wort and get some air mixed in for the yeast. Just a few more weeks and these bottles will be ready to drink.
About three weeks after brewing day, it is finally time to bottle your beer.
Before our own transfer, we had to cook up some priming solution, which is just sugar boiled in water. This helps jump-start the yeast.
Syphoned the beer out and into bottles. There will be a ton of yeast sediment at the bottom of your fermenter, so be careful when you get down to the dregs. We formed a little assembly line and the work went by quickly. Before I knew it, our batch of beer was sealed up in 22 reusable 1-liter bottles.
One last wait of two or three weeks before this beer is finally finished.
Enjoy your beer and a happy Father's Day
A third and final congratulations are in order: You've successfully brewed, fermented, bottled, and cracked open your first beer you've co-brewed with your dad! All that's left to do is drink them with good company—and I think I know just the guy.
I was both nervous and excited to take my first sip of our beer. Had the great hop escape made it overly pungent? Was there some other factor we'd failed to consider? No. It was delicious. Better than any craft beer I'd ever had. And it came with memories of how we'd definitely narrowly escaped a tornado.
The product experts at Reviewed have all your shopping needs covered. Follow Reviewed on Facebook, Twitter, Instagram, TikTok, or Flipboard for the latest deals, product reviews, and more.
Prices were accurate at the time this article was published but may change over time.


