Introduction
What was missing from the G1, though, was the ability to shoot video, a void that has since been filled by several video-equipped SLRs. Now, with the Lumix GH1, Panasonic responds to the SLR video world with a bang, delivering a camera with the manual control and autofocus ability you'd expect from a high-def camcorder, sadly lacking in video-equipped SLRs to date. The 12.1-megapixel GH1 is priced at $1499.99, a hefty chunk of change in this economy, but that hasn't stopped fans from enthusiastically buying snapping up the first few production models too quickly for Panasonic to keep up with demand. In the following review, we'll explore the pros and cons of this groundbreaking camera, with the experts from our sister site CamcorderInfo.com providing an authoritative comparison not only between the GH1 and two SLRs, but also weighing it against a first-rate high-def camcorder.
Design
Front
{{section_header}}{{section.name}}{{/section_header}}
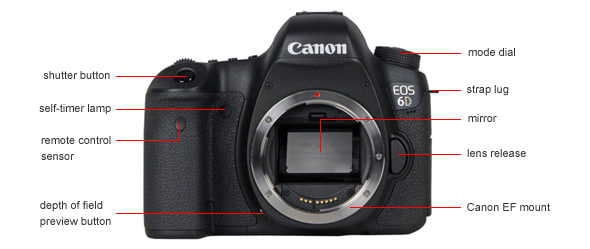
Back
{{section_header}}{{section.name}}{{/section_header}}
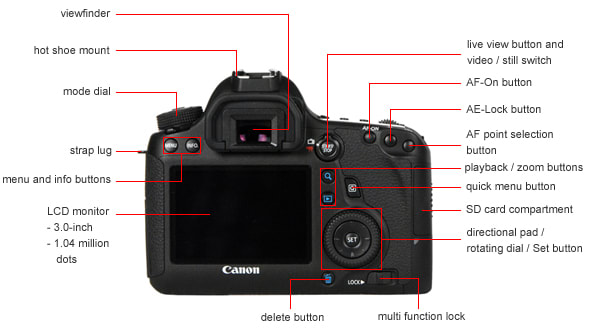
Sides
{{section_header}}{{section.name}}{{/section_header}}
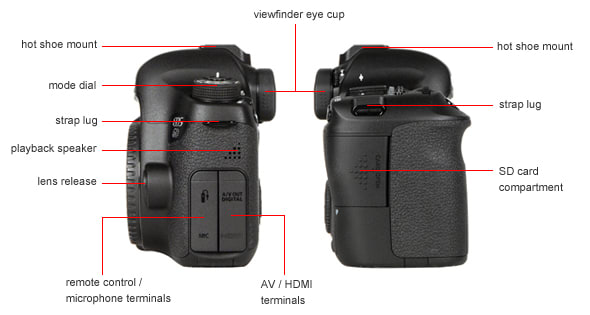
Top
{{section_header}}{{section.name}}{{/section_header}}
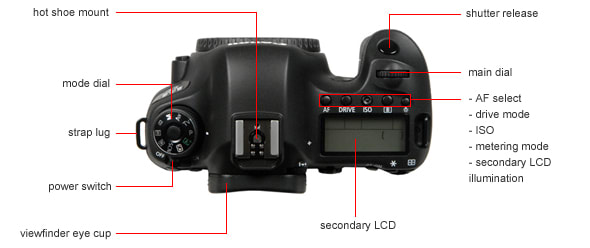
Bottom
{{section_header}}{{section.name}}{{/section_header}}

In the Box
{{section_header}}{{section.name}}{{/section_header}}

- Lumix GH1 camera body
- Lumix G Vario HD 14-140mm lens
- DMW-BLB13PP battery
- DE-A49B battery charter
- K1HA14CD0001 AV cable
- K1HA14AD0001USB cable
- Shoulder strap
- Body cap
- Lens hood
- Lens cap
- VEK0N98 AC adapter
Lens & Sensor
{{section_header}}{{section.name}}{{/section_header}}
As shown below, the 10x zoom kit lens offers a wide range of composition choices without moving an inch.
The GH1 also supports two types of digital zoom. The extended optical zoom increased magnification when shooting at small and medium image sizes by using only the center portion of the sensor. This doesn't affect picture quality, assuming you're happy shooting at lower resolution. There are also 2x and 4x digital zoom, which will mess with your image quality no matter what your resolution setting.
Micro Four Thirds cameras use the same size sensor as Four Thirds cameras, measuring 18 x 13.5mm. This is significantly smaller than the APS-C format sensors found in most digital SLRs, which poses engineering chalenges when you're trying to cram the same number of megapixels into a smaller space. It also changes the math involved in figuring out the 35mm equivalent focal range of a lens mounted on a Micro Four Thirds camera. With most digital SLRs the magnification factor is 1.5x or 1.6x -- a 14-140mm lens like the one shipped with the GH1 would shoot like a 21-210mm. On the GH1, though, you get the equivalent of a 28-280mm, providing a reasonable wide-angle and a powerful telephoto.
The GH1 sensor has a gross resolution of 14.0 megapixels and an effective resolution of 12.1 megapixels. There's a supersonic wave filter in front of the sensor that vibrates every time the camera is turned on, and can also be triggered via the custom menu if you see a problem.
Viewfinder
{{section_header}}{{section.name}}{{/section_header}}
The GH1 offers an electronic viewfinder which draws on technology from Panasonic's professional video camera division, with 1.44 million dot equivalent resolution and approximately 100% field of view. It's a good-looking display, with razor-sharp text superimposed. Unfortunately, it stutters in low-light situations, particularly (though not exclusively) when those lights are fluorescent. The brightness, contrast, saturation and color of the viewfinder can all be tweaked to your liking, and there's a diopter adjustment with a ±4.0 (m-1) range.
There's a sensor on the side of the viewfinder to automatically turn it on and turn off the LCD when you hold the camera up to your eye. If you prefer, you can turn that sensor off and use the LVF/LCD switch on top of the camera.
Unlike the standard SLR approach, the electronic viewfinder and the LCD displays are arranged identically, with the same information display and quick menu options. This helps cut down on the learning curve and makes jumping back and forth between viewfinder and Live View shooting seamless. You can choose from two styles for the viewfinder display. One (called LCD monitor style) is a full-screen approach with information overlaid on the image, the other (Vewfinder style) shows a smaller image and a black strip at the bottom so the information displayed there is more legible. Pressing the Display button toggles between two levels of information detail if you're using the Viewfinder style. With the LCD monitor style, you toggle between an information display and a clean screen.
Three different styles of grid lines can be overlaid on the viewfinder display, one a nine-box pattern, a second more complex design that includes diagonal lines as well, and a third consisting of two crossed lines whose positions can be adjusted using the four-way controller.
Another option we're very glad to see included is having a live luminance histogram displayed while shooting. This can be positioned using using the four-way controller to the least obtrusive spot.
Display(s)
{{section_header}}{{section.name}}{{/section_header}}
The LCD is a 3-inch widescreen display with 460,000-dot resolution. Like the viewfinder, it can be adjusted for brightness, color, contrast and saturation. It can also be set to adjust brightness automatically based on light levels where you're shooting, or set to Power LCD for maximum brightness (also handy as a substitute flashlight in case of a blackout).
The screen is articulated, with a hinge that swings out up to 180 degrees to the side and then pivots up to 270 degrees. This arrangement has several advantages, including the option to hold the camera over your head, down low or off to the side to grab shots at unusual angles. With the camera mounted on a tripod or sitting on a table, you can also see how you'll look when taking a self-timer self-portrait. Turning the screen so the back faces outward effectively protects the LCD from the elements when you're not shooting. We also found the option to fold out the screen very helpful for holding the camera steady when shooting video -- with the screen clicked into position straight out from the left, the wider width made for easier handling.
Secondary Display
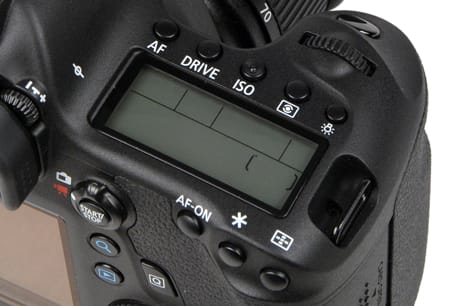
Unlike a traditional high-end SLR, there's no monochrome LCD screen to display settings on top of the camera.
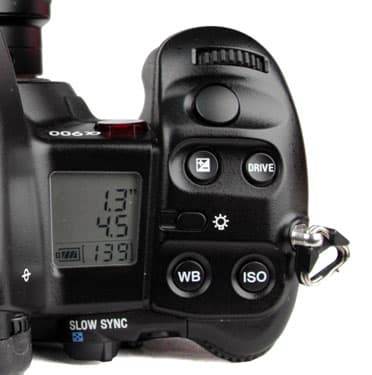
The mono LCD display is small and disappointing.
Flash
{{section_header}}{{section.name}}{{/section_header}}
The pop-up flash is well positioned high above the lens when extended, minimizing red-eye and shadows from the lens (particularly important given the lengthy kit lens). It will leap to attention when you slide the lever beside the focus mode dial on top of the camera. The autoexposure system can't make the flash pop up automatically, a system we prefer to avoid unexpected antisocial behavior in flash-free environments.
Panasonic gives the flash range with the 14-140mm kit lens as 3.28-7.87 feet (1.0-2.4m) when shooting at the widest angle and 1.64-5.91 feet (50cm-1.8m) when shooting at maximum telephoto, both at ISO 100 with 4:3 aspect ratio. The maximum flash sync speed is an impressive 1/4000th second, useful when shooting with fill flash on a bright day. Flash exposure compensation can be adjusted via the Record menu, in a ±2 EV range, in 1/3 EV increments.
The flash can be set to fire automatically when needed, forced on (useful for fill flash in generally well lit conditions) or turned off. Slow sync, which combines flash with a slower shutter speed to expose both a foreground subject and a dark background, is also available. There's also a second curtain sync option, which activates the flash just before the shutter closes rather than as soon as its pressed. This creates a streaking light effect behind a fast-moving subject, but it's rarely used, and Panasonic buried it appropriately in the menu system rather than adding another confusing option to the standard flash mode selection screen.
Any of the flash modes can be combined with red-eye reduction, which uses a quick pre-flash to close the subject's iris before shooting. There's also a digital red-eye correction option which will attempt to remove any red-eye automatically after a shot is taken.
Panasonic offers a compatible compact external flash, the DMW-FL220, which sells for about $160, with a guide number of 22 but no bounce capability. It can be set to fill flash and slow sync modes directly from the camera.

The flash emitter pops up from the top of the body via a mechanical release.
Connectivity
{{section_header}}{{section.name}}{{/section_header}}
A single proprietary port is used for both USB and standard-def AV output. The video out aspect ratio when using the AV cable can be set to 16:9 widescreen or the standard 4:3 screen size. HDMI connections will ordinarily be set automatically, but it is possible to specify 1080i, 720p or 480p output if necessary. The camera is also outfitted with VIERA link, which allows remote control operation when using compatible Panasonic equipment (a nice capability for running slide shows from the sofa).
In addition to the AV and USB connections, there's a jack for connecting a cabled remote control or an external microphone.
Battery
{{section_header}}{{section.name}}{{/section_header}}
The GH1 uses a DMW-BLB13PP battery. Panasonic testing following CIPA standards estimates battery life at approximately 300 pictures or 120 minutes of recording time when shooting with the main LCD screen. Charging time for the battery is approximately 155 minutes. Unlike most cameras, the GH1 comes with a DC cable that can be connected to the battery charger to power the camera directly.
Memory
{{section_header}}{{section.name}}{{/section_header}}
The GH1 is comptible with SD and SDHC memory cards. When shooting video, a Class 6 or higher card is recommended.
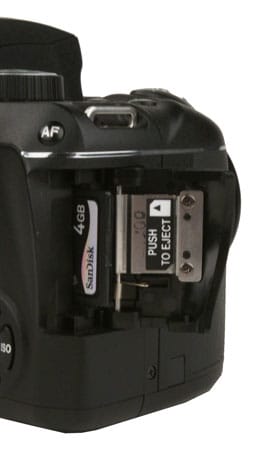
The K2000 accepts inexpensive, easy to find SD cards.
Photo Gallery
{{photo_gallery "Front Photo", "Back Photo", "Sides Photo", "Top Photo", "Bottom Photo", "Viewfinder Photo 1", "Viewfinder Photo 2", "Display Photo 1", "Display Photo 2", "Secondary Display Photo", "Flash Photo", "Lens Mount Photo", "Lens Photo 1", "Lens Photo 2", "Battery Photo", "Memory Photo", "Ports Photo 1", "Ports Photo 2", "Ports Photo 3", "Ports Photo 4", "Ports Photo 5", "Ports Photo 6", "Modes Photo", "Handling Photo 1", "Handling Photo 2", "Handling Photo 3", "Buttons Photo 1", "Buttons Photo 2", "Mic Photo", "Box Photo"}}
Image Quality
Sharpness
{{section_header}}{{section.name}}{{/section_header}}
The highest sharpness results were found when shooting at the widest angle with the aperture wide open, producing a LWPH measurement of 1912 horizontally and 2007 vertically.While the typical variation of falling sharpness midway out from the center and rising again near the edges holds true, overall sharpness remains fairly consistent across the lens, without the severe trouble spots we sometimes see in our analysis. More on how we test sharpness.
Image Stabilization
{{section_header}}{{section.name}}{{/section_header}}
Our tests of the GH1 image stabilization system revealed some benefits, though not a radical improvement. On the plus side, having image stabilization on never had a negative impact on resolution (which frequently occurs), and when the camera is shaking a lot and the shutter speeds are relatively fast (above 1/60 second), the system is quite effective. At slower shutter speeds and high camera shake, though, there was essentially no effect. And shooting with lower shake levels (about what you'd find when holding the camera with both hands), there was a slight benefit gained at slower shutter speeds.
We test a camera's image stabilization by mounting it in a custom-designed motion-control rig that produces predictable, computer-controlled movements. A slanted-edge test chart is shot multiple times at a range of shutter speeds, both with the rig set to high shake and low shake, and with image stabilization turned on and off. The resulting images are analyzed using Imatest software to determine how effectively the image stabilization system improves actual resolution results.
Color
{{section_header}}{{section.name}}{{/section_header}}
The GH1 fared poorly in our color accuracy tests, trailing the other tested cameras by a substantial margin. Of course, what we're testing here is color accuracy, not how pretty the colors look, but somewhere in the variety of color modes provided, we expect at least one to produce colors that match what we're seeing. The best result we found with the GH1 was the Smooth film mode, which was nearly identical to the Standard mode but with much more accurate saturation (the Standard mode was nearly 10% oversaturated).
We test color accuracy by shooting a standard X-Rite ColorChecker chart under controlled studio illumination, testing each available color mode to find the most accurate one and basing our scoring on that result. Images are analyzed using Imatest software. More on how we test color.
Even in Smooth mode, the blue, green and orange hues were off substantially, though the flesh tones looked about right. Standard mode was about as inaccurate overall, but the color shifts were more prominent in the reds and oranges. The more specialized film modes performed as expected, with Vibrant pumping up the blues and reds in particular, with a whopping 124% saturation. Dynamic was strategically similar but a bit more restrained, with 110% saturation and shifts in the red and blue hues. The Nature mode boosted reds and oranges (though surprisingly did little to the greens), with nearly 110% saturation. As for the Nostalgic mode, it achieves an old-time faded photo feel by undersaturating to 90%.
The following table shows same-size crops from the ColorChecker chart from the Panasonic GH1 and four recently reviewed SLRs we've chosen for comparison purposes, each in the camera's most accurate color mode. The patches in the Ideal column reflect the actual values from the original chart.
NOTE: Because of the way computer monitors reproduce colors, the images above do not exactly match the originals found on the chart or in the captured images. The chart should be used to judge the relative color shift, not the absolute captured colors.
The GH1 trails our group of comparison cameras in color accuracy.
{{comparison_bars title="Color Score Comparison", attribute="Color Score", xLabel="Color Score"}}
Color Modes
{{section_header}}{{section.name}}{{/section_header}}
The GH1 supports a variety of 'film modes,' each of which includes adjustments for color, saturation and contrast. These include six settings in color (Standard, Dynamic, Nature, Smooth, Nostalgic and Vibrant) plus three in black and white (Standard, Dynamic and Smooth), plus the option to create and store two of your own settings combinations. There's even a bracketing option called Multifilm that will take a shot in three different modes sequentially with three separate shutter presses (it would be more useful if the camera simply adjusted the settings for a single shot, the way it does with white balance bracketing).
Example still life shots of each of these modes are included in the Picture Effects section. Here we have taken same-size crops from our shots of the X-Rite ColorChecker chart, shot in five of the available color mode (excluding black and white and custom settings). The names along the left side are the official color patch titles X-Rite uses.
White Balance
{{section_header}}{{section.name}}{{/section_header}}
The camera's poor color accuracy performance naturally spills over into disappointing results for our white balance testing, where we compare images shot under different lighting conditions against the actual color values of the X-Rite ColorChecker chart. We use a Macbeth Judge II lighting box to maintain precise color temperature control, shooting under daylight, tungsten and compact fluorescent illumination. We test both the performance of the automatic white balance and custom white balance systems.
Automatic White Balance ({{product.raw_scores['Auto White Balance Score']}})
The automatic system consistently had difficulty producing accurately colored images. In each type of illumination we tested, the GH1 photos displayed significant color shift.
Custom White Balance ({{product.raw_scores['Custom White Balance Score']}})
Taking a custom white balance reading effectively eliminated the orange-red cast of photos shot under tungsten lighting, but the improvement under compact white fluorescents was minimal, and the automatic white balance system did about as well as the custom reading in daylight shots. The custom results aren't bad, but we expect very high accuracy in this test, so the GH1 score is a bit low.
The color error when shooting under daylight was modest compared to the problems we found under incandescent and fluorescent lights, but the other cameras in our test group were more successful under the same conditions, with the exception of the Canon T1i.
The toughest test in our lineup is consistently incandescent lighting, which produces problems for virtually every camera. Here, while the Panasonic still can't claim a good result, it was distinctly less bad than the competition.
Fluorescent lighting proved another significant obstacle for the GH1, producing overly warm results and a higher color error than the other cameras tested.
As shown below, the GH1 lags the field when it comes to white balance overall, though the difference isn't extreme.
{{comparison_bars title="White Balance Score Comparison", attribute="White Balance Score", xLabel="White Balance Score"}}
White Balance Options
{{section_header}}{{section.name}}{{/section_header}}
In addition to automatic white balance, the GH1 offers five white balance presets: Daylight, Cloudy, Shade, Incandescent, and Flash.
On many cameras today we find a variety of fluorescent white balance presets, since fluorescent lighting can be hard to compensate for automatically and there are several different fluorescent bulb colors available. Strangely, there is no fluorescent preset at all on the GH1.
Taking a manual white balance reading is simple enough. You select one of the two custom white balance slots using the Quick Menu or the rightmost four-way controller button, then press up on the four-way controller to enter setting mode. Point the camera at a white or grey surface and press Menu/Set to take a reading. With two slots, you can save settings and return to them later if you like.
It's also possible to directly enter a white balance setting in degrees Kelvin. This is a more valuable option here than with most cameras, since the Live View screen reflects changes to the setting as you make them, allowing you to eyeball the reading you're after.
Custom and preset white balance settings can be finely adjusted along the amber-blue and green-magenta axes, with 18 increments for each.
White balance bracketing is also supported, recording three versions of a single shot, with the increment based on the fine white balance adjustment setting. This capability isn't available when shooting RAW.
Long Exposure
{{section_header}}{{section.name}}{{/section_header}}
Our long exposure test combines color accuracy and image noise, neither of which is a strength of this camera even under normal shooting conditions, producing a result here that trails the competition by a substantial margin. We shoot the ColorChecker chart under low lighting (20 lux and below) with exposure times of 1, 5, 10, 15 and 30 seconds, with long exposure noise reduction turned off and turned on. The good news here is that, unlike most cameras we test, the long exposure noise reduction system did prove highly effective. However, since it takes a toll on timing (doubling the time it takes to shoot a photo) and image quality, our testing combines the scores under both shooting conditions. More on how we test long exposure.
Color error was at least consistent across shutter speeds, but it was very high throughout -- roughly double what we found with the Nikon D5000, for example.
Even at one second the noise level is above 1% and, without long exposure noise reduction, reaches nearly 10% at 30 seconds. The moral of the story is simple: by all means make sure you have NR set to On when taking night shots.
{{comparison_bars title="Long Exposure Score Comparison", attribute="Long Exposure Score", xLabel="Long Exposure Score"}}
Noise Reduction
{{section_header}}{{section.name}}{{/section_header}}
It's worth noting that while higher levels of noise reduction did cut down on the details in photos we shot at ISO 1600 (see the Sample Photos section), the effect was not dramatic, and the trade-off between boosting noise reduction and losing a bit of fine line is worth making in most cases.
Image noise starts out fairly high, even at ISO 100 There's no major jump through ISO 400,though, which means the most frequently used ISO settings don't suffer from major noise problems. Trying to eke out a shot at ISO 3200 is not recommended, though we did pull off a nice handheld shot at ISO 1600 in a dark train station (see the Sample Photos section). More on how we test noise.
ISO Options
{{section_header}}{{section.name}}{{/section_header}}
The Lumix GH1 offers an ISO range from 100-3200, along with two different auto ISO systems. Standard Auto ISO adjusts based strictly on brightness, while Intelligent ISO takes the movement of the subject into account as well (since higher ISOs enable higher shutter speeds). There is an option to limit the maximum ISO available to the auto systems.
Dynamic Range
{{section_header}}{{section.name}}{{/section_header}}
The GH1 scored well in our dynamic range testing, though we did find one oddball result that recurred even after running the test again, adding a grain of salt to the results. As shown in the chart below, the dynamic range starts at a modest but acceptable 6.35 stops at ISO 100, lowers slightly through ISO 200 and 400, then somehow expands again dramatically at ISO 800 before resuming its predicted downward path. We believe this is a result of significant noise reduction image processing that kicks in at the ISO 800 level. Ordinarily, we test dynamic range with the camera's noise reduction system turned off, but that was not possible with the GH1. More on how we test dynamic range.
Once again, the cameras with larger sensors posted superior results, though the GH1 dynamic range is still respectable at this level, especially compared to the dismal showing for the Olympus E-30. Taken as a whole, the GH1 scores well here, meaning it should successfully hold onto details in high-contrast scenes.
{{comparison_bars title="Dynamic Range Score Comparison", attribute="Dynamic Range Score", xLabel="Dynamic Range Score"}}
Noise Reduction
{{section_header}}{{section.name}}{{/section_header}}
It's worth noting that while higher levels of noise reduction did cut down on the details in photos we shot at ISO 1600 (see the Sample Photos section), the effect was not dramatic, and the trade-off between boosting noise reduction and losing a bit of fine line is worth making in most cases.
Image noise starts out fairly high, even at ISO 100 There's no major jump through ISO 400,though, which means the most frequently used ISO settings don't suffer from major noise problems. Trying to eke out a shot at ISO 3200 is not recommended, though we did pull off a nice handheld shot at ISO 1600 in a dark train station (see the Sample Photos section). More on how we test noise.
ISO Options
{{section_header}}{{section.name}}{{/section_header}}
The Lumix GH1 offers an ISO range from 100-3200, along with two different auto ISO systems. Standard Auto ISO adjusts based strictly on brightness, while Intelligent ISO takes the movement of the subject into account as well (since higher ISOs enable higher shutter speeds). There is an option to limit the maximum ISO available to the auto systems.
Focus Performance
{{section_header}}{{section.name}}{{/section_header}}
The autofocus system that made the G1 a breakthrough camera is alive and well in the GH1. Like the Live View mode provided with many SLRs today, Panasonic uses a contrast detect autofocus system, as opposed to the speedy phase detect system used when shooting through an SLR's optical viewfinder. Unlike the SLRs we've tested, though, the Panasonic system is fast and reliable, able to keep up with fast action which would completely flummox other Live View focus systems. You can actually take the GH1 to a soccer game and shoot the action in Live View, something we'd never consider with an SLR Live View implementation.
The autofocus system offers four modes: 23-Area, Single-Area, Face Detection, and AF Tracking.
Focus can be set to single (acquires focus when the shutter button is pressed halfway and maintains that setting), continuous (attempts to adjust focus as long as the shutter button is halfway down) and manual, using a small dial at the top left. If you're particularly worried about catching a shot,you can turn on the Pre AF setting in the Custom menu. With Pre AF set the camera doesn't wait until you have the shutter button held down, but goes ahead and focuses whenever the camera is held still (in Quick AF mode) or at all times (Continuous AF). As you'd imagine, you take a battery life hit when this feature is turned on.
A small red aufocus assist lamp sits at the top right of the camera front. It proved more effective than we expected, given its small size. Panasonic gives the range as about 3.28 to 9.84 feet (1.0m to 3.0m) when using the kit lens at its widest setting.
Long Exposure
{{section_header}}{{section.name}}{{/section_header}}
Our long exposure test combines color accuracy and image noise, neither of which is a strength of this camera even under normal shooting conditions, producing a result here that trails the competition by a substantial margin. We shoot the ColorChecker chart under low lighting (20 lux and below) with exposure times of 1, 5, 10, 15 and 30 seconds, with long exposure noise reduction turned off and turned on. The good news here is that, unlike most cameras we test, the long exposure noise reduction system did prove highly effective. However, since it takes a toll on timing (doubling the time it takes to shoot a photo) and image quality, our testing combines the scores under both shooting conditions. More on how we test long exposure.
Color error was at least consistent across shutter speeds, but it was very high throughout -- roughly double what we found with the Nikon D5000, for example.
Even at one second the noise level is above 1% and, without long exposure noise reduction, reaches nearly 10% at 30 seconds. The moral of the story is simple: by all means make sure you have NR set to On when taking night shots.
{{comparison_bars title="Long Exposure Score Comparison", attribute="Long Exposure Score", xLabel="Long Exposure Score"}}
Video: Low Light Sensitivity
{{section_header}}{{section.name}}{{/section_header}}
The Panasonic GH1 didn't have very good low light sensitivity, although its results were better than the Canon T1i. The camera needed 17 lux of light to reach 50 IRE on our waveform monitor—an amount that's nearly double what the Panasonic HDC-HS300 needed. In the camera's 60p record mode (720/60p) it needed even more light, 36 lux, to reach 50 IRE. Testing the 720/30p record mode, which uses the MJPEG codec instead of AVCHD, 31 lux of light was needed. All of these scores aren't very good, although the 17 lux performance at 24p isn't awful.
Chromatic Aberration
{{section_header}}{{section.name}}{{/section_header}}
While our lab tests turned up minor horizontal chromatic aberration midway between the center and edges, it wouldn't be noticeable in an actual photograph.
At the widest zoom setting, the center remains tack sharp until we stop the lens down to f/22, and chromatic aberration is well controlled.
Shooting at the midpoint of the zoom range, we can see the sharpness consistency mentioned above, with only slight softening at the f/22 setting.
At maximum zoom we start to see softness in the corners of the lens, though the results are still very good.
Distortion
{{section_header}}{{section.name}}{{/section_header}}
We found negligible distortion at the midpoint and maximum telephoto settings, and even at the widest-angle barrel distortion was under 2%, an acceptable result from a 10x zoom lens.
Motion
{{section_header}}{{section.name}}{{/section_header}}
The motion on the Panasonic GH1 was quite good, although it varied drastically depending on what shooting mode was used. The camera's full HD mode will probably be the one used by most people as it captures 1920 x 1080 HD video using the AVCHD codec—just like a traditional HD camcorder. When recording full HD video with the GH1, the camera captures the footage at 60i, but it's outputted at 24 frames per second (24p). This is the same method used by Panasonic's Digital Cinema Mode and Canon's 24p and 30p options on its consumer camcorders. This is something that sets the GH1 apart from the Canon T1i and Nikon D5000, both of which record with natively progressive frame rates. The results between native and non-native24p modes aren't very different, although compatibility issues could arise in the editing process.
The Panasonic GH1's full HD mode was fairly choppy and had quite a bit of trailing. Still, the motion was better than what we saw with the Nikon D5000 and Canon T1i. We noticed less artifacting on the GH1 and the video had minimal interference. The biggest problem was with blurring, which we noticed more when we watched the video on a computer than on our HD Television. For smoother motion and less blur, we found the lower resolution AVCHD modes looked much better. These modes only record at 1280 x 720, however, so they're not capturing full HD video, but they record using a 60p frame rate. This 60 frames per second footage is incredibly smooth, looks natural, and captures motion very well.
Recording with MJPEG compression on the GH1 produced entirely different results than AVCHD. All the MJPEG settings record using a 30p frame rate, which produced very smooth, quick motion. In fact, the motion was much quicker than we expected to see from 30p, especially when we compared it to the Nikon D5000 (also records at 30p with MJPEG). There was more artifacting in the GH1's MJPEG footage, but the motion itself looked quite good—and it is very easy for a computer to handle and edit. More on how CamcorderInfo tests motion.
The GH1 didn't have the horrendous rolling shutter that plagued the Canon T1i and Nikon D5000. We noticed a bit of a jiggling problem when we panned very quickly with the camera, but it was nowhere near what we saw with the other video-capable DSLRs.
The Canon T1i offers a strange frame rate for its 1920 x 1080 recording. It captures video at 20 frames per second, which is quite slow, and you can definitely notice its speed lagging in our motion test. The camera can do 30 frames per second, but only with a lower video resolution of 1280 x 720. We're disappointed that Canon didn't offer a 24p mode in any of its recording settings. Even though the Canon T1i's motion looks good by some accounts (it has very little blur and artifacting), the speed of its 20p frame rate is just too slow.
The Nikon D5000 probably has the worst motion of the video-capable DSLRs we've tested. Its MJPEG codec produces quite a bit of artifacting and the motion looks very choppy even though it is 30p. The camera also produced a lot of interference, especially in the black and white pinwheel on our testing footage. Straight lines came out jagged and artifacting is prominent in our RGB pinwheel as well.
Even with the improvements introduced by the Panasonic GH1, it isn't capable of matching the motion on the HDC-HS300 (an HD camcorder from Panasonic). The HDC-HS300 records full HD video with a 60i frame rate. The interlaced frame rate does produce some blur and trailing, but the motion is much smoother than any video-capable DSLR is capable of at a 1920 x 1080 resolution.
Video Sharpness
{{section_header}}{{section.name}}{{/section_header}}
Recording full HD video with the Panasonic GH1, we measured a horizontal sharpness of 750 line widths per picture height (lw/ph). The camera's vertical resolution came in at 650 lw/ph. These are the same results we got with the HDC-HS300, which isn't all that surprising considering bot models are manufactured by Panasonic. The Canon T1i pulled out a slightly higher sharpness score when we used its 1920 x 1080 video resolution setting. Keep in mind, however, that the T1i can only record at 20 frames per second when shooting full HD.
The Nikon D5000 is a step behind the rest of the models here because it shoots at a maximum resolution of 1280 x 720. This lower resolution is still HD, but it isn't full HD. This means the camera really can't capture the level of sharpness or detail that the other products are capable of. More on how CamcorderInfo tests video sharpness.
{{comparison_bars title="Video Sharpness Score Comparison", attribute="Video Sharpness Score", comps="video", xLabel="Video Sharpness Score"}}
Low Light Sensitivity
{{section_header}}{{section.name}}{{/section_header}}
The Panasonic GH1 didn't have very good low light sensitivity, although its results were better than the Canon T1i. The camera needed 17 lux of light to reach 50 IRE on our waveform monitor—an amount that's nearly double what the Panasonic HDC-HS300 needed. In the camera's 60p record mode (720/60p) it needed even more light, 36 lux, to reach 50 IRE. Testing the 720/30p record mode, which uses the MJPEG codec instead of AVCHD, 31 lux of light was needed. All of these scores aren't very good, although the 17 lux performance at 24p isn't awful.
Usability
Buttons & Dials
{{section_header}}{{section.name}}{{/section_header}}
Shooting with the original G1 we found the front control dial was too sensitive, leading us to click it accidentally and change the exposure compensation settings. In the new model there appears to be more resistance, making this less of a problem (though we did slip occasionally). The new point of concern, though, is the movie record button on the top right thumb rest. Keeping your thumb off the button requires a level of delicacy we lacked during fast action shooting, leading to some very peculiar accidental video clips. We did have fewer slips as we spent more time with the camera, but it remains an awkwardly positioned control.
Menu
{{section_header}}{{section.name}}{{/section_header}}
As with most cameras today, the GH1 uses a two-tier menu system, with a Quick Menu for fast access to settings used while shooting along with a more complete traditional menu system. The Quick Menu is easy to access, with its own dedicated button on top of the camera. The display will differ depending on the LCD view in effect when you call up the menu, though the available settings are the same. If you have the LCD set for one of the two variations of Live View (LCD Monitor style or Viewfinder style), shooting information is overlaid top and bottom on the screen, and pressing Quick Menu makes these items interactive, with drop-down lists of options. Getting to the setting you're interested in setting is fairly awkward in this view, though, since you have to navigate through each possibility in sequence, starting in the top group and working your way down to the bottom of the screen. If you're using the full-screen recording information display (and lining up your shots with the electronic viewfinder), the Quick Menu system is far more effective, since all your settings are displayed on one neatly arranged screen and you can move directly to the one you want.
The Menu/Set button in the middle of the four-way controller brings up the main menu system, and the four directional buttons are the basic tool for navigating through it. You can also turn the control dial to zoom you up and down through the individual menus quickly. That comes in handy when faced with menus that can run five screens long. That's a structure we're never glad to see, since important options are hidden out of sight until you've scrolled down to find them.
Instruction Manual
{{section_header}}{{section.name}}{{/section_header}}
The 200-page manual is a bit dense but complete and thorough, with a nice introductory section that presents the information you'll need to start shooting in an easy-to-understand way. As we find so often, the index is a major weakness here. Want to shoot video? It's not listed under 'video' or even 'movie' -- try 'motion picture' instead. Want to improve dynamic range performance? You'd better know that the feature is called Intelligent Exposure, because there's no listing for dynamic range. This lack of user focus when creating an index makes the entire manual far less valuable.
To download a copy of the GH1 user manual in PDF format, click here.
Handling
{{section_header}}{{section.name}}{{/section_header}}
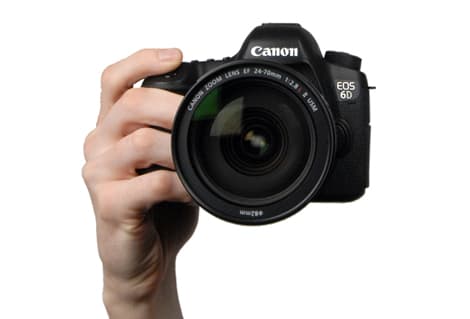
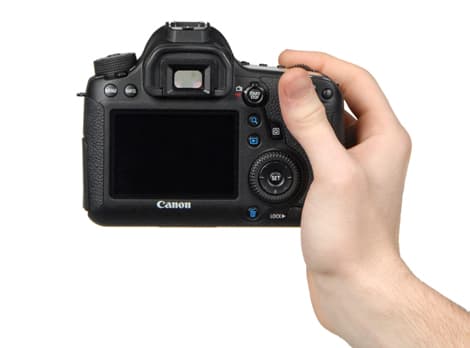
The fact that the camera format is called 'Micro Four Thirds' might lead you to expect an ultracompact camera body, but it ain't necessarily so. The GH1 is just a bit more petite than the smallest SLR out there today, the Olympus E-450, in height, width and weight. Where the Micro Four Thirds format makes a significant different is the camera depth. Removing the SLR mirror mechanism allows a depth of only 1.78 inches, versus 2.1 inches for the E-450 and more like 3 inches for a typical SLR design. But when you have a lens sticking out from the front of the camera, a small difference in camera body depth just isn't that significant. What we care about is how it feels to shoot with the camera. And overall, we're pleased.
The GH1 is precisely the same size and shape as its predecessor, the G1. It feels substantial in your hands, with enough weight to sit comfortably. We would have preferred a deeper, wider grip -- if you tuck your fingers around it entirely, it puts your index finger out of line with the shutter. A bit more texture would have been welcome too, since sweaty palms and smooth plastic surfaces make a poor combination when trying to move quickly. Still, this is a highly maneuverable camera, with the added bonus of a pivoting LCD screen for shooting flexibility.
Buttons & Dials
{{section_header}}{{section.name}}{{/section_header}}
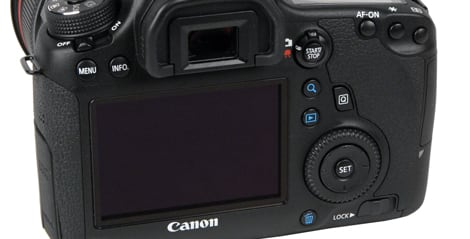
Shooting with the original G1 we found the front control dial was too sensitive, leading us to click it accidentally and change the exposure compensation settings. In the new model there appears to be more resistance, making this less of a problem (though we did slip occasionally). The new point of concern, though, is the movie record button on the top right thumb rest. Keeping your thumb off the button requires a level of delicacy we lacked during fast action shooting, leading to some very peculiar accidental video clips. We did have fewer slips as we spent more time with the camera, but it remains an awkwardly positioned control.
Display(s)
{{section_header}}{{section.name}}{{/section_header}}
The LCD is a 3-inch widescreen display with 460,000-dot resolution. Like the viewfinder, it can be adjusted for brightness, color, contrast and saturation. It can also be set to adjust brightness automatically based on light levels where you're shooting, or set to Power LCD for maximum brightness (also handy as a substitute flashlight in case of a blackout).
The screen is articulated, with a hinge that swings out up to 180 degrees to the side and then pivots up to 270 degrees. This arrangement has several advantages, including the option to hold the camera over your head, down low or off to the side to grab shots at unusual angles. With the camera mounted on a tripod or sitting on a table, you can also see how you'll look when taking a self-timer self-portrait. Turning the screen so the back faces outward effectively protects the LCD from the elements when you're not shooting. We also found the option to fold out the screen very helpful for holding the camera steady when shooting video -- with the screen clicked into position straight out from the left, the wider width made for easier handling.
Secondary Display
Unlike a traditional high-end SLR, there's no monochrome LCD screen to display settings on top of the camera.

The mono LCD display is small and disappointing.
Viewfinder
{{section_header}}{{section.name}}{{/section_header}}
The GH1 offers an electronic viewfinder which draws on technology from Panasonic's professional video camera division, with 1.44 million dot equivalent resolution and approximately 100% field of view. It's a good-looking display, with razor-sharp text superimposed. Unfortunately, it stutters in low-light situations, particularly (though not exclusively) when those lights are fluorescent. The brightness, contrast, saturation and color of the viewfinder can all be tweaked to your liking, and there's a diopter adjustment with a ±4.0 (m-1) range.
There's a sensor on the side of the viewfinder to automatically turn it on and turn off the LCD when you hold the camera up to your eye. If you prefer, you can turn that sensor off and use the LVF/LCD switch on top of the camera.
Unlike the standard SLR approach, the electronic viewfinder and the LCD displays are arranged identically, with the same information display and quick menu options. This helps cut down on the learning curve and makes jumping back and forth between viewfinder and Live View shooting seamless. You can choose from two styles for the viewfinder display. One (called LCD monitor style) is a full-screen approach with information overlaid on the image, the other (Vewfinder style) shows a smaller image and a black strip at the bottom so the information displayed there is more legible. Pressing the Display button toggles between two levels of information detail if you're using the Viewfinder style. With the LCD monitor style, you toggle between an information display and a clean screen.
Three different styles of grid lines can be overlaid on the viewfinder display, one a nine-box pattern, a second more complex design that includes diagonal lines as well, and a third consisting of two crossed lines whose positions can be adjusted using the four-way controller.
Another option we're very glad to see included is having a live luminance histogram displayed while shooting. This can be positioned using using the four-way controller to the least obtrusive spot.
Image Stabilization
{{section_header}}{{section.name}}{{/section_header}}
Our tests of the GH1 image stabilization system revealed some benefits, though not a radical improvement. On the plus side, having image stabilization on never had a negative impact on resolution (which frequently occurs), and when the camera is shaking a lot and the shutter speeds are relatively fast (above 1/60 second), the system is quite effective. At slower shutter speeds and high camera shake, though, there was essentially no effect. And shooting with lower shake levels (about what you'd find when holding the camera with both hands), there was a slight benefit gained at slower shutter speeds.
We test a camera's image stabilization by mounting it in a custom-designed motion-control rig that produces predictable, computer-controlled movements. A slanted-edge test chart is shot multiple times at a range of shutter speeds, both with the rig set to high shake and low shake, and with image stabilization turned on and off. The resulting images are analyzed using Imatest software to determine how effectively the image stabilization system improves actual resolution results.
Shooting Modes
{{section_header}}{{section.name}}{{/section_header}}
The GH1 offers both manual control options for picky shooters and an advanced auto mode that relies on scene recognition. And unlike the video-equipped SLRs we've tested, the GH1 allows you to maintain settings control while shooting movies, a major step in fulfilling the promise of the product category.
Panasonic offers an oddball twist on face recognition, allowing you to register a particular face (up to six of them, complete with the person's name and birthday). Afterward, when shooting with face recognition turned on, the camera will prioritize focus and exposure for people it has memorized. It will even display the name on-screen if you like, offering a distinctive Terminator-like experience.
Focus
{{section_header}}{{section.name}}{{/section_header}}
The autofocus system that made the G1 a breakthrough camera is alive and well in the GH1. Like the Live View mode provided with many SLRs today, Panasonic uses a contrast detect autofocus system, as opposed to the speedy phase detect system used when shooting through an SLR's optical viewfinder. Unlike the SLRs we've tested, though, the Panasonic system is fast and reliable, able to keep up with fast action which would completely flummox other Live View focus systems. You can actually take the GH1 to a soccer game and shoot the action in Live View, something we'd never consider with an SLR Live View implementation.
The autofocus system offers four modes: 23-Area, Single-Area, Face Detection, and AF Tracking.
Focus can be set to single (acquires focus when the shutter button is pressed halfway and maintains that setting), continuous (attempts to adjust focus as long as the shutter button is halfway down) and manual, using a small dial at the top left. If you're particularly worried about catching a shot,you can turn on the Pre AF setting in the Custom menu. With Pre AF set the camera doesn't wait until you have the shutter button held down, but goes ahead and focuses whenever the camera is held still (in Quick AF mode) or at all times (Continuous AF). As you'd imagine, you take a battery life hit when this feature is turned on.
A small red aufocus assist lamp sits at the top right of the camera front. It proved more effective than we expected, given its small size. Panasonic gives the range as about 3.28 to 9.84 feet (1.0m to 3.0m) when using the kit lens at its widest setting.
When focusing manually, an enlarged focus assist display is available, though optional. It magnifies an area you select (the size of this area is also adjustable) by up to 10x, on the Live View screen or in the electronic viewfinder. There is no focus confirmation indicator in manual mode, a feature found on many higher-end SLRs. The camera can also be set to AF+MF, allowing fine manual adjustment using the focus ring after the autofocus system has set the focus automatically and the shutter button is halfway down.
Recording Options
{{section_header}}{{section.name}}{{/section_header}}
The GH1 can shoot in four different aspect ratios, with three sizes for each. There are two JPEG compression levels, Fine and Standard. You can also shoot RAW files, either alone or combined with a Fine or Standard JPEG.
Other Controls
{{section_header}}{{section.name}}{{/section_header}}
Audio Recording
The stereo microphone located directly in front of the pop-up flash can be used to add 5 seconds of audio to a still image in addition to sound recording in video mode. This can be a useful way to record the location or other information about your photos without reaching for a pen and paper.
Speed and Timing
{{section_header}}{{section.name}}{{/section_header}}
There are two burst mode speed settings, High (claimed to be 3 frames per second) and Low (2 frames per second). While you can technicallly shoot as long a sequence as you like, we found that when shooting large JPEGs the camera nearly ground to a halt after nine shots, or four shots when shooting RAW, even with a fast memory card.
The first time we tested the GH1 burst mode we were concerned, getting only about two shots per second. Then Panasonic issued a firmware update and, lo and behold, the camera now squeezed out 3.13 shots per second, not particularly quick compared to the competition (see below) but acceptable, and a hair above the promised 3 shot per second rate.
There are three self-timer modes: 2 second, 10 second, and 10 second/3 pictures (after waiting 10 seconds takes 3 pictures at approximately 2-second intervals).
An optional remote control is available for shake-free shooting, but the DMW-RSL1 (about $80) is a cable unit that connects via a dedicated port on the left side. There is no wireless remote option.
Focus Speed
{{section_header}}{{section.name}}{{/section_header}}
The autofocus system that made the G1 a breakthrough camera is alive and well in the GH1. Like the Live View mode provided with many SLRs today, Panasonic uses a contrast detect autofocus system, as opposed to the speedy phase detect system used when shooting through an SLR's optical viewfinder. Unlike the SLRs we've tested, though, the Panasonic system is fast and reliable, able to keep up with fast action which would completely flummox other Live View focus systems. You can actually take the GH1 to a soccer game and shoot the action in Live View, something we'd never consider with an SLR Live View implementation.
The autofocus system offers four modes: 23-Area, Single-Area, Face Detection, and AF Tracking.
Focus can be set to single (acquires focus when the shutter button is pressed halfway and maintains that setting), continuous (attempts to adjust focus as long as the shutter button is halfway down) and manual, using a small dial at the top left. If you're particularly worried about catching a shot,you can turn on the Pre AF setting in the Custom menu. With Pre AF set the camera doesn't wait until you have the shutter button held down, but goes ahead and focuses whenever the camera is held still (in Quick AF mode) or at all times (Continuous AF). As you'd imagine, you take a battery life hit when this feature is turned on.
A small red aufocus assist lamp sits at the top right of the camera front. It proved more effective than we expected, given its small size. Panasonic gives the range as about 3.28 to 9.84 feet (1.0m to 3.0m) when using the kit lens at its widest setting.
When focusing manually, an enlarged focus assist display is available, though optional. It magnifies an area you select (the size of this area is also adjustable) by up to 10x, on the Live View screen or in the electronic viewfinder. There is no focus confirmation indicator in manual mode, a feature found on many higher-end SLRs. The camera can also be set to AF+MF, allowing fine manual adjustment using the focus ring after the autofocus system has set the focus automatically and the shutter button is halfway down.
Features
Other Features
{{section_header}}{{section.name}}{{/section_header}}
External Mic Availability
You won't find it in the box, but we're still pleased to see that an external boom mic that mounts to the hot shoe is available. The DMW-MS1 is not cheap (we found it selling for $180), but for those who take their video seriously (i.e., they're willing to fork over nearly $1500 for a video-enabled camera), it's going to be appealing.
Recording Options
{{section_header}}{{section.name}}{{/section_header}}
The Panasonic DMC-GH1 has the distinct recognition of being one of the few cameras or camcorders to offer two options for compressing HD video—AVCHD and Motion JPEG (MJPEG). The AVCHD codec is the same compression system used in Panasonic's HD camcorders and it is essentially the standard in the consumer HD market. MJPEG is commonly used in digital still cameras to record video and it is also the codec featured in the Nikon D5000. Essentially, AVCHD is the newer, more complex codec of the two, which means it should produce higher-quality video than MJPEG (it's also the only option for recording full HD on the GH1). MJPEG, however, is simpler and more compatible with a variety of software. It also isn't as taxing for your computer to handle, while AVCHD is notoriously difficult to edit on a computer, due to its large file size. We applaud Panasonic for including two compression options, and the move significantly improves the camera's video recording versatility.
Using the AVCHD codec, the Panasonic GH1 offers four quality options. Only one of these options, FHD, offers full 1920 x 1080 recording. The FHD setting records HD video at a bitrate of 17Mbps. When the video is played back, it has the slow, cinematic look of a 24p mode. In actuality, however, the video is captured at 60i and then down-converted to 24p inside the camera (much like Panasonic's Digital Cinema Mode on its consumer camcorders). This is something that sets the GH1 apart from the Nikon D5000 and Canon T1i, both of which record natively progressive video.
The rest of the AVCHD quality settings on the GH1 record at a 1280 x 720 resolution with a native 60p frame rate. These videos have a smoother, more natural look than the full HD 24p mode, but the quality is not as good (due to the lower resolution). Using the MJPEG codec, the camera offers four more quality options, ranging from 1280 x 720 video (HD mode) to 320 x 240 (QVGA mode). All the MJPEG formats capture video using a 30p frame rate.
Video Controls
{{section_header}}{{section.name}}{{/section_header}}
The Panasonic GH1 is the first DSLR camera to offer a wide range of manual controls. The camera's features and options for recording video are extensive and can be rather overwhelming and complicated for first-time users. Still, it is exciting to finally see a DSLR camera that gives you the opportunity to precisely adjust and control the video image. Not to mention, all controls can be adjusted either before shooting has begun or during video recording—something that many dedicated camcorders don't even allow for.
Auto Controls
Another feature that separates the GH1 from the rest of the DSLR crowd is its ability to perform a live autofocus while shooting video. While autofocus is a staple of any consumer camcorder, it has been noticeably lacking on video-capable DSLRs. The GH1 solves this issue by providing numerous auto focus modes and a sharp, accurate focusing system. Our only complaint was that the auto focus mechanism occasionally worked too slowly, but it wasn't too bad most of the time.
Auto focus can be set to face detection, 23-area weighted, and spot. With face detection, the camera hones in on faces within the video frame and focuses the subjects correctly. The 23-area weighted focus makes numerous measurements within the frame in an attempt to provide the best focus for the entire image. Spot focus allows you to pick one spot on the screen (by moving a small box with the d-pad) and the camera will use that specific area to determine focus.
Auto exposure on the GH1 also worked pretty darn well. The camera produced smooth adjustments between light and dark, although we occasionally noticed an ND filter automatically clicking on when we pointed towards the sky or brightly-lit subjects. The camera's metering mode can be set to center weighted (bases exposure on the center of the frame), spot (like spot focus), or multiple (makes exposure adjustment based on brightness of entire frame).
Video can be recorded in any of the GH1's shooting modes. This means the various scene modes on the camera can also be used in conjunction with video. You don't have full access to manual video controls unless the camera is in Creative Motion Picture mode, however. The various scene modes available for use with video are Sunset, Party, Baby, Pet, Night Portrait, Close-up, Sports, Scenery, and Portrait.
Zoom
The amount of zoom available on the GH1 is entirely dependent on what lens you have attached to the camera. The kit lens is a Lumix G Vario HD 14-140mm, which features a 10x optical zoom. There are a number of lenses available that fit Panasonic's Micro Four Thirds mount system, however, so if you want a different zoom ratio you can always buy an additional lens.
Zoom is adjusted using the inner lens ring on the GH1's lens. It is pretty comfortable to adjust zoom this way, but it does require the use of two hands and it isn't as simple as the tiny zoom toggles featured on most consumer camcorders. The lens ring does make for more accurate adjustment, though, and the numerical listings on the lens itself makes it easy to replicate zoom lengths. The camera also has a 2x and 4x digital zoom option, but you have to go into the menu to turn them on and off (they are not controlled with the lens ring).
Focus
There are a lot of focusing options on the GH1. We must reiterate that the most impressive focus control on the camera is its ability to produce a live autofocus—something that both the Nikon D5000 and Canon T1i were not capable of doing. We tested the GH1 with another Micro Four Thirds lens and the live autofocus continued to work well, although it seemed to take a bit longer than with the kit lens.
You can also use the lens ring to perform a manual focus, just like you would on a regular DSLR camera. There's a focus assist setting that can be engaged when you use manual focus. The assist simply adds a digital zoom while you focus so you can get a better look at your subject as you rotate the focus ring. Strangely, the camera's default setting doesn't engage live auto focus until you start recording. You can turn on pre-recording auto focus in the camera's menu, however. AF tracking is not available in video mode.
Exposure Controls
In Creative Motion Picture mode (the icon with a camcorder and an 'M' on the mode dial), the GH1 allows you to set exposure, aperture, and shutter speed. Each can be set independently or adjusted as priority settings (i.e. aperture-priority and shutter-priority). Aperture can be set with a range of f/4 - f/22 and you can even adjust the settings while video is being shot. The same goes with shutter speed, which can be set as low as 1/30 of a second and as high as 1/4000 of a second. We're a bit disappointed that Panasonic didn't include any ultra-slow shutter speeds in manual mode, but the absence isn't that significant. Exposure can be set when the camera is in Program mode, Aperture-priority, or Shutter-priority mode, although it cannot be controlled in full Manual mode. All of these settings are manipulated by rotating the adjustment dial on the front of the camcorder (below the shutter button).
The AF/AE lock button can be used in Program mode or any auto mode if you want to lock the camera's exposure level so it doesn't change while you move the camera around during recording. You can also turn Intelligent Exposure controls on, which are designed to improve scenes that have a lot of contrast.
Other Controls
The GH1 has so many manual controls for video, it even includes ISO. ISO, which is just like gain for camcorders, can be set to auto, 100, 200, 400, 800, or 1600 on the GH1. You can even notice the boost it gives the video as soon as you change the values. The camera has the same white balance settings for video as it does for still images—including two manual settings, auto controls with four presets, color temperature adjustment, and direct Kelvin control from 2500K to 10,000K.
There's also the film mode options, which we went over in our color testing. These film modes allow you to adjust picture controls and fine tune your image using contrast, sharpness, saturation, and noise reduction (each offering -2 to +2 adjustment). Also available in video mode is a live histogram, three different guide line options for framing, and optical image stabilization.
Audio Features
{{section_header}}{{section.name}}{{/section_header}}
The Panasonic GH1 has a built-in stereo microphone that will record audio in conjunction with video and can also be used to record voice memos or sound while taking still photographs. The camera also includes a 2.5mm external microphone jack, which is something not present on the Canon T1i or Nikon D5000. Using the external mic jack, the optional DMW-MS1 microphone can be mounted to the camera's accessory shoe. This external microphone jack gives the GH1 professional audio options, although the camera is still rather limited when it comes to audio features. The camera has no manual audio level adjustment or audio level display. On a positive note, there is a wind cut feature that offers three levels of wind noise reduction.The GH1 also has an audio dub feature that allows you to add audio to a selection of photographs or video after you've shot them.
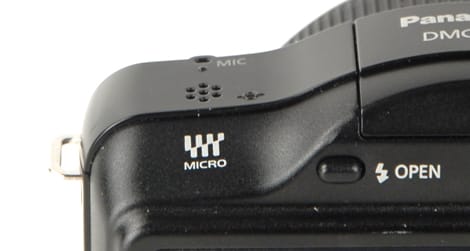
The built-in mic is located on the top of the camera, which is out of the way from wandering fingers or noisy adjustment dials. It does, however, point straight up, so the audio it picks up up may not necessarily be coming from the subject that you're shooting. Still, the fact that the camera has a stereo mic that actually records quality audio makes the GH1 a far better audio device than the rest of the video-capable DSLRs out there. Unfortunately, the built-in speaker for playing back audio is only monaural, so you'll have to hook up the camera to a computer or television to hear your stereo sound.
In the Box
{{section_header}}{{section.name}}{{/section_header}}

- Lumix GH1 camera body
- Lumix G Vario HD 14-140mm lens
- DMW-BLB13PP battery
- DE-A49B battery charter
- K1HA14CD0001 AV cable
- K1HA14AD0001USB cable
- Shoulder strap
- Body cap
- Lens hood
- Lens cap
- VEK0N98 AC adapter
Meet the tester

Steve Morgenstern
Editor
Steve Morgenstern is a valued contributor to the Reviewed.com family of sites.
Checking our work.
Our team is here to help you buy the best stuff and love what you own. Our writers, editors, and experts obsess over the products we cover to make sure you're confident and satisfied. Have a different opinion about something we recommend? Email us and we'll compare notes.
Shoot us an email