Introduction
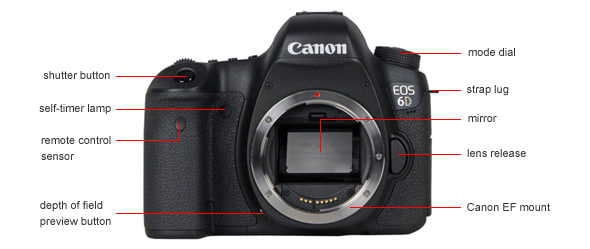
Front
{{section_header}}{{section.name}}{{/section_header}}
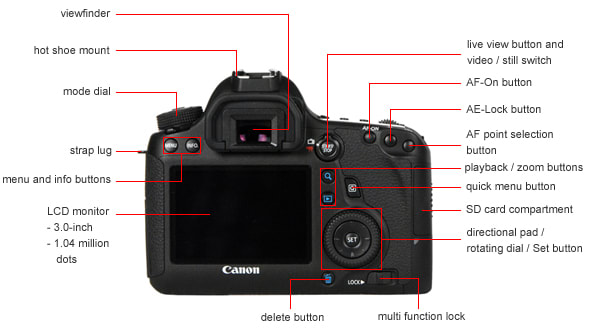
Back
{{section_header}}{{section.name}}{{/section_header}}
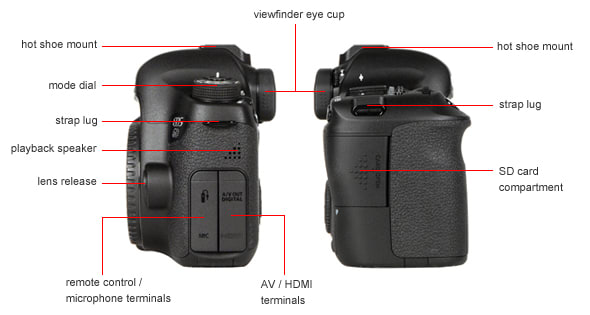
Sides
{{section_header}}{{section.name}}{{/section_header}}
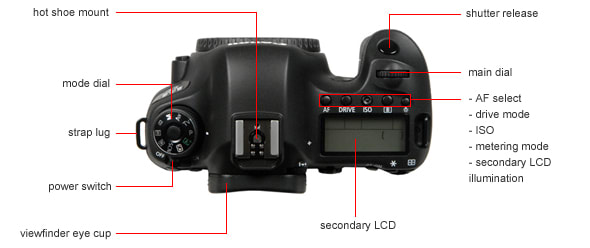
Top
{{section_header}}{{section.name}}{{/section_header}}
Bottom
{{section_header}}{{section.name}}{{/section_header}}

In the Box
{{section_header}}{{section.name}}{{/section_header}}

- Sony Cyber-shot DSC-TX9 digital camera
- rechargeable battery pack (NP-BN1)
- battery charger
- USB cable
- composite AV cable
- multi-output stand
- wrist strap
- stylus
- CD-ROM (application software and handbook)
- instruction manual
Color
{{section_header}}{{section.name}}{{/section_header}}
The Sony DSC-TX9 did well in our color accuracy test, but that is to be expected from an upper-tier compact camera. In fact, the models we selected for comparison all performed a bit better than the TX9 in this test. The TX9 achieved a minimum color accuracy of 3.02, with a saturation of about 110%. This is one area in which the TX9 actually fared more poorly than its predecessor; if color accuracy is the most vital performance characteristic for you, consider sticking with the older TX7 model from Sony. More on how we test color.
Color Modes
{{section_header}}{{section.name}}{{/section_header}}
The Cyber-shot TX9 offers literally no color modes or controls for adjusting color, saturation, etc. The only way to impact color is by choosing one of the white balance presets, which will change the color temperature. The TX7—released earlier this year—also came equipped sans color modes.
Noise
{{section_header}}{{section.name}}{{/section_header}}
All of the Sony point-and-shoot cameras we reviewed this year had excellent noise performance, and the DSC-TX9 was no exception. The camera registered very low noise levels in both bright light and low light shooting conditions and across all ISOs. The TX9's performance was virtually identical to that of the TX7, released earlier this year. More on how we test noise.
Image clarity was particularly good across the low end of the ISO spectrum—the camera averaged just under 1% noise through ISO 800. There's a noticeable spike in noise at ISO 1600, suggesting that for the best image quality, you should probably stick to ISO 125-800.
The other cameras in this group did not perform nearly as well in our noise test, particularly at ISO 200-800. If you plan to do a lot of high ISO shooting (or auto ISO in extremely low light), the Canon SD4000 was the best performer.
{{comparison_bars title="Noise Score Comparison", attribute="Noise Score", xLabel="Noise Score"}}
ISO
{{section_header}}{{section.name}}{{/section_header}}
The Sony Cyber-shot DSC-TX9 has a moderate range of ISO levels available, ranging from ISO 125 to ISO 3200. There is a High Sensitivity scene mode available, but Sony does not state whether this extends the ISO range beyond 3200 or simply forces the camera into a high-ISO/no flash mode.
Fortunately, noise levels are very low at most ISO settings; ISO 125 through ISO 800 all displayed exceptional clarity in our noise testing. If you plan to shoot beyond ISO 800, be prepared for an increase in noise.
NOTE: The images above are not used in our testing or scoring, but are included here to show real-world examples of the differences between cameras at the various ISO settings.
Resolution
{{section_header}}{{section.name}}{{/section_header}}
Our resolution testing is where the Sony DSC-TX9 really shone above the competition. The new Cyber-shot bested its predecessor substantially in sharpness and distortion—and left the competition in the dust too. More on how we test resolution.
Distortion ({{product.raw_scores['Distortion Score']}})
The tiny lens inside the TX9 proved to have no discernible distortion—at both ends of the focal range. The minuscule 0.5% distortion is not enough to be noticed in the vast majority of shooting situations, which is why the camera netted our maximum score for lens distortion.
Sharpness ({{product.raw_scores['Sharpness Score']}})
The camera's sharpness performance is what really blew us away. The 12.8-megapixel sensor captured photos that retained a great deal of fine detail, measuring a maximum horizontal sharpness of 2090 lw/ph and a maximum vertical sharpness of 2069 lw/ph. These are very good numbers for an ultracompact point-and-shoot camera in this price range.
Chromatic Aberration ({{product.raw_scores['Chromatic Aberration Score']}})
Chromatic aberration is one area in which the TX9 landed around the middle of the pack. You can see evidence of this discoloration in several of the crops below.
Quality & Size Options
{{section_header}}{{section.name}}{{/section_header}}
The TX9 comes equipped with just a handful of image size options—and no quality/compression options. That just means that the vast majority of your shooting will be done at the default 12-megapixel setting.
Image Stabilization
{{section_header}}{{section.name}}{{/section_header}}
The Sony TX9 does feature optical image stabilization, but it does not give the user the ability to turn the feature off. We test based on comparing shots taken with stabilization on and off under the same conditions. We cannot quantify the feature's effectiveness (or lack thereof) without a control example. The Sony TX7 did score well for image stabilization, but we cannot say if those results would hold true for the TX9. More on how we test image stabilization.
Video Mode
{{section_header}}{{section.name}}{{/section_header}}
The video recording capabilities of the Cyber-shot DSC-TX9 are a real highlight of this camera. Like the TX7 before it, the TX9 captures full 1080/60i HD video in the AVCHD format. What's more, you actually have a choice of several different frame rate and resolution options. AVCHD recording has a maximum clip length of approximately 30 minutes, while MPEG-4 clips are limited to 2GB.
Movie mode on the TX9 is fairly versatile, allowing users to access simple controls like exposure compensation and white balance. Since the TX9 does not offer more advanced controls in photo mode, you can be sure that options such as aperture and shutter speed are not available in movie mode either.
Optical zoom (up to 4x) is available while shooting video, as is continuous autofocus. Neither operation requires a noisy focus motor, so the stereo audio that accompanies each video remains pristine.
Video Color
{{section_header}}{{section.name}}{{/section_header}}
The color accuracy on TX9 was just one more aspect of the camera's excellent performance when it comes to capturing video. Though not as accurate as in photo mode, the colors recorded in video mode were quite accurate. Accuracy was measured at 5.75, with a saturation of 93.19%. These are better results than we've recorded on the vast majority of point-and-shoot cameras. More on how we test video color.
{{comparison_bars title="Video Color Score Comparison", attribute="Video Color Score", xLabel="Video Color Score"}}
Video Sharpness
{{section_header}}{{section.name}}{{/section_header}}
Video sharpness testing was excellent—unsurprising, given the camera's ability to capture full 1080/60i HD video. Our video sharpness registered a horizontal sharpness of 700 lw/ph and a vertical sharpness of 475 lw/ph. More on how we test video sharpness.
{{comparison_bars title="Video Color Sharpness Comparison", attribute="Video Sharpness Score", xLabel="Video Sharpness Score"}}
Playback Mode
{{section_header}}{{section.name}}{{/section_header}}
The Sony DSC-TX9 has the same playback options as several other models in the Cyber-shot series. Basic playback functions are accessed in playback mode, including a calendar view, playback zoom, and slideshow. The TX9 is also compatible with TransferJet, which allows you to upload up to ten images at a time through a wireless connection between two devices. Transfer Jet only works when in close proximity to another TransferJet-compatible device.
The interface itself is straightforward, but not without its quirks. The touchscreen can make some processes (like deletion) a laborious task. Swiping your way through a set of burst images can be confusing until you realize what's going on.
There is, of course, special playback support for the camera's 3D photography feature.
In-Camera Editing
{{section_header}}{{section.name}}{{/section_header}}
The TX9 does offer some modest in-camera editing features, though most of these are more gimmicky than they are useful. One prominently displayed feature is the Paint tool, which lets you doodle on a photo with a stylus or add cheesy stamps and frames to the image.
Slightly more useful is the retouch option, which allows the user to crop/resize, correct redeye, and apply an unsharp mask.
Direct Print Options
{{section_header}}{{section.name}}{{/section_header}}
The vast majority of point-and-shoot cameras today offer the same DPOF and PictBridge support: the TX9 is no different. DPOF allows you to flag images on the memory card for printing, and when you insert this memory card into a printer, the printer will detect the flagged images and print them. PictBridge support means that this camera can be connected directly to a printer that supports it to print without a computer.
As mentioned above, the TX9 is also compatible with TransferJet, which allows for wireless transfer between two TransferJet devices. The devices need to be in close proximity, so TransferJet merely eliminates the need for a USB cable. (A convenient option, since the TX9 has no USB on it's body and must be connected to USB via the external docking station.)
Viewfinder
{{section_header}}{{section.name}}{{/section_header}}
Luckily, Sony did not attempt to cram a tiny viewfinder onto the ultracompact DSC-TX9. With its generous LCD, there's really no need to add a useless viewfinder.
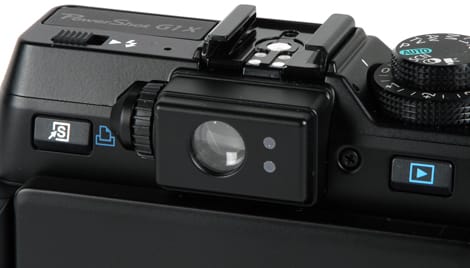

... and it has a diopter adjustment ring.
Display
{{section_header}}{{section.name}}{{/section_header}}
The 3.5-inch LCD is a real highlight of the TX9, making it easy to line up shots and view your handiwork in playback. Of course, some part of that real estate is used for the camera's touchscreen controls, but that just means that there's plenty of room. Sony does provide users with a small stylus, but we found that the buttons were big enough to be activated with your finger.

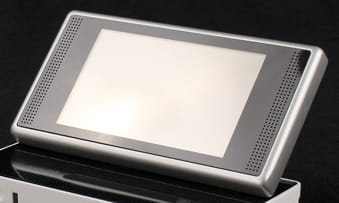
...but it turns into a nice 3-inch widescreen in playback mode.
Flash
{{section_header}}{{section.name}}{{/section_header}}
The flash on the Cyber-shot TX9 is identical to that provided on its predecessor, the TX7. It is small, but fairly powerful, allowing us to take decent photos in total darkness out to a range of about ten or eleven feet. The camera comes equipped with a standard range of flash options, including auto, on, off, slow synchro, and red-eye reduction.

The flash emitter pops up from the top of the body via a mechanical release.
Lens
{{section_header}}{{section.name}}{{/section_header}}
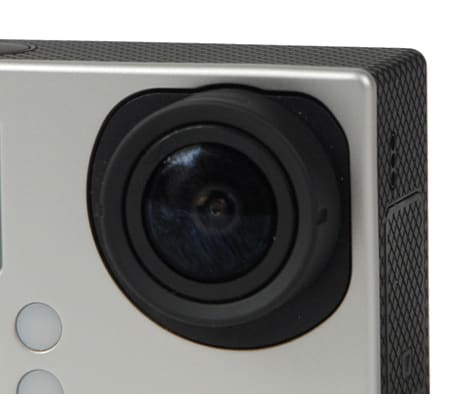
The tiny Carl Zeiss Vario-Tessar lens is another import from the TX7. This little 4x optical zoom lens fits entirely within the casing of the camera, allowing it to be protected by the single, large sliding cover when not in use. We're big fans of this simple, cunning design, as it allows a single cover to protect the lens, microphones, flash, and AF assist lamp.
The lens itself has a focal range of 4.43mm-17.7mm; the 35mm equivalent is 25mm-100mm. That's a decent range for a tiny compact camera, with a wide enough angle to capture good group photos or landscapes. The maximum aperture is f/3.5-f/4.6, with a minimum of f/6.3. That range isn't great—the camera's automatic aperture will only choose from three or four options—but it's to be expected on this type of camera.
Battery
{{section_header}}{{section.name}}{{/section_header}}
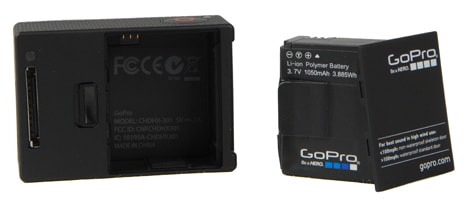
The DSC-TX9 employs a small NP-BN1 lithium-ion battery. The camera ships with a battery charge station so that you must remove the battery from the camera in order to charge it. The docking station (or multi-output stand) has a DC power input, but you must buy the DC power cord separately.
Memory
{{section_header}}{{section.name}}{{/section_header}}
The TX9 records primarily to removable memory cards: either SD/SDHC or MemoryStick PRO Duo cards. Sony does not state whether the camera is compatible with SDXC cards, so it's probably safer to assume that it is not. The camera does have a modicum of internal memory (about 32MB), but that can only be used for 5-6 photos at the maximum quality setting.
Jacks, Ports & Plugs
{{section_header}}{{section.name}}{{/section_header}}
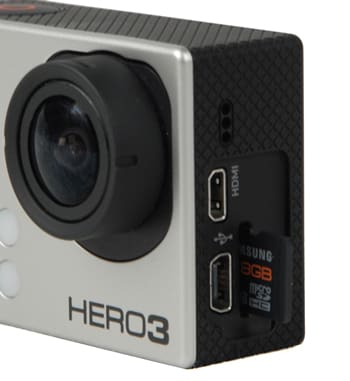
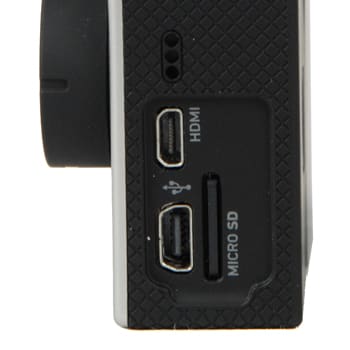
The Cyber-shot TX9 has only a single port on the body of the camera: a multi-connector for interfacing with the included docking station (called multi-output stand by Sony). If you want to connect the camera via HDMI, AV, or USB, you'll need to have this dock on hand at all times. If you have a memory card reader in your television or computer, you can transfer files without the dock. The TX9 is also enabled with TransferJet, making it possible to transfer files wirelessly with other TransferJet devices in close proximity.
The dock itself houses a number of ports, including standard miniUSB and miniHDMI connections. There is an A/V output, which can be used with the included composite AV cables or with component cables (sold separately). If you want to charge the camera while in the docking station, you can also purchase a proprietary DC power cable.
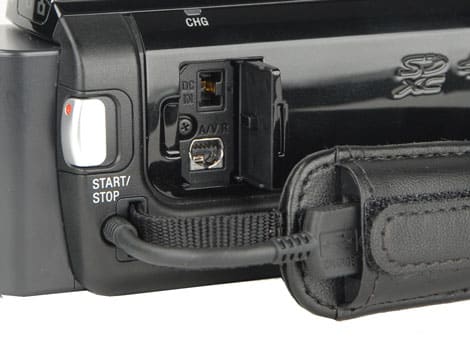
The DC-input and multi-AV port are located on the right side of the camcorder.
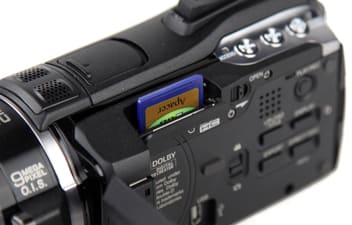
... as is the SD/SDHC card slot.
Shooting Modes
{{section_header}}{{section.name}}{{/section_header}}
The Sony Cyber-shot DSC-TX9 is heaped full of shooting modes—all designed to aid the user with a variety of automatic image adjustments. Shooting modes are accessed easily via the Mode button on the touchscreen. These include: Intelligent Auto (iAuto), Superior Auto Adjustment, iSweep Panorama, Movie Mode, Program Auto, Background Defocus, Scene Selection, and 3D Shooting. Scene Selection mode allows you to choose from a number of more specific presets. Available choices are: Soft Skin, Soft Snap, Anti Motion Blur, Landscape, Backlight Correction HDR, Twlight Portrait, Twilight, Hand-Held Twilight, High Sensitivity, Gourmet, Pet, Beach, Snow, Fireworks, Underwater, and High-Speed Shutter.
We detailed many of these shooting modes and scene modes in much greater detail in the TX7 review published earlier this year. Superior Auto—new for the TX9—shoots each composition at a number of different exposures, then combines those shots to create a single "superior" shot.
Focus - The autofocus on the TX9 is generally responsive, both in normal light and low light. It usually took less than a second to find the right focus point, and was often much quicker. There are also a number of ways to control the focusing, including a handy feature that takes advantage of the camera's touchscreen controls. Simply tap the screen and the TX9 will use that as its focus point.
You can also adjust the autofocus to one of three typical settings: Multi AF (which uses 9 focus points), Center AF (which uses a rectangular area in the center of the screen), or Spot AF (which uses a single point in the middle of the screen).
Face detection can recognize up to 8 faces in the frame. You can either select the face to use as the focus point by tapping on it, or set the camera to prioritize on adult or child faces.
Exposure - The TX9 offers only the standard exposure compensation, with no options for bracketing or independent control over shutter speed and aperture. The Superior Auto mode will do something similar to bracketing: the camera takes multiple shots at various exposures, but then combines those shots into a single "superior" photo.
The exposure compensation option (called EV) is a little buried, but if you plan to use the option frequently, you can simply drag it over to your commonly used functions and it will remain on the left side of the LCD during shooting.
Metering - The typical metering mode options are available in program mode: an automatic evaluative mode (called multi), center weighted and spot metering. Enabling face detection sets the camera to meter correctly for the faces in the image.
White Balance - The common options are also available for white balance: you can set it to auto, use any one of 7 presets, or perform a custom white balance. The custom white balance was easy to use and usually quite accurate: simply point the camera at a white or gray surface, and push the corresponding button on the LCD. White balance presets include
daylight, cloudy, incandescent, flash, and three different fluorescent light options.
Aperture - The DSC-TX9 has a good range of aperture settings for a compact point-and-shoot camera. However, there is no manual aperture mode, so you will have to leave it up to the camera to choose the best aperture for you.
Shutter Speed - As with aperture, there is no manual shutter speed available on the TX9. Everything is selected automatically by the camera depending on your shooting conditions. The standard range of shutter speeds selected in Program mode is 1 sec. to 1/1600. This expands to include 2 seconds when the camera is set to iAuto mode. Sony does not specify the shutter speed used for the High-Speed Shutter scene mode.
This is a relatively narrow range of shutter speeds, even for a compact point-and-shoot camera.
Self-Timer - The TX9 offers the usual limited variety of self-timer options. You can dig through the menus for these or move self-timer over to your custom menu so that it always appears on the LCD while shooting. The camera's self-timer can be set to operate in conjunction with face recognition, automatically taking the photo when one or two faces have entered the frame. There is also a smile a shutter function, which will automatically take a photo when a smile is detected.
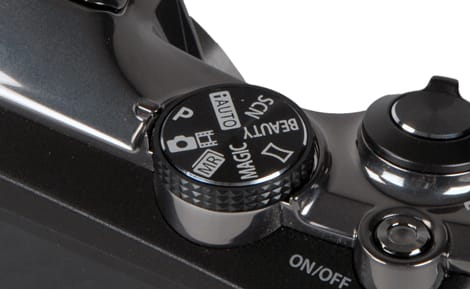
The full mode dial is nice, but frequently rotates by accident.
Picture Effects
{{section_header}}{{section.name}}{{/section_header}}
The TX9 does not offer any picture effects (such as a vibrant setting or sharpness controls).
Manual Controls
{{section_header}}{{section.name}}{{/section_header}}
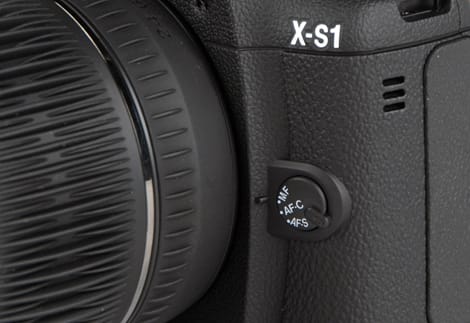
A dedicated focus-mode switch on the front panel.
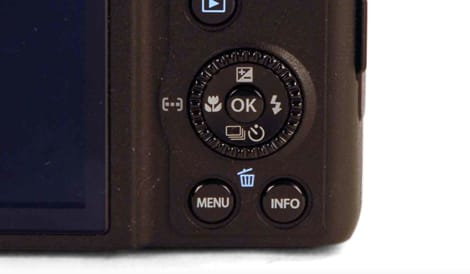
The scroll wheel surrounding the d-pad is neither awful nor perfect.
Drive/Burst Mode
{{section_header}}{{section.name}}{{/section_header}}
There is no unlimited continuous shot on the TX9, but the camera does offer the same insanely fast burst shot that is offered on the TX7. There are three burst settings, each with a different speed (up to 10fps, up to 5fps, and up to 2fps). No matter which setting you choose, the maximum number of photos taken in this manner is ten. All three burst settings can be used with the self-timer, which will take ten photos at the desired speed with a single push of the button.
During playback, all photos shot within a single "burst" are displayed in a folder. This is a little unintuitive at first, but is ultimately a handy way of skipping from burst to burst—especially if you use this feature often.
Shot to Shot ({{product.raw_scores['Shot to Shot Score']}})
As with the TX7, we were impressed by the TX9's ability to take several photos in such fast succession. We found that the TX9 averaged about 11 shots per second on its highest speed mode. The burst modes all max out at 10 photos, but we find that you rarely want to take more than ten photos in this way before starting again.
Handling
{{section_header}}{{section.name}}{{/section_header}}
While we love the TX9's diminutive size and huge LCD touchscreen, these advantages do come at a price. The TX9 is quite small in the hand, making it a bit difficult to hold in a traditional one-handed grip. There's also very little on the camera in the way of gripping surfaces: the front is smooth and slippery; the back has just three tiny ridges to provide support. As a result, we suggest holding the camera in two hands or leaving a thumb under the camera for support. (Using the provided wrist strap for added security wouldn't hurt either.)
These dedicated buttons give you quick access to aperture and shutter speed controls.
Buttons & Dials
{{section_header}}{{section.name}}{{/section_header}}
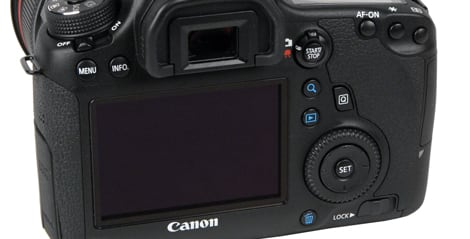
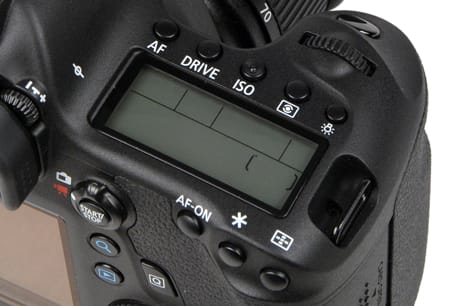
The few physical buttons on the camera are located on the top: power, shutter, zoom, playback, and a photo/video mode button. The buttons are well designed and in an intuitive location, but they are quite small. The zoom lever works well enough, but you have little control over varying the zoom speed with such a limited toggle.
The rest of the camera's controls are accessed via the touchscreen. Sony seems to have improved the interface since the TX7, as we noticed the screen is more responsive than it was in our previous experience. The screen still ignores your inputs if you are touching it in more than one place, so we definitely recommend that you keep your thumb and fingers framing the camera to prevent a stray thumb from wandering onto the LCD. The camera ships with a small stylus that can be used to interact with the touchscreen, but we found that the stylus wasn't really necessary.
Menus
{{section_header}}{{section.name}}{{/section_header}}
Since the TX9 is controlled entirely via touchscreen, the menu system is an important component of the camera's usability. We found that the menu was well-designed and simple to use. The touch controls were, themselves, quite responsive, though the scroll buttons were a bit small and difficult to activate at times.
Most items were very easy to locate, though some peculiar options are hidden in the mode selection and scene selection interfaces. Background defocus, for instance, seems a peculiar choice for a "mode." We do, however, enjoy the customizable interface that easily lets you drag and drop your favored options into a more permanent location. You can a handful of features to appear on the left side of the LCD during recording (such as self-timer or exposure compensation) if you plan to use those options frequently.
For users that find even this simple menu interface daunting, there is an easy mode, which slims down the number of options available and enlarges the text and icons of the menu.
Manual & Learning
{{section_header}}{{section.name}}{{/section_header}}
The TX9 comes with a tiny instruction manual that has only brief descriptions of a couple key features. It will help you identify what accessories ship with the camera and some basic specs. It shows you how to remove the battery pack for charging and set the date and time. This basic instruction manual is available for download here,600,560,10,10,%27Manuals%27.
For a more thorough investigation of the camera's operation, you'll need to turn to the handbook, which is available here,600,560,10,10,%27Manuals%27 on the Sony website or on the CD-ROM that ships with the TX9. This documentation is an excellent resource, providing detailed illustrations and helpful explanation of every camera option.
Panasonic Lumix DMC-ZS3 Comparison
Sony didn't make many improvements when introducing the TX9 as an upgrade to the previously released TX7. In our testing labs, the differences were quite subtle, with sharpness leading the pack of improvements that Sony thinks worth an extra $50. That improved sharpness in photos and video is clearly the result of the shiny new sensor: 12.2MP instead of 10.2MP on the TX7.
The Superior Auto and 3D shooting are both new features as well, but we're not sure how many people would really be willing to pay extra money for that. With virtually the same design, menus, and options, that leaves the increased resolution as the only compelling reason the purchase the TX9 over its less expensive sister model.
Of course, we like performance. A lot. So, unless you're getting an insane deal on the TX7, why not pony up and get yourself better quality?
Canon PowerShot SD4000 IS Comparison
Though these two cameras are offered with the same MSRP, they stand as clear evidence that not all cameras are created equal. The Sony Cyber-shot DSC-TX9 outshines the Pansonic ZS3 in virtually every performance category, particularly in noise and resolution. Looking at the score below, you might think the Panasonic inferior in every possible way.
What, then, remains to persuade people to buy it? There are some simple things that set it apart: people may not like the design of the TX9 or its touchscreen controls. A more compelling reason, however, may be the versatility of the ZS3's controls, including picture effects, exposure bracketing, and autofocus tracking. The ZS3 also showed itself to be extraordinarily capable in the video department—something that may appeal to a certain niche audience.
If you simply want the best photos, however, the TX9 is the obvious winner.
COMP 3
The Canon SD4000 IS certainly stands as a strong performer among this year's point-and-shoot contenders. Having been recently replaced by the SD4500, it also stands about $50 cheaper than the newly minted TX9. However, there are some things worth paying for, and the TX9's incredibly sharp, 12.22MP sensor is one of those things. The TX9 edged out the SD4000 in several key performance areas and proved itself a bit more impressive in video performance as well.
What the SD4000 does have—besides a $50 savings—is a tad bit more versatility in manual controls. The TX9 gives you eight ways to cruise on autopilot, but not even a hint of aperture or shutter control. If these are options you think you might like in a point-and-shoot camera, the SD4000 is clearly the camera for you.
Conclusion
The Sony Cyber-shot DSC-TX9 is an impressive camera. It is simply and elegantly designed and has stellar performance in every one of our testing categories.
That said, it is certainly not a camera for everyone. Those looking for some degree of manual image control will be sorely disappointed, as the TX9 offers no hint of an aperture priority mode or sophisticated picture adjustments. It does, however, have a wealth of auto modes, like iAuto, Superior Auto, panorama, and Sony's strange 3D photos mode.
For users hunting for an easy point-and-shoot experience with excellent photo quality, we can't think of many cameras we would recommend over the TX9.
Photo Gallery
{{photo_gallery "Front Photo", "Back Photo", "Sides Photo", "Top Photo", "Bottom Photo", "Lens Photo", "Flash Photo", "EVF Photo 1", "EVF Photo 2", "LCD Photo 1", "LCD Photo 2", "Media Photo", "Modes Photo", "Manual Controls Photo", "Manual Controls Photo 2", "Other Controls", "Buttons 1", "Buttons 2", "Other Hardware Photo", "Battery Photo", "Ports Photo 1", "Ports Photo 2", "Ports Photo 3", "Ports Photo 4", "Handling Photo 1", "Handling Photo 2", "Handling Photo 3", "Box Photo"}}
Meet the tester
Vice President of Editorial Management, Kaitlyn oversees the editorial departments of Reviewed.com’s various sites. She has been writing about technology since the turn of the century. Outside of her Reviewed.com home, Kaitlyn is also a theatre director and avid gamer.
Checking our work.
Our team is here to help you buy the best stuff and love what you own. Our writers, editors, and experts obsess over the products we cover to make sure you're confident and satisfied. Have a different opinion about something we recommend? Email us and we'll compare notes.
Shoot us an email