Pros
Cons
Introduction
Design
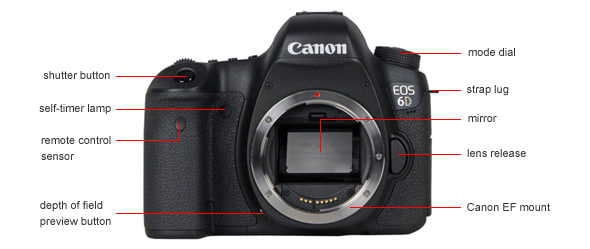
Front
{{section_header}}{{section.name}}{{/section_header}}
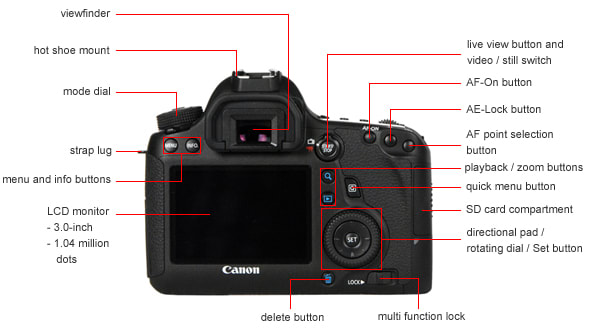
Back
{{section_header}}{{section.name}}{{/section_header}}
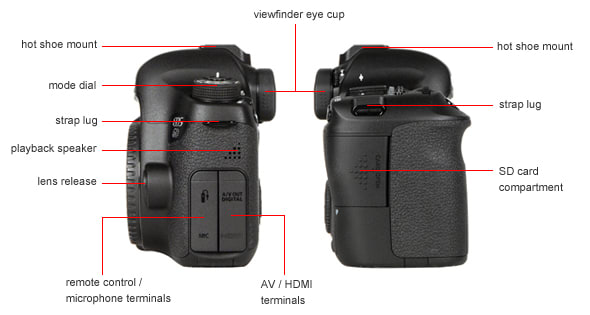
Sides
{{section_header}}{{section.name}}{{/section_header}}
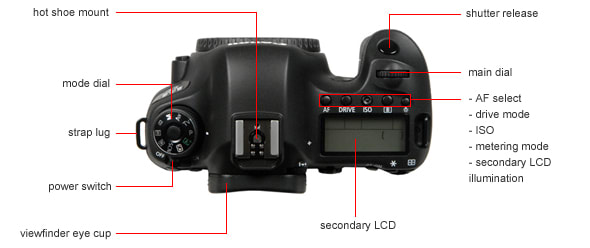
Top
{{section_header}}{{section.name}}{{/section_header}}
Bottom
{{section_header}}{{section.name}}{{/section_header}}

In the Box
{{section_header}}{{section.name}}{{/section_header}}

- Sony A550 camera with body cap
- Lens
- FM500H rechargeable Li-on battery
- BC-VM10 battery charger
- Shoulder strap
- USB cable
- Software CD
- Instruction manual
- Eyepiece cover
Lens & Sensor
{{section_header}}{{section.name}}{{/section_header}}
The APS-C format sensor has a gross resolution of 14.6 megapixels and an effective resolution of 14.2 megapixels. To fight the battle against dust intrusion, there's a charge protection coating on the low-pass filter, and a sensor vibrating mechanism that kicks in whenever the camera is turned off.
Viewfinder
{{section_header}}{{section.name}}{{/section_header}}
The eye-level pentamirror viewfinder offers a 95% field of view and 0.80 magnification. The diopter control, which is nicely shielded from errant fingers, offers -2.5 to +1.0 m-1 range of adjustment.
The eyecup can be removed and replaced with optional magnifying and angle finder accessories.
There is a sensor below the optical viewfinder that turns the LCD information display off when you hold the camera to your eye. However, switching between Live View and viewfinder while shooting requires sliding a mechanical switch on top of the camera, which seems like an odd solution. On the other hand, if you want to shoot on a tripod and avoid having light flood into the eyepiece and alter the exposure reading, shooting in Live View means you can avoid using the cumbersome included eyepiece cover, which requires removing the eyecup to insert.
Display(s)
{{section_header}}{{section.name}}{{/section_header}}
The A550 boasts a handsome 3-inch LCD with 921,600-dot resolution. The LCD brightness can be automatically adjusted using a built-in light sensor, or it can be set manually to one of five levels.
The LCD is articulated, in an odd way. There's a hinge along the bottom edge that allows the screen to pulled outward from the body, then tilted up or down to allow viewing from overhead or when holding the camera down low. This is useful, of course, but doesn't help at all if you want to shoot with the camera off to one side, or turn the screen around completely to shoot a self-portrait. The Nikon D5000, for example, uses an LCD that flips down with a bottom hinge, but it also pivots around, so you can turn it to shoot from the side, or turn it around completely and close it up, leaving the screen protected against the back of the camera.
When shooting with the viewfinder there are two information display options for the LCD. The Graphic Display (the default setting) and the Standard Display. The Standard Display version shown below appears when you're shooting in program, aperture-priority, shutter-priority or manual modes. A simpler version is used when shooting in auto.
A feature we like is the way the data display rotates 90 degrees when you hold the camera in portrait rather than landscape orientation. Unfortunately, this works only in viewfinder shooting mode, not Live View, and playback screens don't rotate.
Shown below is a diagram of the LCD info display in graphic mode, with all potentially visible settings shown and identified.
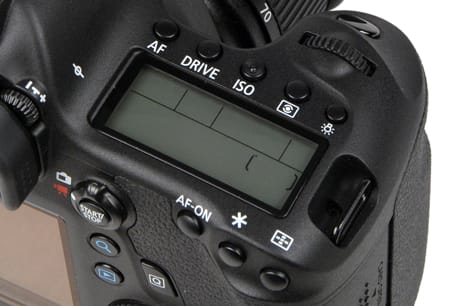
Secondary Display
A monochrome LCD panel positioned on the top panel of an SLR, providing shooting setting info when viewed from above, is a higher-end SLR feature, and not included here.
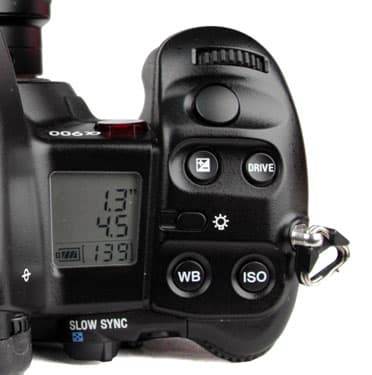
The mono LCD display is small and disappointing.
Flash
{{section_header}}{{section.name}}{{/section_header}}
The pop-up flash has a guide number of 12 at ISO 100. When shooting at ISO 200 at an f/2.8 aperture, this translates to a flash range of 3.3 - 20 feet (1-6 meters). Sony gives the cycle time at approximately 4 seconds, which feels about right. When shooting in the standard Auto mode, the camera can pop up and fire the flash on its own when lighting conditions warrant it, but fortunately there's a separate spot on the mode dial for Auto without flash, so you can prevent accidental discharge in inappropriate settings.
We were happy with the flash performance in most respects. The illumination levels were fine for most indoor settings, coverage was more even than most built-in systems we test, and the exposures were well balanced. We also found that it took just about two seconds to recharge and fire again, which feels pretty speedy. Unfortunately, the A550 uses the flash for autofocus assist purposes instead of a dedicated autofocus assist lamp. The brief bursts of AF assist lighting are disturbing, and it takes two to achieve focus (when it succeeds at all). Not a great assist when trying to shoot indoor candids.
There are two flash control options. Advanced Distance Integration (ADI) uses focus distance information from the lens in addition to light metering from a pre-flash to set the exposure level. The TTL method relies only on the pre-flash information, and is used automatically when the lens doesn't provide distance readings or an off-camera flash is used.
Red-eye reduction is turned on using the shooting menu, rather than selected as one of the flash modes.
Flash exposure compensation is available, in a range of ±2 EV in 1/3 EV increments. The flash sync speed is 1/160 second.
Given the company's well-established love of proprietary formats, it should come as no surprise that Sony uses a non-standard hot shoe, limiting your shopping options.Sony offers the compact HVL-F20AM ($129.99), the more powerful HVL-F42AM ($299.99) and their top of the line HVL-F58AM ($499.99).

The flash emitter pops up from the top of the body via a mechanical release.
Connectivity
{{section_header}}{{section.name}}{{/section_header}}
The A550 has two connector doors on the left side of the camera. One covers a jack for the optional RM-S1AM or RM-L1AM wired remotes. The other provides a standard mini USB jack for connecting to a PC and a mini HDMI jack for hooking up to a high-def TV. Another connector, located on the right side, is used with the optional external DC adapter.
What's missing from this picture? An analog TV connector. We know Sony makes lots of high-def TVs, but we still find it weird that there's no way to connect the A550 to a set that's not high-def. The only video output is HDMI, and needless to say the required cable is not included. On the bright side, if you do connect via HDMI to a compatible Sony set, you can use the TV remote to control camera playback.
Battery
{{section_header}}{{section.name}}{{/section_header}}
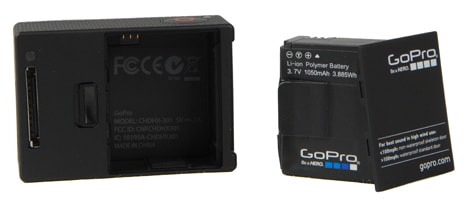
The A550 uses the NP-FM500H rechargeable Lithium ion battery pack, Sony gives the battery life per charge as 480 images when shooting in Live View mode and 950 images in viewfinder mode, based on CIPA standard testing procedures.
One of the nice features of Sony battery technology, which the company calls 'InfoLITHIUM' is the enhanced battery level information they offer. In addition to the usual battery level indicator, the precise percentage of remaining battery life is also displayed on-screen.
Memory
{{section_header}}{{section.name}}{{/section_header}}
The camera supports both Sony's proprietary Memory Stick PRO Duo format (up to 16GB) and the industry-standard SD/SDHC memory card format (up to 32GB) , in separate slots. You select which one you're using by moving a switch in the battery compartment. Unfortunately, there's no option to switch between cards through the menu system, which would be more convenient if you wanted to save different types of shots in different locations.
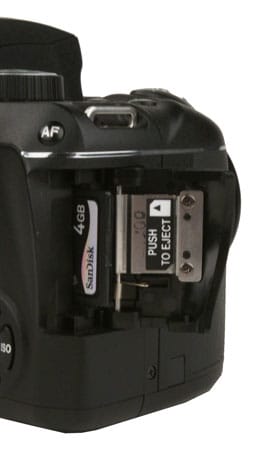
The K2000 accepts inexpensive, easy to find SD cards.
Photo Gallery
{{photo_gallery "Front Photo", "Back Photo", "Sides Photo", "Top Photo", "Bottom Photo", "Viewfinder Photo 1", "Viewfinder Photo 2", "Display Photo 1", "Display Photo 2", "Secondary Display Photo", "Flash Photo", "Lens Mount Photo", "Lens Photo 1", "Lens Photo 2", "Battery Photo", "Memory Photo", "Ports Photo 1", "Ports Photo 2", "Ports Photo 3", "Ports Photo 4", "Ports Photo 5", "Ports Photo 6", "Modes Photo", "Handling Photo 1", "Handling Photo 2", "Handling Photo 3", "Buttons Photo 1", "Buttons Photo 2", "Mic Photo", "Box Photo"}}
Image Quality
Sharpness
{{section_header}}{{section.name}}{{/section_header}}
Image sharpness holds up reasonably well at all tested focal lengths, with the only major trouble occurring at very high aperture settings. The top results in our tests were at the 35mm focal length, with a maximum horizontal resolution reading of1881 lw/ph and a maximum vertical reading of 1734. More on how we test sharpness.
Image Stabilization
{{section_header}}{{section.name}}{{/section_header}}
Like other Sony SLRs, the A550 provides in-camera image stabilization, so any lens can benefit from the technology. However, in our tests using the kit 18-55mm lens at its full telephoto length, we found the IS system provided minimal improvements. We test image stabilization based on the improvements in image resolution produced with the system turned on versus shots taken with the system off. The camera is mounted in a custom-built, computer-controlled rig, shooting separately in both horizontal and vertical orientation and with low and high levels of shake.
Color
{{section_header}}{{section.name}}{{/section_header}}
The Sony A550 was reasonably accurate in reproducing color hues, but routinely produced oversaturated images in every available color mode, which brought down the overall score in this section. We test color accuracy by shooting the X-Rite ColorChecker chart under bright 3000 lux studio illumination in all of the camera's color modes (in this case, these are called Creative Styles, and there are six in all). We use Imatest software to analyze the captured color compared to the known values of the industry-standard chart, and derive a score based on the camera's most accurate color mode. For the A550, this was the Portrait mode, though Standard mode produced results that were very close to these values. More on how we test color.
In all of the color modes, light skin tones were reproduced very accurately, though dark skin didn't fare as well. Purple and green were also handled well in Portrait and Standard modes. However, blues and reds were seriously off the target values. As you'd expect, the Landscape mode pushes blues and greens into unrealistically 'pretty' tones, Sunset pumps up the reds and yellows. Vivid mode doesn't change color values much (except for blue tones), but pumps saturation up to over 125%, and Landscape and Sunset modes are about the same when it comes to flagrant oversaturation, As for Standard and Portrait modes, they each come in at around 110% saturation. It's interesting that, when we tested the Sony A900 some months ago, we found similar color reproduction patterns with these same Creative Styles, but that camera also included a Neutral mode that was far more accurate. Presumably, someone at Sony decided that for this more consumer-oriented SLR, the less sophisticated buyer would welcome more pumped-up colors.
NOTE: Because of the way computer monitors reproduce colors, the images above do not exactly match the originals found on the chart or in the captured images. The chart should be used to judge the relative color shift, not the absolute captured colors.
The Sony A550 and Panasonic GF1 each produced so-so color reproduction performance, with the GF1 actually less accurate when it came to color values but without the Sony oversaturation problem. As shown here, the Canon, Nikon and Olympus all delivered significantly more accurate color.
{{comparison_bars title="Color Score Comparison", attribute="Color Score", xLabel="Color Score"}}
Color Modes
{{section_header}}{{section.name}}{{/section_header}}
The A550 offers six Creative Style settings (the A900 has thirteen). These settings affect color reproduction in addition to contrast, saturation and sharpness (these last three can be adjusted, as explained in detail the Picture Effects section of this review). Shown below are sample swatches taken from our test shots of the X-Rite ColorChecker chart in each Creative Style mode (except black and white). The ideal chart value is shown in the leftmost column. The color names are those used by X-Rite.
White Balance
{{section_header}}{{section.name}}{{/section_header}}
The A550 did reasonably well in our automatic white balance testing, but taking a custom WB reading didn't produce the level of precise color reproduction we expect from custom white balance systems, leading to a mediocre overall score. We test white balance accuracy by shooting the ColorChecker chart inside the X-Rite Judge II lightbox, which produces consistent color temperatures for incandescent, compact fluorescent and daylight illumination.
Automatic White Balance ({{product.raw_scores['Auto White Balance Score']}})
The automatic WB system was particularly adept at handling often-tricky fluorescent lighting, and did almost as well in daylight. Only incandescent illumination, the tungsten-bulb light source that so often produces overly warm, orange-hued photos, tripped up the A550.
Custom White Balance ({{product.raw_scores['Custom White Balance Score']}})
The color errors we measured after taking a custom white balance reading aren't extreme, but they are larger than we like to see in an SLR, where accuracy standards in this mode are demanding.
The level of color error during daylight shooting is unlikely to be noticeable to the naked eye in your photos. With the noteworthy exception of the Panasonic GF1, none of the comparison cameras handled incandescent lighting particularly well. The A550 has the honor of being less bad than the others here. Fluorescent lighting can be tough on an automatic white balance system, but the A550 handled the challenge well, particularly compared to the Nikon D5000 and Olympus E-30.
The overall white balance score for the Sony A550 is a bit below the competition, owing largely to the mediocre custom white balance results.
{{comparison_bars title="White Balance Score Comparison", attribute="White Balance Score", xLabel="White Balance Score"}}
White Balance Options
{{section_header}}{{section.name}}{{/section_header}}
In addition the Auto WB mode there are six white balance presets: Daylight, Shade, Cloudy, Incandescent, Fluorescent, and Flash.
Each of these white balance presets can be adjusted, with three available steps toward a more reddish tone and three toward a more bluish tone. However, since you can't see the effects of this tweaking while you're changing the setting, it's not likely to get much use.
Taking a manual exposure reading is simple enough, once you figure out the slightly obscure series of controller presses required to actually take the reading. Two additional white balance adjustment methods are available; enter a color temperature value in degrees Kelvin, or choose a virtual Color Compensation filter, selecting one of nine values for either green or magenta. Again, since there's no visible feedback until you've actually taken and reviewed your photo, we don't expect these options to be very popular.
White balance bracketing is also available, as a drive mode setting. A single image is shot and stored in three separate JPEG files, each with an adjusted white balance value. The user can choose between having a large (20 mired) or small (10 mired) adjustment value applied.
Long Exposure
{{section_header}}{{section.name}}{{/section_header}}
Our long exposure test weighs two component factors, image noise and color accuracy. The Sony A550 did well when it came to noise and less well on color accuracy (which makes sense, since even under ideal conditions its color reproduction isn't great). Overall, this produced a decent but not exceptional score.
The long exposure test procedure involves shooting the X-Rite ColorChecker chart under subdued lighting, at shutter speeds ranging from 1 second to 30 seconds, with any long exposure noise reduction system set both on and off. The resulting test images are run through Imatest to determine image noise levels and color accuracy. More on how we test long exposure.
Color error remained nearly constant, at a relatively high level, across all tested shutter speeds, and saturation ran about 108% across the board. Long exposure noise reduction had no effect on the results.
The image noise levels didn't vary much with shutter speed either, remaining at under 1% throughout. The long exposure noise reduction system had little effect here either, which is a result we often see -- in fact, it's not uncommon for long exposure noise reduction to make matters worse. The concept is to have the camera take a second exposure with the shutter closed, analyze the noisy areas in this dark exposure and then mathematically remove these spots from the original shot. However, since the overwhelming majority of image noise is random, this approach rarely produces much improvement and, what's more, doubles the time before you can take another shot.
The two stragglers in our comparison group, the Olympus and Panasonic, have something in common: they both use smaller Four Thirds / Micro Four Thirds sensors, which are subject to higher image noise than the larger APS-C format sensors found in the other three cameras. The Sony didn't match the performance of the Canon Rebel T1i or Nikon D5000, but it's not far behind.
{{comparison_bars title="Long Exposure Score Comparison", attribute="Long Exposure Score", xLabel="Long Exposure Score"}}
Noise Reduction
{{section_header}}{{section.name}}{{/section_header}}
Unlike most SLRs, which offer the option to turn high-ISO noise reduction off entirely to preserve the maximum level of image detail, the A550 offers only two choices here: high, which emphasizes image quality and normal, which prioritizes shooting speed). (Panasonic also prohibits turning high ISO noise reduction off entirely, though they do offer five levels to choose from). Given Sony's take it or take a little less of it attitude, the question becomes 'How well do the A550 photos capture fine image detail after the noise reduction system gets done with them?' In our sample photos taken at high ISOs, we found the camera ramped up sharpening substantially as ISOs increased, producing images that do deliver fine detail, albeit in a field of colorful speckles.
The difference in processing kicks in at ISO 1600 and the higher setting does offer a small improvement at ISO 1600 and 3200, where the noise levels are still low enough to offer usable results.
We break out the levels for the component parts of image noise: red, green, blue, yellow and chroma (gray). If the noise in one channel spikes over the others it can cause a problem even when the overall noise level is relatively low. In this case, though, they are all grouped tightly together. More on how we test noise.
ISO Options
{{section_header}}{{section.name}}{{/section_header}}
Available settings range from ISO 200 to an unusually high ISO 12800. There is also an Auto ISO setting, which is the only available mode when shooting in Auto or scene modes. Auto ISO is limited to the ISO 100-1600 range.
Dynamic Range
{{section_header}}{{section.name}}{{/section_header}}
The A550 is specially built to produce high-dynamic-range photos, using a special shooting mode that combines two images taken at different exposure settings in-camera to create an image that maximizes detail in the highlight and shadow areas (see details in our Exposure section). Even without using this neat trick, though, the camera delivered strong dynamic range performance. In fact, the A550 outscored all the other cameras in our test group by a significant margin.
We test a camera's dynamic range by shooting a Kodak stepchart, with 20 gradated patches ranging from solid white to solid black, at the full range of available ISO settings. These test shots are analyzed using Imatest to determine the number of visible steps in each photo, then compiled to produce an overall score for the entire test range.
A camera's dynamic range inevitably declines as the ISO level increases, but the A550 started at a high 7.55 EV rating at ISO 200 and this figure dropped very gradually as we cranked up the light sensitivity. In fact, even at ISO 6400 we still recorded a dynamic range of 4.29 EV, roughly equivalent to what the Panasonic GF1 managed at ISO 800. More on how we test dynamic range.
The closest competitor to the Sony A550 here is the Nikon D5000, but its d-range reading drops to 5.93 EV at ISO 800, where the Sony is still at 6.69 EV. The A550 proves its mettle here against all comers, particularly the small-sensor Olympus and Panasonic, which had trouble with this test.
{{comparison_bars title="Dynamic Range Score Comparison", attribute="Dynamic Range Score", xLabel="Dynamic Range Score"}}
Noise Reduction
{{section_header}}{{section.name}}{{/section_header}}
Unlike most SLRs, which offer the option to turn high-ISO noise reduction off entirely to preserve the maximum level of image detail, the A550 offers only two choices here: high, which emphasizes image quality and normal, which prioritizes shooting speed). (Panasonic also prohibits turning high ISO noise reduction off entirely, though they do offer five levels to choose from). Given Sony's take it or take a little less of it attitude, the question becomes 'How well do the A550 photos capture fine image detail after the noise reduction system gets done with them?' In our sample photos taken at high ISOs, we found the camera ramped up sharpening substantially as ISOs increased, producing images that do deliver fine detail, albeit in a field of colorful speckles.
The difference in processing kicks in at ISO 1600 and the higher setting does offer a small improvement at ISO 1600 and 3200, where the noise levels are still low enough to offer usable results.
We break out the levels for the component parts of image noise: red, green, blue, yellow and chroma (gray). If the noise in one channel spikes over the others it can cause a problem even when the overall noise level is relatively low. In this case, though, they are all grouped tightly together. More on how we test noise.
ISO Options
{{section_header}}{{section.name}}{{/section_header}}
Available settings range from ISO 200 to an unusually high ISO 12800. There is also an Auto ISO setting, which is the only available mode when shooting in Auto or scene modes. Auto ISO is limited to the ISO 100-1600 range.
Focus Performance
{{section_header}}{{section.name}}{{/section_header}}
The A550 uses a 9-point autofocus system when shooting with the viewfinder, with eight line sensors and a cross-hair sensor in the middle. There are two focus modes, Single-shot and Continuous, plus an automatic mode that lets the camera make the call.
By default, the camera uses an Eye-Start AF system when shooting with the optical viewfinder. Holding the camera up to your eye automatically starts the autofocus system, which then continues to adjust focus as you move the camera. If you're used to holding the shutter button halfway to autofocus, this alternative approach takes some getting used to. It can potentially shave a second or so off your ready-to-shoot time. At the same time, having the camera start autofocusing on its own threw off our tried-and-true shooting rhythm, and we found that as we held the camera between shots, we frequently triggered the autofocus as the viewfinder moved close to our body. Full credit to Sony for providing the option, but we went into the Custom menu and turned it off.
In well-lit settings, the autofocus speed was very good, but moving into low-light situations we ran into trouble. First problem: the system uses the flash as an autofocus assist instead of a dedicated AF assist lamp, blasting two blinding staccato bursts of light -- so much for candid shots in a dark room. Second problem: even with the autofocus assist, the camera failed to achieve a proper focus too often in night shooting situations.
There are three focus area options: Wide, Spot, and Local.
The local focus area option is unnecessarily tricky to use because of the poor viewfinder display as you select a focus point. It blinks briefly while you hold the directional pad down, but that's hard to see, and there's no indication afterward to show which of the nine points you've selected until you see the point blink red to confirm focus. Also challenging is moving the pad diagonally to select the corner points. All in all, it's a clumsy system.
Long Exposure
{{section_header}}{{section.name}}{{/section_header}}
Our long exposure test weighs two component factors, image noise and color accuracy. The Sony A550 did well when it came to noise and less well on color accuracy (which makes sense, since even under ideal conditions its color reproduction isn't great). Overall, this produced a decent but not exceptional score.
The long exposure test procedure involves shooting the X-Rite ColorChecker chart under subdued lighting, at shutter speeds ranging from 1 second to 30 seconds, with any long exposure noise reduction system set both on and off. The resulting test images are run through Imatest to determine image noise levels and color accuracy. More on how we test long exposure.
Color error remained nearly constant, at a relatively high level, across all tested shutter speeds, and saturation ran about 108% across the board. Long exposure noise reduction had no effect on the results.
The image noise levels didn't vary much with shutter speed either, remaining at under 1% throughout. The long exposure noise reduction system had little effect here either, which is a result we often see -- in fact, it's not uncommon for long exposure noise reduction to make matters worse. The concept is to have the camera take a second exposure with the shutter closed, analyze the noisy areas in this dark exposure and then mathematically remove these spots from the original shot. However, since the overwhelming majority of image noise is random, this approach rarely produces much improvement and, what's more, doubles the time before you can take another shot.
The two stragglers in our comparison group, the Olympus and Panasonic, have something in common: they both use smaller Four Thirds / Micro Four Thirds sensors, which are subject to higher image noise than the larger APS-C format sensors found in the other three cameras. The Sony didn't match the performance of the Canon Rebel T1i or Nikon D5000, but it's not far behind.
{{comparison_bars title="Long Exposure Score Comparison", attribute="Long Exposure Score", xLabel="Long Exposure Score"}}
Chromatic Aberration
{{section_header}}{{section.name}}{{/section_header}}
These color imperfections, caused by the inability to precisely focus different light wavelengths, was most noticeable when shooting at the widest angle settings, which is no surprise, but except for the center of the lens there are traces across all tested focal lengths and aperture settings.
Image sharpness holds up reasonably well at the widest 18mm focal length, though there's a clearly visible blue-green shadow along the outer edges as we move away from the center of the image.
Stepping back from the widest setting to this 35mm midrange group delivers obvious improvements. The A550 offers high aperture settings, which is great for controlling depth of field in brightly lit scenes, but takes a toll on sharpness at those extremes.
Noticeable softness creeps in at the maximum zoom setting, and again there is chromatic aberration at the outer edges, particularly at f/5.6.
Distortion
{{section_header}}{{section.name}}{{/section_header}}
The kit lens performed exceptionally well at the midrange and maximum telephoto, but we found a full 3.19% barrel distortion at the widest setting, which would certainly be noticeable in photos where straight lines are part of the scene.
Usability
Buttons & Dials
{{section_header}}{{section.name}}{{/section_header}}
The camera controls are laid out reasonably well, with the menu button conveniently at the far left for fast, no-search access. As you turn the mode dial, the LCD shows the current position and some text explaining the purpose of each setting, a nice touch. And having dedicated buttons to pull up drive mode, exposure compensation and ISO settings makes sense. Labeling the quick menu access button 'Fn' make a bit less sense, and the same goes for labeling the OK button 'AF' -- yes, it can autofocus, but that's not the primary function. Ordinarily we also like to see the four-way controller used for quick access to shooting settings, which wasn't done here, but the overly narrow, slightly finicky controller wouldn't have been much good for this purpose anyway.
Menu
{{section_header}}{{section.name}}{{/section_header}}
As with most SLRs today, the A550 uses a two-level menu system: a quick menu on the LCD screen while shooting, providing fast access to the most frequently used settings, and a more traditional multi-part full-screen menu system for additional camera settings.
The quick menu is displayed by pressing the Fn key. When shooting in Live View mode, it appears as an overlay on the scene image; when shooting with the viewfinder it's shown on a black background. The two displays are nearly the same, except for the two additional functions (face detection and smile shutter) which are available only in Live View mode.
There are two ways of making adjustments in the quick menu. If you press the center button on the four-way controller, you get a screen listing your setting options, which can be navigated with the controller. You can also just move the on-screen highlight to the setting you want to change and turn the control dial, which will cycle through your options directly.
By default, if you leave the highlight on a quick menu setting, an explanatory Help Guide text box appears. These can be useful, but they also cover up other available menu choices. The display can be turned off easily in the Setup menu.
And speaking of the main menu section, it follows the Sony convention of Halloween colors: white text on a black background with a bright orange highlight. It's very legible on the beautiful A550 screen, and we appreciate the fact that each menu section is only a screen long, so you don't have to scroll down to see hidden options. Of course, that's more practical with this camera than some other models, since there really aren't a lot of options available. With no in-camera image editing, button customization or custom settings storage, a simple menu system is a practical design.
Instruction Manual
{{section_header}}{{section.name}}{{/section_header}}
The camera comes with a 180-page Instruction Manual, which applies to both the A500 and the A550. It's small -- roughly the size of a 4x6 print -- which provides welcome portability. The text is well written, making even potentially difficult concepts like high dynamic range shooting reasonably easy to understand, and everything is covered, including items like scene mode explanations which are too frequently left out of the manual. The diagrams are pretty good too, though they could have been larger. The only real train wreck we found here is the index, which is just a step to the left of useless. Looking for high dynamic range information? Nothing under 'H' for 'High' and no, there's no listing under 'D' for Dynamic range either. Wondering about the metering pattern? It's not listed under 'metering.' Instead, it's the very first entry in the index, '40-segment honeycomb pattern metering', apparently assuming that you already know the answer and are just looking it up to kill time.
You can download a pdf file of the complete instruction manual by clicking here.
Handling
{{section_header}}{{section.name}}{{/section_header}}
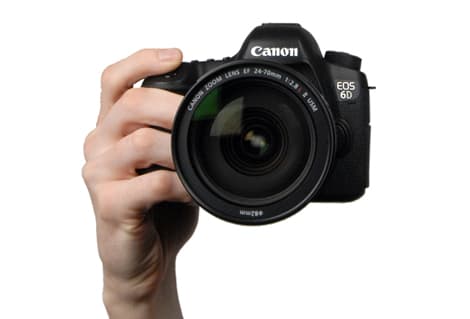
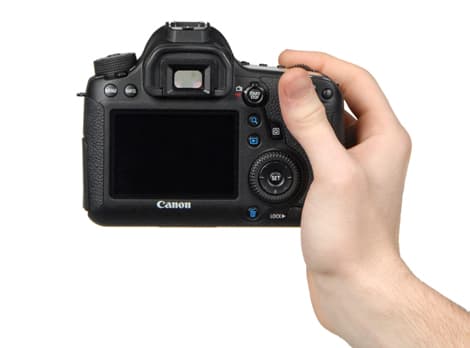
The A550 feels a bit heavy at 21.1 ounces (599 grams) plus lens, though the nicely sculpted right hand grip makes it very easy to handle. There's a protruding ridge that rests the camera on your middle finger while positioning your index finger right over the shutter, and the grip is covered with a rubberized surface for a secure non-slip grasp. On the back is a thumb rest, again with a rounded protruding edge at the top and a rubberized surface. We don't do a lot of one-handed shooting but, with this well designed front-and-back grip combination, it's certainly easy to keep the camera steady when you do.
Buttons aren't raised very high, making accidental commands unlikely, but are easy enough to find by touch if necessary. The one control that doesn't feel quite right is the four-way controller, which is a bit narrow and tricky to use accurately. It's not a disaster certainly, but it's far from ideal.
Buttons & Dials
{{section_header}}{{section.name}}{{/section_header}}
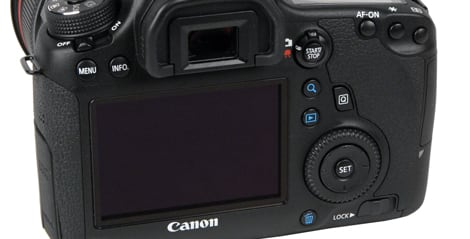
The camera controls are laid out reasonably well, with the menu button conveniently at the far left for fast, no-search access. As you turn the mode dial, the LCD shows the current position and some text explaining the purpose of each setting, a nice touch. And having dedicated buttons to pull up drive mode, exposure compensation and ISO settings makes sense. Labeling the quick menu access button 'Fn' make a bit less sense, and the same goes for labeling the OK button 'AF' -- yes, it can autofocus, but that's not the primary function. Ordinarily we also like to see the four-way controller used for quick access to shooting settings, which wasn't done here, but the overly narrow, slightly finicky controller wouldn't have been much good for this purpose anyway.
Display(s)
{{section_header}}{{section.name}}{{/section_header}}
The A550 boasts a handsome 3-inch LCD with 921,600-dot resolution. The LCD brightness can be automatically adjusted using a built-in light sensor, or it can be set manually to one of five levels.
The LCD is articulated, in an odd way. There's a hinge along the bottom edge that allows the screen to pulled outward from the body, then tilted up or down to allow viewing from overhead or when holding the camera down low. This is useful, of course, but doesn't help at all if you want to shoot with the camera off to one side, or turn the screen around completely to shoot a self-portrait. The Nikon D5000, for example, uses an LCD that flips down with a bottom hinge, but it also pivots around, so you can turn it to shoot from the side, or turn it around completely and close it up, leaving the screen protected against the back of the camera.
When shooting with the viewfinder there are two information display options for the LCD. The Graphic Display (the default setting) and the Standard Display. The Standard Display version shown below appears when you're shooting in program, aperture-priority, shutter-priority or manual modes. A simpler version is used when shooting in auto.
A feature we like is the way the data display rotates 90 degrees when you hold the camera in portrait rather than landscape orientation. Unfortunately, this works only in viewfinder shooting mode, not Live View, and playback screens don't rotate.
Shown below is a diagram of the LCD info display in graphic mode, with all potentially visible settings shown and identified.
Secondary Display
A monochrome LCD panel positioned on the top panel of an SLR, providing shooting setting info when viewed from above, is a higher-end SLR feature, and not included here.

The mono LCD display is small and disappointing.
Viewfinder
{{section_header}}{{section.name}}{{/section_header}}
The eye-level pentamirror viewfinder offers a 95% field of view and 0.80 magnification. The diopter control, which is nicely shielded from errant fingers, offers -2.5 to +1.0 m-1 range of adjustment.
The eyecup can be removed and replaced with optional magnifying and angle finder accessories.
There is a sensor below the optical viewfinder that turns the LCD information display off when you hold the camera to your eye. However, switching between Live View and viewfinder while shooting requires sliding a mechanical switch on top of the camera, which seems like an odd solution. On the other hand, if you want to shoot on a tripod and avoid having light flood into the eyepiece and alter the exposure reading, shooting in Live View means you can avoid using the cumbersome included eyepiece cover, which requires removing the eyecup to insert.
Image Stabilization
{{section_header}}{{section.name}}{{/section_header}}
Like other Sony SLRs, the A550 provides in-camera image stabilization, so any lens can benefit from the technology. However, in our tests using the kit 18-55mm lens at its full telephoto length, we found the IS system provided minimal improvements. We test image stabilization based on the improvements in image resolution produced with the system turned on versus shots taken with the system off. The camera is mounted in a custom-built, computer-controlled rig, shooting separately in both horizontal and vertical orientation and with low and high levels of shake.
Shooting Modes
{{section_header}}{{section.name}}{{/section_header}}
While the shooting mode selection is mostly business as usual, we did find one oddity: there's no program shift function, a useful option that lets you adjust the shutter speed/aperture balance without changing the overall exposure setting.
There is, however, a Smile Shutter function, which waits until the camera detects a smile and then automatically snaps a picture. This seems like one of those features included because an engineer figured out how to do it, rather than to fulfill some practical demand, though it might be useful when trying to take a jovial self-portrait. The slightly more useful blink detection technology that Sony often pairs with Smile Shutter in its compact Cyber-shot cameras didn't make it into the A550.
Focus
{{section_header}}{{section.name}}{{/section_header}}
The A550 uses a 9-point autofocus system when shooting with the viewfinder, with eight line sensors and a cross-hair sensor in the middle. There are two focus modes, Single-shot and Continuous, plus an automatic mode that lets the camera make the call.
By default, the camera uses an Eye-Start AF system when shooting with the optical viewfinder. Holding the camera up to your eye automatically starts the autofocus system, which then continues to adjust focus as you move the camera. If you're used to holding the shutter button halfway to autofocus, this alternative approach takes some getting used to. It can potentially shave a second or so off your ready-to-shoot time. At the same time, having the camera start autofocusing on its own threw off our tried-and-true shooting rhythm, and we found that as we held the camera between shots, we frequently triggered the autofocus as the viewfinder moved close to our body. Full credit to Sony for providing the option, but we went into the Custom menu and turned it off.
In well-lit settings, the autofocus speed was very good, but moving into low-light situations we ran into trouble. First problem: the system uses the flash as an autofocus assist instead of a dedicated AF assist lamp, blasting two blinding staccato bursts of light -- so much for candid shots in a dark room. Second problem: even with the autofocus assist, the camera failed to achieve a proper focus too often in night shooting situations.
There are three focus area options: Wide, Spot, and Local.
The local focus area option is unnecessarily tricky to use because of the poor viewfinder display as you select a focus point. It blinks briefly while you hold the directional pad down, but that's hard to see, and there's no indication afterward to show which of the nine points you've selected until you see the point blink red to confirm focus. Also challenging is moving the pad diagonally to select the corner points. All in all, it's a clumsy system.
The manual focus system, on the other hand, is nicely designed. The in-focus sensor in the viewfinder display blinks as you get near a sharp focus and then lights steady when you achieve it. In addition, there's a dedicated button on top of the camera for the Manual Focus Live View Check function. Pressing it raises the mirror and temporarily shows the image on the Live View screen for focusing purposes. You can enlarge the image in two steps, 7x and 10x, and choose whether or not to have a nine-block grid overlaid on the display. Press the shutter and the camera immediately takes the shot, and returns to viewfinder mode. It's easy to use, and very useful, especially when you're shooting with the camera mounted on a tripod.
Recording Options
{{section_header}}{{section.name}}{{/section_header}}
The A550 supports two aspect ratios, standard 3:2 and widescreen 16:9, in the sizes shown below.
Two JPEG compression choices are available, Fine and Standard. RAW files can also be shot, either on their own or combined with a large JPEG with Fine compression.
Speed and Timing
{{section_header}}{{section.name}}{{/section_header}}
The A550 supports three continuous shooting speeds. The Lo setting promises a maximum 3 images per second whether you're shooting with the viewfinder or in Live View mode. The Hi setting claims a maximum 4 images per second when shooting Live View, and 5 when using the viewfinder. There is an even faster shooting mode available, though, if you select Speed Priority Continuous Advance. This mode can get up to 7 shots per second, but exposure and focus are set at the first shot. We consider that a reasonable approach for many shooting situations, and used this mode in our speed and timing testing.
The A550 will shoot up to 32 images continuously before slowing down when to set Fine image quality, and 116 images in the Standard setting. For RAW files without JPEGs, the limit is 14.
Using the Speed Priority Continuous Advance mode, shooting large Fine JPEGs, we zipped through 6.67 shots per second, a blistering pace for a mid-priced SLR, and particularly impressive given the high 14.2-megapixel resolution.
Focus Speed
{{section_header}}{{section.name}}{{/section_header}}
The A550 uses a 9-point autofocus system when shooting with the viewfinder, with eight line sensors and a cross-hair sensor in the middle. There are two focus modes, Single-shot and Continuous, plus an automatic mode that lets the camera make the call.
By default, the camera uses an Eye-Start AF system when shooting with the optical viewfinder. Holding the camera up to your eye automatically starts the autofocus system, which then continues to adjust focus as you move the camera. If you're used to holding the shutter button halfway to autofocus, this alternative approach takes some getting used to. It can potentially shave a second or so off your ready-to-shoot time. At the same time, having the camera start autofocusing on its own threw off our tried-and-true shooting rhythm, and we found that as we held the camera between shots, we frequently triggered the autofocus as the viewfinder moved close to our body. Full credit to Sony for providing the option, but we went into the Custom menu and turned it off.
In well-lit settings, the autofocus speed was very good, but moving into low-light situations we ran into trouble. First problem: the system uses the flash as an autofocus assist instead of a dedicated AF assist lamp, blasting two blinding staccato bursts of light -- so much for candid shots in a dark room. Second problem: even with the autofocus assist, the camera failed to achieve a proper focus too often in night shooting situations.
There are three focus area options: Wide, Spot, and Local.
The local focus area option is unnecessarily tricky to use because of the poor viewfinder display as you select a focus point. It blinks briefly while you hold the directional pad down, but that's hard to see, and there's no indication afterward to show which of the nine points you've selected until you see the point blink red to confirm focus. Also challenging is moving the pad diagonally to select the corner points. All in all, it's a clumsy system.
The manual focus system, on the other hand, is nicely designed. The in-focus sensor in the viewfinder display blinks as you get near a sharp focus and then lights steady when you achieve it. In addition, there's a dedicated button on top of the camera for the Manual Focus Live View Check function. Pressing it raises the mirror and temporarily shows the image on the Live View screen for focusing purposes. You can enlarge the image in two steps, 7x and 10x, and choose whether or not to have a nine-block grid overlaid on the display. Press the shutter and the camera immediately takes the shot, and returns to viewfinder mode. It's easy to use, and very useful, especially when you're shooting with the camera mounted on a tripod.
Features
In the Box
{{section_header}}{{section.name}}{{/section_header}}

- Sony A550 camera with body cap
- Lens
- FM500H rechargeable Li-on battery
- BC-VM10 battery charger
- Shoulder strap
- USB cable
- Software CD
- Instruction manual
- Eyepiece cover
Meet the tester

Steve Morgenstern
Editor
Steve Morgenstern is a valued contributor to the Reviewed.com family of sites.
Checking our work.
Our team is here to help you buy the best stuff and love what you own. Our writers, editors, and experts obsess over the products we cover to make sure you're confident and satisfied. Have a different opinion about something we recommend? Email us and we'll compare notes.
Shoot us an email