Introduction
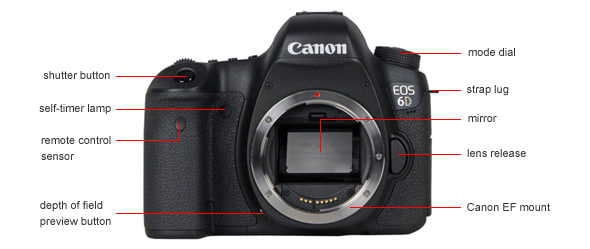
Front
{{section_header}}{{section.name}}{{/section_header}}
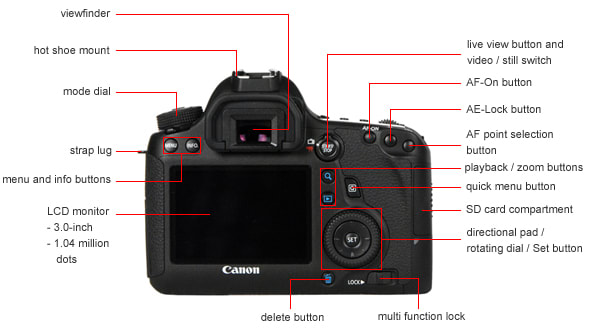
Back
{{section_header}}{{section.name}}{{/section_header}}
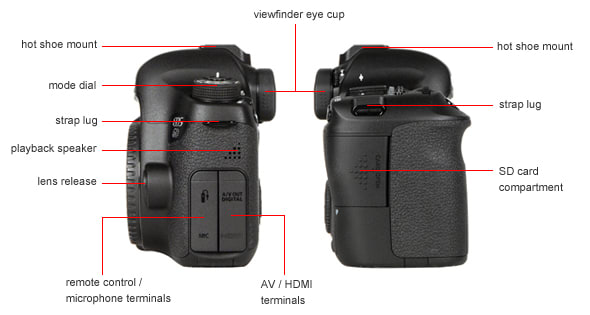
Sides
{{section_header}}{{section.name}}{{/section_header}}
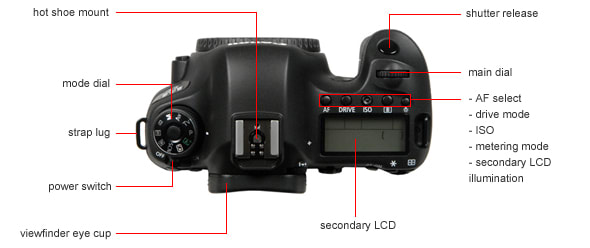
Top
{{section_header}}{{section.name}}{{/section_header}}
Bottom
{{section_header}}{{section.name}}{{/section_header}}

In the Box
{{section_header}}{{section.name}}{{/section_header}}

- Camera
- Lens cap
- Lens hood with hood adapter
- CRG-S006A battery
- DE-A43B charger
- USB cable
- AV cable
- Shoulder strap
- Instruction manual CD
- Software CD
- Basic Operating Instructions booklet
- Supplied Software booklet
Color
{{section_header}}{{section.name}}{{/section_header}}
The FZ35 scored poorly in our color accuracy tests, undoubtedly due in large part to the limited color mode selection provided. Most cameras offer a few color modes to fit different needs and situations, often including standard, portrait, landscape, and vivid options. The FZ35 has only one standard color mode. There ares a few Color Effects (B&W, Sepia, Cool and Warm), but these are highly exaggerated settings not intended for day to day shooting.
The standard color mode reproduces skin tones, flower blue, orange, green and magenta with reasonable accuracy. However, some of nature's favorite colors (foliage green, blue, purplish blue and red) have been shifted off their natural hue significantly, presumably favoring pleasing aesthetics over accurate color reproduction. The saturation has also been boosted by nearly 10%. One saving grace here if color accuracy is dear to you: there is a Picture Adjustment section of the Record menu that allows manual tweaking of contrast, sharpness and saturation, though each offers only five settings. More on how we test color.
The following chart includes samples of all the color patches from the X-Rite ColorChecker chart as shot with the Panasonic FZ35 and three comparable ultrazooms, each in its most accurate color mode.
The Panasonic received the lowest color accuracy scores in our ultrazoom comparison group, no doubt due to the fact that there is no color mode dedicated to producing realistic, as opposed to pleasing, colors.
Color Modes
{{section_header}}{{section.name}}{{/section_header}}
The FZ35 has no color mode shooting options. There are Picture Effect settings (black & white, sepia, cool (bluish) and warm (reddish), but these are special effects that would only be used in unusual situations.
There is also My Color mode, accessible via the mode dial, that lets you manually adjust color, brightness and saturation, each in 11 steps. These settings are used in both still and video modes. They are retained when you turn the camera off and power it up again, and can be stored as part of a Custom Settings configuration in one of three available slots. You see the effects of color adjustments on-screen as you make them, though the screen is fairly small and low-res, and the range of changes is somewhat limited.
Noise
{{section_header}}{{section.name}}{{/section_header}}
The FZ35 did very well in our image noise testing, which involves shooting both under bright 3000 lux illumination (approximating outdoor lighting) and more subdued 60 lux illumination (roughly what you'd expect to find indoors). Using the default noise reduction setting, we found levels not much above 1% out to ISO 800, a very good result.
There are five noise reduction intensity choices available in the Picture Adjustments menu, though it isn't possible to turn this processing off entirely. As shown in our Sample Photos section, while the lowest possible setting preserved the most detail as expected, even using the highest setting didn't have a severe impact on fine line reproduction. More on how we test noise.
The difference in noise levels between the images we shot at 3000 lux and those at 60 lux were inconsequential.
The top performers in our image noise testing, the Nikon P90 and the Panasonic FZ35, are neck and neck until we hit ISO 800, at which point the Nikon noise levels rise swiftly while the Panasonic remains low. The Canon and Sony test photos were significantly noisier across the board.
Panasonic scores a substantial victory in this important category, keeping the grain-like imperfections of image noise to a minimum at both light levels we use for testing purposes.
{{comparison_bars title="Noise Score Comparison", attribute="Noise Score", xLabel="Noise Score"}}
ISO
{{section_header}}{{section.name}}{{/section_header}}
The ISO range starts at 80 but tops out at ISO 1600, offering less low-light flexibility than the other ultrazoom cameras in our comparison group. In addition to manual settings, there is an Intelligent ISO mode that lets the camera control the ISO level and shutter speed. The maximum ISO setting available in auto mode can be set by the user.
NOTE: The images above are not used in our testing or scoring, but are included here to show real-world examples of the differences between cameras at the various ISO settings.
Resolution
{{section_header}}{{section.name}}{{/section_header}}
Resolution testing results for the FZ35 proved exceptionally strong. We evaluate sharpness, chromatic aberration (color fringing) and distortion in this three-part testing section, and the Panasonic outscored or equaled our three comparison cameras in all three categories. We shoot our resolution test under bright studio lighting, at three focal lengths, using program mode for compact and ultrazoom cameras. The Panasonic autoexposure system consistently kept the aperture as wide open as possible, maximizing shutter speed, which seems logical for a camera where maintaining long-lens handheld steadiness is likely to be a challenge. More on how we test resolution.
Distortion ({{product.raw_scores['Distortion Score']}})
Long-lens cameras are prone to distortion problems, but the 18x Leica 4.8-86.4mm lens (27-486mm equivalent) was surprisingly trouble-free across the board. There's modest barrel distortion at the widest setting (0.62%), and test shots at maximum telephoto range have just 0.18% pincushioning.
The flexibility of an ultrazoom focal length range usually leads to substantial problems in some areas of our resolution testing regimen, but the Lumix FZ35 proved an impressive performer across the board, deliveirng the best test results of our comparison group by a respectable margin.
Sharpness ({{product.raw_scores['Sharpness Score']}})
Image sharpness remains very high throughout the zoom range, with maximum performance at the midrange and slightly lower, but still impressive results at full telephoto.There is some visible oversharpening, which was taken into account in figuring the final score in this section.
Chromatic Aberration ({{product.raw_scores['Chromatic Aberration Score']}})
Chromatic aberration, the color halo surrounding lines in a photo when the lens can't align the incoming light perfectly, is extremely low when shooting at the widest angle and midrange lens settings.There is some slight color fringing visible in the same-size crops taken from our test photos shot at maximum zoom below, but you'd be hard pressed to see this at any realistic enlargement size.
Quality & Size Options
{{section_header}}{{section.name}}{{/section_header}}
There's a lot of flexibility in aspect ratio and image sizes here. As shown below, you can shoot in 4:3, 3:2 or 16:9 aspect ratio, with fourteen image size options in all.
There are two JPEG compression settings, Fine and Standard. The FZ35 supports RAW format shooting along with RAW+JPEG, but the JPEG image is saved with Standard rather than Fine compression.
Image Stabilization
{{section_header}}{{section.name}}{{/section_header}}
In our testing, the image stabilization system provided only modest insurance against camera shake, unfortunate in an ultrazoom camera which will inevitably be handheld in difficult shooting circumstances. We mount the camera in a computer-controlled rig that produces predictable camera movement. We set the system for a low shake level (about what you'd expect while shooting two-handed), zoom the lens to its full telephoto extent and shoot at 1/30 second with image stabilization turned on and off. By measuring the resolution difference between the two sets of test images, we can determine how much of an improvement the image stabilization system produces (in this case, about 13%). More on how we test image stabilization.
The Canon SX1 and Sony HX1 image stabilization systems were far more effective in controlling blur caused by camera shake. On the other hand, the NIkon P90 system produced no measurable improvement at all.
{{comparison_bars title="Stabilization Score Comparison", attribute="Stabilization Score", xLabel="Stabilization Score"}}
Video Mode
{{section_header}}{{section.name}}{{/section_header}}
The FZ35 delivers a feature-packed movie mode (Panasonic consistently calls this 'motion picture' recording, which seems a bit grandiose). The camera's Intelligent Auto mode evaluates the scene and attempts to categorize it as a portrait, scenery, low-light or macro situation, adjusting camera settings accordingly, If you prefer more control, you can chose to shoot in program, aperture-priority, shutter-priority or full manual mode. If you want to split the automation/manual control difference, there are five preset scene modes available for video shooting (portrait, scenery, sports, close-up and night portrait). And finally, if you want hands-on control of color reproduction, My Color mode lets you adjust color, brightness and saturation, each in 11 steps. Face recognition is available as a movie mode option. So is continuous autofocus.
One helpful touch worth mentioning is the dedicated movie record button on the back of the camera. If you're shooting stlills and a videogenic moment suddenly materializes, there's no need to reach for the mode dial. Just pressing the shiny red button will start video recording directly. If you want to take advantage of all the video control options, though, you'll want to switch over to Creative Movie mode, which is a dial-twisting operation.
Stereo audio is captured by a pair of side-by-side microphones mounted on the pop-up flash. A wind cut filter can be turned on if needed. There's no input for an external mic.
High-def video is recorded in AVCHD Lite format, at widescreen 1280x720-pixel resolution, in 60p mode (sensor output is 30fps). There are three quality settings, 17, 13 and 9 megabits per second (Mbps). AVCHD has the advantage of higher compression when compared to Motion JPEG, and the disadvantage of being difficult to view or edit on most computers.
Standard-def video shooting uses Motion JPEG format. There are four video size options, 1280x720, 848x480, 640x480 and 320x240.
Video Color
{{section_header}}{{section.name}}{{/section_header}}
Shooting in the high-def AVCHD Lite mode, we found color accuracy was mediocre for the FZ35 (this was also a problem area when shooting stills). Panasonic does produce an enhanced level of visual oomph by pumping up the video saturation to 133%, which we suspect many users will find more pleasing than dull old reality.
The Canon and Sony models, with CMOS sensors, captured colors far more accurately than the CCD-equipped Panasonic and Nikon. More on how we test video color.
{{comparison_bars title="Video Color Score Comparison", attribute="Video Color Score", xLabel="Video Color Score"}}
Video Sharpness
{{section_header}}{{section.name}}{{/section_header}}
The FZ35 shines in still image resolution testing, but the same can't be said for video sharpness. The results here, shooting under bright studio lighting, are very disappointing for a camera with a 720p video mode.
The Canon SX1 and Sony HX1, equipped with CMOS sensors that shoot at 1920x1080 and 1440x1280 resolution respectively, run rings around the Panasonic, with its CCD sensor at its maximum 1280x720 video resolution. The Nikon P90, which is limited to standard definition video recording, scored even lower, but that's cold comfort if you're considering the FZ35 and video is important to you. More on how we test video sharpness.
{{comparison_bars title="Video Color Sharpness Comparison", attribute="Video Sharpness Score", xLabel="Video Sharpness Score"}}
Playback Mode
{{section_header}}{{section.name}}{{/section_header}}
To get to playback mode you have to slide a switch on the camera back, which means you can't just press the shutter button halfway to quickly return to shooting mode, as you would with most cameras. You can set the programmable function key to access image review as an alternative, which lets you access the three basic playback displays and magnify the photo up to 8x, but you don't get all the playback mode options.
If you select the Histogram option in the setup menu, a luminance histogram will be included in the expanded info display.
Pressing the Focus button during playback zooms you in on the point the camera used for autofocus, provding a handy quick check.
Photos can be deleted one by one, in batches of up to 50 or the card can be cleared entirely
The slide show utility lets you include all stored files, pictures only, video only, particular categories (based on face recognition, scene mode selection or travel date) and files you've tagged as favorites. You can choose to have between-image transition effects and/or background music, adjust the duration for each photo displayed and decide whether or not to have the show repeat automatically.
Movie playback works well. In addition to play, pause and stop, you can adjust volume, fast forward and fast rewind, and move forward or backward one frame at a time. What's missing is the option to jump instantly to the beginning or end of a clip.
In-Camera Editing
{{section_header}}{{section.name}}{{/section_header}}
Photos can be resized, trimmed and 'leveled' (up to a 2-degree shift) in the camera. There are no adjustments for image characteristics (color, saturation, etc.), and no in-camera RAW file editing, which is disappointing.
You can add a text comment (up to 30 characters long) to a photo using the Title Edit function. You can add text to a single image, or up to 50 images at a time. This label can be viewed on-screen and optionally included as a text imprint when using PictBridge direct printing. Alternatively, you can use Text Stamp to add shooting date and time, travel date, age and title to an image.
Direct Print Options
{{section_header}}{{section.name}}{{/section_header}}
The PictBridge utility, used to output directly to a compatible printer connected to the camera via USB, lets you select individual images to print, or all the files you've tagged as favorites. You can specify the number of prints of each image, the print size, whether or not the date should be overlaid on the image, and select a print layout (1, 2 or 4 picture on a page). What's missing is the option to print thumbnail images of the photos on the current memory card.
The DPOF system, used to create a digital order form on your memory card for printing at an outside service bureau, provides the basic requirements (number of prints, whether or not to imprint the recording date) without anything fancy, like ordering thumbnail prints or specifying print size.
Viewfinder
{{section_header}}{{section.name}}{{/section_header}}
The electronic viewfinder is an 0.20-inch screen with 201,600 pixels, providing a field of view approaching 100%. It looks fine, and even lets an eyeglass-wearing user see the full screen and information overlay without fidgeting – as long as you're standing still. The problem with the EVF is the stuttering that happens when you move the camera. Instead of panning smoothly, the image jerks along in little steps as you move. It's not a huge problem in ordinary shooting, but we fear for the shooter who tries to follow the neighborhood soccer league action on a full stomach using the EVF.
There is a diopter adjustment dial on the left side of the viewfinder, easy to reach but not prone to accidental adjustment. The FZ35 doesn't have a sensor system that automatically switches between the LCD and the viewfinder when you hold the camera to your eye. You'll have to press the EVF/LCD button manually to make the switch, which is less convenient.
Brightness for both the EVF and the LCD can be manually adjusted to one of seven levels via the setup menu.
The information display is identical whether you're using the EVF or the LCD.
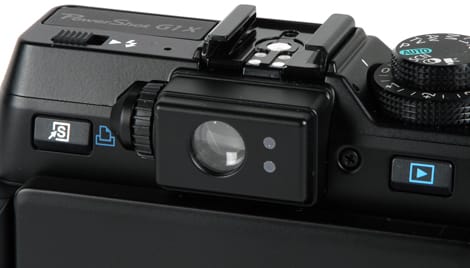

... and it has a diopter adjustment ring.
Display
{{section_header}}{{section.name}}{{/section_header}}
The LCD is an ordinary 2.7-inch, 230,000 dot screen. You do have a few choices when it comes to screen brightness control. There's an Auto Power LCD setting, that brightens or dims the screen based on your environment, and a Power LCD setting that keeps the screen at maximum brightness. And maximum is quite bright, standing up well to outdoor shooting on a sunny day.
While shooting, you can toggle among several LCD information set-ups by pressing the DISPLAY button. These options include a clean screen, a view with current still shooting settings (including available memory for stills), a slightly different view with available memory for movie recording instead, and a view with optional grid lines and/or a live luminance histogram.You can also set overexposed areas to blink during image review and playback.
There are two grid line overlay options, one with a nine-box pattern, the other with 16 boxes plus a pair of diagonal lines crossing at the center. We found the white lines too distracting to leave on all the time, but very helpful when trying to precisely line up a shot, as in architectural photography.

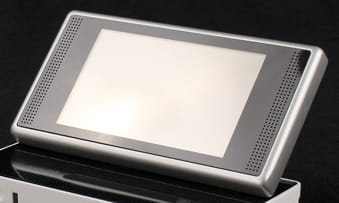
...but it turns into a nice 3-inch widescreen in playback mode.
Flash
{{section_header}}{{section.name}}{{/section_header}}
The pop-up flash is controlled using a small button to the left of the electronic viewfinder. It has five settings: auto, auto with red-eye reduction, fill flash (with and without red-eye reduction) and slow sync with red-eye reduction (used to capture a foreground subject with a burst of the flash and the background scene with a slow shutter speed). In addition, you can set second-curtain flash synch, a rarely used option that captures a trailing effect when a subject is moving away from the camera (a car with its lights on is the standard example).
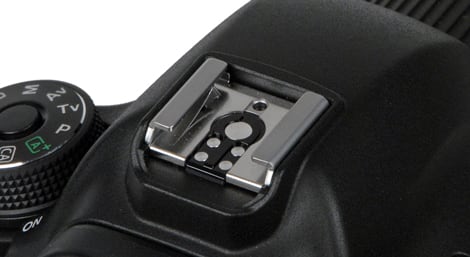
The extended flash pops up reasonably high over the lens, which should prevent red-eye or light clipping from the extended zoom lens (though removing the lens hood is certainly a smart move when shooting with the flash). There's no hot shoe for connecting an external flash.
Panasonic gives the effective flash range as 0.3 - 8.5m with the lens at its widest setting and 1.0 - 5.4m using maximum telephoto. We found the flash pattern fairly even, with some inevitable unevenness given the size of the strobe, but with no objectionable hot spot in the middle. And we like the fact that the autoexposure system can't raise the flash by itself in low-light settings: it's up to the user to pop up the flash manually, which we far prefer to having the flash accidentally fire in inappropriate situations. Flash recycle time, though, takes several seconds, jeopardizing your readiness for the next shot.
Flash output can be manually adjusted in a ±2 EV range, in 1/3 EV increments. Maximum flash synch speed is 1/2000th second, which is relatively high and useful when using fill flash on a bright day.

The flash emitter pops up from the top of the body via a mechanical release.
Lens
{{section_header}}{{section.name}}{{/section_header}}
The FZ35 boasts an 18x Leica 4.8-86.4mm zoom lens (equivalent to a 27-486mm on a 35mm camera), providing good wide-angle coverage along with a very substantial telephoto capability. Maximum aperture ranges from f/2.8 at the widest setting to f/4.4, a fast lens that's helpful both when shooting in low light and when hand-holding a long zoom shot, where increasing shutter speeds can help cut down on blur caused by shaky hands.
In macro mode, you can get extremely close to your subject (1 cm, or 0.4 inches) for screen-filling shots of small objects.
In addition to the optical zoom, there's a straightforward digital zoom, which we never recommend using, and an 'extended optical zoom' that increases apparent magnification by cutting down on image resolution and using only the middle part of the sensor. This extended optical technique does prevent loss of image quality, though with an optical zoom of nearly 500mm, it seems like overkill.
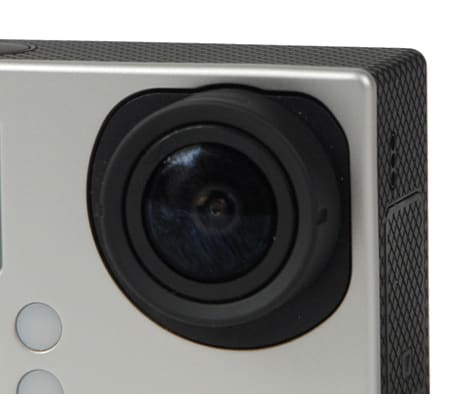
Adjusting the zoom length with the side-to-side switch is typical for this type of camera, though the FZ35 lens does move smoothly rather than jerk into place. Since the lens moves faster the further you push the switch, the trick for precise handling is a gentle touch, maintaining a narrower angle for greater control.
As shown below, the long, wide zoom provides a dramatic range of composition options without moving an inch.
Battery
{{section_header}}{{section.name}}{{/section_header}}
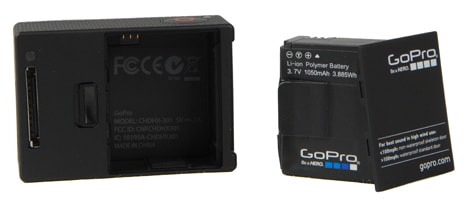
Unlike many ultrazoom cameras, which typically use AA batteries, the FZ35 is powered by a rechargerable Lithium ion battery. This not only holds down battery costs, it also contributes to a far lighter ready-to-shoot weight than any of our comparison cameras.
Panasonic estimates battery life at approximately 470 pictures, when firing the flash every other shot, and the time required for a full battery charge at 120 minutes. The estimate for video recording time per charge is 150 minutes.
Memory
{{section_header}}{{section.name}}{{/section_header}}
The FZ35 accepts SD and SDHC memory cards, for a maximum capacity of 32 gigabytes. There is also about 40 megabytes of built-in memory, which inspired the instruction manual writer to refer to the 'optional' memory card.
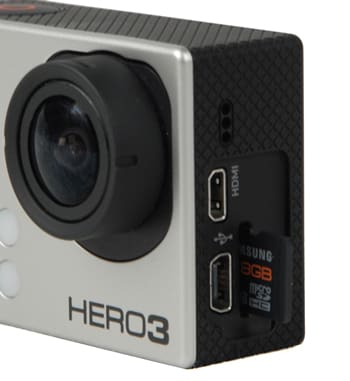
Jacks, Ports & Plugs
{{section_header}}{{section.name}}{{/section_header}}
There are two locations for I/O connections. On the left side of the camera is a door for the HDMI port and a connection for the optional AC power adapter. On the right is the proprietary port for connecting the supplied USB data cable and standard-def AV cable. It's a minor point, but we like the way the doors for these connectors are hinged, snapping open and staying open until you close them. Lots of cameras have flimsy plastic covers that are hard to open, hard to close and get in the way when trying to connect a cable.
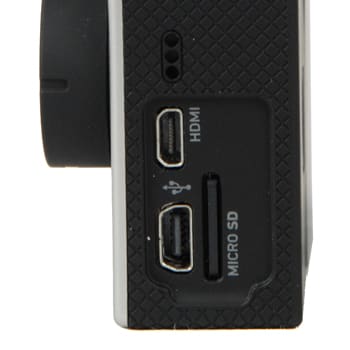
The HDMI output mode can be set manually, though we found the autodetect function worked fine on three TVs we tried.If you are connecting the cameras to a compatible Panasonic Viera set, you can control the camera using the TV remote, a nice option for sociably sharing your shots.
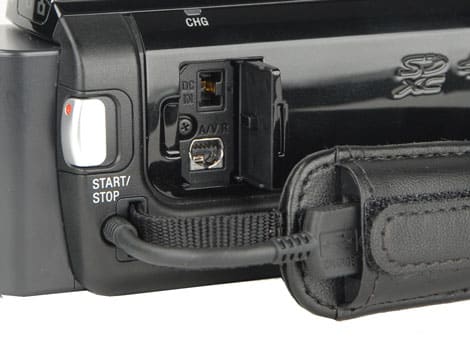
The DC-input and multi-AV port are located on the right side of the camcorder.
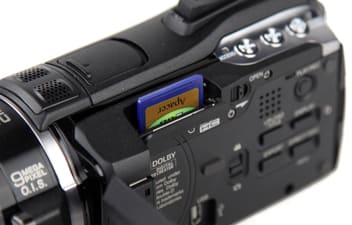
... as is the SD/SDHC card slot.
Shooting Modes
{{section_header}}{{section.name}}{{/section_header}}
Whether you're a point-and-shoot fan or a more sophisticated photographer, the FZ35 offers a nice range of controls to suit your needs. The Intelligent Auto mode is a scene-recognition-based system that attempts to determine whether your subject matches one of six of the camera's built-in scene modes (portrait, scenery, macro, night portrait, night scenery or baby) and adjusts camera settings accordingly. If scene recognition fails, standard settings are applied. In Intelligent Auto mode, only image size, color effect, face recognition, movie recording mode (AVCHD or MJPEG) and a few system settings can be adjusted by the user.
Program mode, aperture-priority, shutter-priority and full manual modes are also available. The joystick is used to control aperture and shutter speed, by pushing it horizontally and vertically.
Auto Mode Features
Focus - The autofocus system can be set to use up to 11 focus areas (9 areas when shooting videos), or a single focus area, which can be standard-sized or reduced by choosing Spot Focus. There are two single-point focus options, standard and high-speed. The difference between standard and high-speed isn't clearly explained in the manual, so we pinged our contact at Panasonic, who says that high-speed focusing should be faster, but not in low-light condtiions. They suggest you use the high-speed option when shooting outdoors, the standard 1-area focusing when shooting indoors. In our informal testing, we were hard pressed to find a performance difference between the two./o:p>
Face detection autofocus is also an option, using the detail-oriented Panasonic face recognition system that lets you register important faces in camera memory, prioritize these when shooting, and even have information about those privileged characters displayed on screen during recording or playback.
Autofocus tracking is easy to use, but not entirely effective when shooting fast-moving subjects (active kids and sports, for example). When you choose autofocus tracking mode, pressing the AF/AE button locks onto a target in the center of the screen, turning the on-screen focus indicator yellow. At this point, if you move the camera fairly slowly, or your subject walks at a moderate pace or fidgets while sitting, the focus automatically follows and adjusts to the new position. Pan quickly, though, or try to follow a kid charging down the soccer field, and the yellow cursor drifts off dejectedly.
Yet another autofocus option is pre AF, which attempts to achieve focus even when you're not holding the shutter button down halfway. There are two settings: Quick AF will focus when the camera isn't moving much, Continuous AF will keep trying to focus at all times. As you might imagine, the Continuous mode will drain your battery more quickly. We found the pre AF system worked surprisingly well, focusing at a good speed and with no noticeable noise or vibration.
There is a bright red autofocus assist lamp on the front right corner of the camera. It has a long range, and proved helpful in extremely dark conditions, though we found that when shooting in most low-light conditions, the camera actually focused nicely even without the extra illumination. Having a dedicated autofocus assist lamp is certainly far preferable to using the built-in flash for this purpose, a distracting approach used by too many compact cameras.
Exposure - Exposure compensation is available in a ±2 EV range, in 1/3 EV increments. Three-shot exposure bracketing is also provided, in the same range. The Intelligent Exposure system automatically identifies high-contrast scenes and adjusts contrast and exposure accordingly. There are three settings, Low, Standard and High.
Metering - Multiple (full-screen), center-weighted and spot metering are supported. Exposure will be adjusted to match faces detected in face detect autofocus mode if metering is set to multiple.
Self Timer - The self-timer has the typical 2-second and 10-second delays, plus a mode that takes three consecutive shots after a 10-second delay, very helpful when you're running around to join in a group shot.
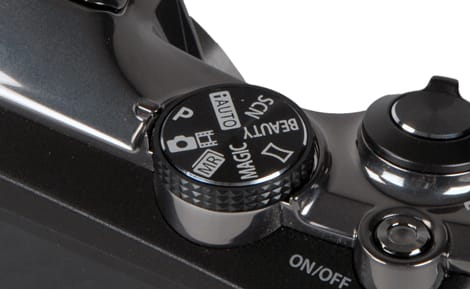
The full mode dial is nice, but frequently rotates by accident.
Scene Modes
A tremendous variety of scene modes is available, though the organization is a bit confusing. There are five scene mode settings on the mode dial – Portrait, Scenery, Sports, Close-up and Night Portrait – each of which then offers more specialized options when you press the Menu button. The Portrait options, for example, include Normal Portrait, Soft Skin, Outdoor Portrait, Indoor portrait and Creative Portrait, which lets you control background blur by adjusting the aperture.
But like the man on the infomercial says, 'But wait, there's more!' Turn the mode dial to SCN and you can access twenty additional settings. These include a panorama assist mode that maintains a ghost image on screen for lining up consecutive shots (but does not stitch photos together in-camera), a high-ISO, low-res mode, a simulated high dynamic range option, a picture frame overlay and a high-speed, lower-res burst shooting mode.
Picture Effects
{{section_header}}{{section.name}}{{/section_header}}
Below are four Color Effects that can be applied while shooting, and an unfiltered shot for comparison. Color bracketing lets you save the same shot with up to three Picture Effects settings applied. You can choose black & white plus standard, sepia plus standard or black & white, sepia and standard.
Manual Controls
{{section_header}}{{section.name}}{{/section_header}}
Manual focus is available, though it's only borderline practical, since focus is controlled using either the joystick or the zoom lever, neither of which offers the precision of an SLR lens barrel. On the plus side, you can choose one of two manual focus aids; one enlarges the middle of the screen while you're adjusting the focus, the other enlarges the entire screen.
The white balance system can be set to auto or one of five presets (clear sky, cloudy sky, shade, flash, incandescent lighting); a fluorescent setting is notably absent. Any of the presets can be finely adjusted along the amber-blue and green-magenta axes, which becomes a practical procedure thanks to the live on-screen update as you change settings.
Setting a manual white balance is easy to do, either from the quick menu or the main menu. Two custom white balance settings can be registered, letting you return to a successful setting if you return to the same shooting situation.
There's also the option to enter a white balance reading in degrees Kelvin. This is usually a pretty esoteric procedure but, with the live preview capability, it becomes a useful way to eyeball your white balance readings, particularly if you're hunting for a particular lighting effect.
The maximum aperture ranges from f/2.8 at the widest setting to f/4.4 at maximum telephoto, a fast lens that helps enable faster shutter speeds for handheld telephoto shooting. The minimum aperture is far more limited, at f/8, which could be an issue when trying to keep shutter speeds low in bright light.
Available shutter speeds when shooting stills range from 1/2000 second to 60 seconds. Shutter speeds in movie mode can be set from 1/30 second to 1/20,000 second, limiting your creative slow-shutter effect options.
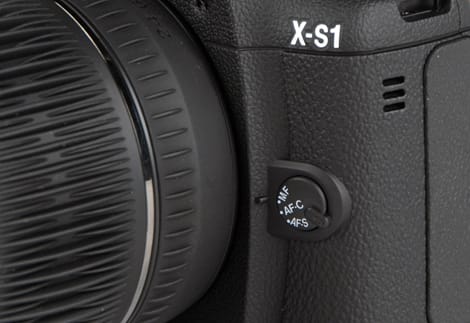
A dedicated focus-mode switch on the front panel.
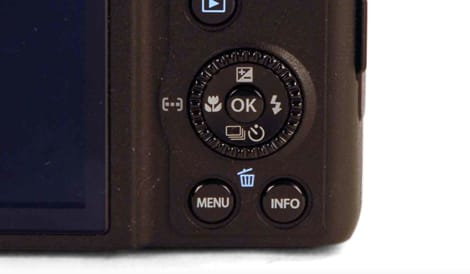
The scroll wheel surrounding the d-pad is neither awful nor perfect.
Drive/Burst Mode
{{section_header}}{{section.name}}{{/section_header}}
There is a single burst speed, a claimed 2.3 frames per second, with a 3-shot limitation at full resolution and minimum compression. As for burst mode when shooting RAW... sorry, it's not going to happen.
If you need faster burst mode performance, there's a Hi-Speed Burst scene mode that trades performance for resolution and compression quality. With available picture sizes of 3M (4:3 aspect ratio), 2.5M (3:2) and 2M (16:9), and JPEG compression automatically set to standard, Panasonic claims a maximum burst rate here of 10 frames per second. In our testing we hit about 7.5 frames per second, a very fast and useful rate when shooting sports or other action scenes, with enough resolution to make a decent 4 x 6 and a fine on-screen display.
Shot to Shot ({{product.raw_scores['Shot to Shot Score']}})
Panasonic claims a burst rate of approximately 2.3 frames per second, but we didn't get close to that in the lab, with a timed performance of 1.3 frames per second in full-resolution, fine JPEG compression mode. Burst mode is severely limited when it comes to duration, and here the actual performance matches the manual specs. You can only shoot 3 consecutive photos with fine compression, or 5 with standard compression.
Handling
{{section_header}}{{section.name}}{{/section_header}}
The FZ35 has a familiar shape in an unusual size. At 4.63 x 1.98 x 3.50 inches (117.6 x 75.8 x 88.9mm) and 12.9 oz. (367g), it's noticeably smaller and lighter than other cameras with this zoom range. The weight difference is even more substantial when you factor in the AA batteries used in many ultrazooms (including the Canon SX1 IS). The small size and weight are certainly good news from a portability perspective. The camera's too bulky to be pocket-friendly, of course, but whatever backpack or shoulder bag you tote around will be minimally burdened by the FZ35. As for handling, the right hand grip is a bit small for those of us with large paws, but still manageable with a delicate touch. and the textured surface and prominent middle finger indent help significantly. If you have daintier digits, the feel of this camera should be just about perfect.
These dedicated buttons give you quick access to aperture and shutter speed controls.
Buttons & Dials
{{section_header}}{{section.name}}{{/section_header}}
There are a heck of a lot of buttons on a small camera body. For the most part, this isn't a problem. The four-way controller, with its four assigned functions, is on a slightly raised circular pad, helping to keep it distinct from the other back-of-camera buttons. We're not crazy about the itsy-bitsy joystick, particularly the need to press it in to access the quick menu, but your thumb becomes acclimated to the slightly twitchy behavior of this control after a few hours. As noted elsewhere, the dedicated movie record button is very useful, providing spur-of-the-moment video access.
Unlike most camera manufacturers, Panasonic likes using a physical switch to move between record and playback mode. We find this a bit clumsy, especially when you want to move quickly from reviewing your pictures to shooting mode – you have to move a switch instead of just tapping the shutter button. The workaround here is to set the programmable function button to access Image Review mode.
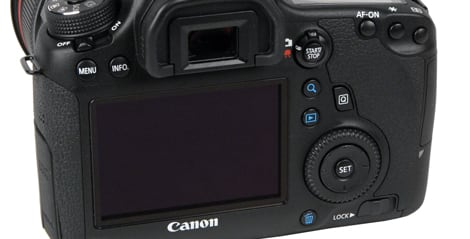
The southernmost button in the four-way controller cluster is a programmable function button (labeled Fn). It can be assigned to image review, or to provide quick access to settings for ISO, white balance, metering mode, autofocus mode or Intelligent Exposure. We found the hardware switch for moving between record and playback mode inconvenient, so generally left Fn mapped to Image Review.
On top of the camera, the shutter is well positioned, the variable-speed zoom control reward a gentle touch with enhanced precision, and the mode dial is crowded but clearly labeled.
There are three Custom Settings slots on that mode dial, which can store 20 recording settings, including both still and video choices, for quick access. To record settings combinations, you adjust the camera to your liking, then use Custom Set Memory in the Setup menu to save the current status. To access a Custom Memory setup, turn the mode dial to CUST; this brings up a menu with the three stored options, which can be reviewed by pressing the DISPLAY button. This would be even better if you could label each group with a meaningful name (Sports or Indoor Available Light, for example), but it's certainly a useful advanced feature as is.
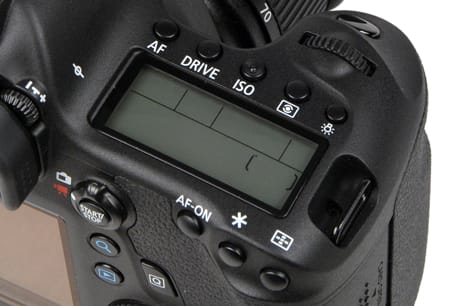
Menus
{{section_header}}{{section.name}}{{/section_header}}
The FZ35 uses both a quick menu, which overlays the recording screen with frequently changed options, and a standard full-screen menu system. You access the quick menu by pressing in on the joystick (which is labeled Q. MENU). You can then navigate through a drop-down menu of settings using either the joystick or the four-way controller. In program, aperture-priority, shutter-priority or manual mode, the quick menu includes settings for image stabilization, metering mode, focus mode, white balance, ISO, Intelligent Exposure (dynamic range adjustment), picture size, movie record quality and LCD display. Shooting in other modes eliminates settings that aren't relevant from the quick menu.
The main menu changes depending on whether the camera is in record or playback mode. While shooting there are three sections, for still image recording, video recording and camera setup. The main menu during playback has a playback mode section (normal, slide show, mode play or category play), a playback tab with editing options, and the same camera setup options as found in the record mode menus. The menu layout is easy to read, with clean white type on a black background, but a bit tedious to use. Sections can have multiple pages (the setup section has 7 separate pages), and the only way to get from one page to the next is to cursor through all the options in between.
Manual & Learning
{{section_header}}{{section.name}}{{/section_header}}
We often have issues with the user manuals Panasonic provides. The writing, illustration and organization aren't bad, but actually finding the information you're after can be a royal pain. Expected words are missing (video or movie, for example) in favor of idiosyncratic terms (motion picture), a real problem when browsing the table of contents or index. And this time out, for some unknown reason, there's no index at all, an astonishing flaw in a 219-page publication. But then again, the publication itself has disappeared too. There's a very brief printed getting started guide, but the camera manual is delivered in PDF format on an included CD. That means, unless you're carrying your computer with you or choose to laboriously print out over 200 pages and lug them along, you have no reference manual at hand while traveling with a camera that has a multitude of settings and features, and no way to add notes or bookmark key pages. This was not a user-friendly decision.
If you're curious, you can download the PDF manual directly from Panasonic's support site by clicking here.
Nikon Coolpix P90 Comparison
While these two cameras deliver similar zoom capabilities, the Canon does offer a variety of step-up features that at least in part justify the $200 price difference. It shoots in full HD 1080p resolution, and does it well, where the FZ35 delivers so-so results at 720p. The LCDs are both a bit small and low-res, but the Canon screen is articulated, so it can swing out to the side, pivot to face forward for self-portraits or fold the delicate screen side up against the camera body for safe travels. The Panasonic wins the portability head-to-head handily, weighing half a pound less even before you factor in the heavier AA batteries required by the Canon, versus the Panasonic rechargeable.
In our lab tests, the Canon SX1 IS produced more accurate color in stills and far superior video output, with an image stabilization system that did a better job compensating for horizontal camera shake. The Panasonic FZ35 was much more impressive in two key areas, though: resolution (which includes lens distortion and chromatic aberration in addition to sharpness) and image noise.
Sony Cyber-shot DSC-HX1 Comparison
The Nikon P90 and Panasonic FZ35 share a $399.95 price tag along with 12-megapixel resolution. The Nikon offers a longer zoom range at 24x, and a 3-inch LCD that pivots on a bottom hinge to allow shooting from unusual angles. However, the Nikon video mode is limited to standard definition shooting and, while the Panasonic video is no great shakes, it does outperform the Nikon when shooting at 720p resolution, and has a dedicated video record button to make spur-of-the-moment shooting practical.
The Panasonic color accuracy is underwhelming, though the user can tweak color reproduction to achieve better results. Nikon P90 owners won't have the same flexibility when it comes to mediocre resolution performance (particularly when it comes to lens distortion, a major strength of the Panasonic FZ35). The Panasonic also produces lower image noise, offers HDMI connection for viewing both video and stills on a high-def TV, and feels more comfortable when shooting. At the same price, we'd give the FZ35 the advantage.
COMP 3
The Sony HX1 is a sophisticated 9.1-megapixel camera with a 20x zoom and several cool features, including a blazing 10-shot-per-second burst rate (versus a pokey 1.7 fps for the FZ35) and the ability to automatically take wide panoramic shots by simply pressing the shutter and panning the camera. Video results at 1440 x 1080 provide excellent color accuracy and sharpness, where the Panasonic movie mode is both lower-res and far lower quality. The FZ35 is smaller and lighter, but the HX1 has a more comfortable grip, so that's basically a wash, And while both cameras have 230,000-dot LCDs, the Sony screen is larger (3 inches versus 2.7) and pivots on a bottom hinge, which is handy when shooting with the camera held overhead or down low.
In our lab testing, the Sony color accuracy was marginally superior. While both cameras have impressively low distortion figures, overall resolution and image noise performance favors the Panasonic. Image stabilization is important on an ultrazoom, though, and the Sony HX1 did an outstanding job here. Bottom line, while these cameras are two of our favorite ultrazooms, we think the Sony advantages justify the extra $100 expense.
Conclusion
The Panasonic Lumix FZ35 is a very practical all-around camera. It's highly portable, if not pocketable, and the combination of a fast wide-angle lens and long zoom makes it a great travel camera, able to capture both scenic vistas and distant subjects. Resolution results for stills are very strong, and image noise is well controlled even at high ISOs.
There is certainly room for improvement in some areas. The FZ35 may shoot at 720p, but we were underwhelmed by its video resolution and color accuracy. Continuous burst shooting at full resolution is limited to just three shots, and the high-speed mode at reduced resolution only partly makes up for this shortcoming. Overall, though, with a compact body, light weight, solid still image results and reasonable price, there's a lot to like here.
Photo Gallery
{{photo_gallery "Front Photo", "Back Photo", "Sides Photo", "Top Photo", "Bottom Photo", "Lens Photo", "Flash Photo", "EVF Photo 1", "EVF Photo 2", "LCD Photo 1", "LCD Photo 2", "Media Photo", "Modes Photo", "Manual Controls Photo", "Manual Controls Photo 2", "Other Controls", "Buttons 1", "Buttons 2", "Other Hardware Photo", "Battery Photo", "Ports Photo 1", "Ports Photo 2", "Ports Photo 3", "Ports Photo 4", "Handling Photo 1", "Handling Photo 2", "Handling Photo 3", "Box Photo"}}
Meet the tester

Steve Morgenstern
Editor
Steve Morgenstern is a valued contributor to the Reviewed.com family of sites.
Checking our work.
Our team is here to help you buy the best stuff and love what you own. Our writers, editors, and experts obsess over the products we cover to make sure you're confident and satisfied. Have a different opinion about something we recommend? Email us and we'll compare notes.
Shoot us an email